Today we are talking all about the sizing and fit of the Chelsea Party Dress. This was the most challenging part of the testing process because getting the fit right in the bodice of the Chelsea is so crucial to both being comfortable and keeping everything in place.
MAKE A MUSLIN
First up, as discussed on the fit notes page of your instructions I highly recommend muslining the bodice of this pattern. The deep V combined with the open back means if the fit isn’t right, you will end up feeling exposed. You can probably get away with only muslining one layer of the bodice (not both the self and lining) IF you stay stitch around all the raw edges before trying it on. For best results, I do recommend a full bodice muslin.
CHOOSE A SIZE
If you are in between sizes or not sure which size to pick, I recommend choosing a size based on the finished measurements of your under bust. Getting a snug fit on that under bust band is key to making sure the dress sits where it is supposed to.
ADJUSTING THE BUST:
The dress is currently drafted for a B cup. You can use this information combined with the size chart to determine if you will need a Full Bust Adjustment (FBA). If your chest is spilling out of the sides and front of the bodice in your muslin that is a good determining factor as well. We will discuss how to do a FBA in an upcoming post.
IN BETWEEN SIZES
The skirt is quite full, so if your under bust measurement puts you at a different size than your hip measurement you should not need to grade out unless you want the extra fullness. In this case, instead of blending between sizes you could simply cut the skirt pieces to fit your hips and gather them into the waistband that fits your under bust using the same steps shown in the instructions.
COMMON BODICE ADJUSTMENTS
Here are a few possible adjustments that you may find necessary once you have fit your muslin. Notice that you must draw in your stitch line using the 1/2″ seam allowance and make adjustments to the stitch line first, adding the new seam allowance back in afterward. Don’t forget to transfer any notches and make adjustments to both the lining and self pattern pieces!
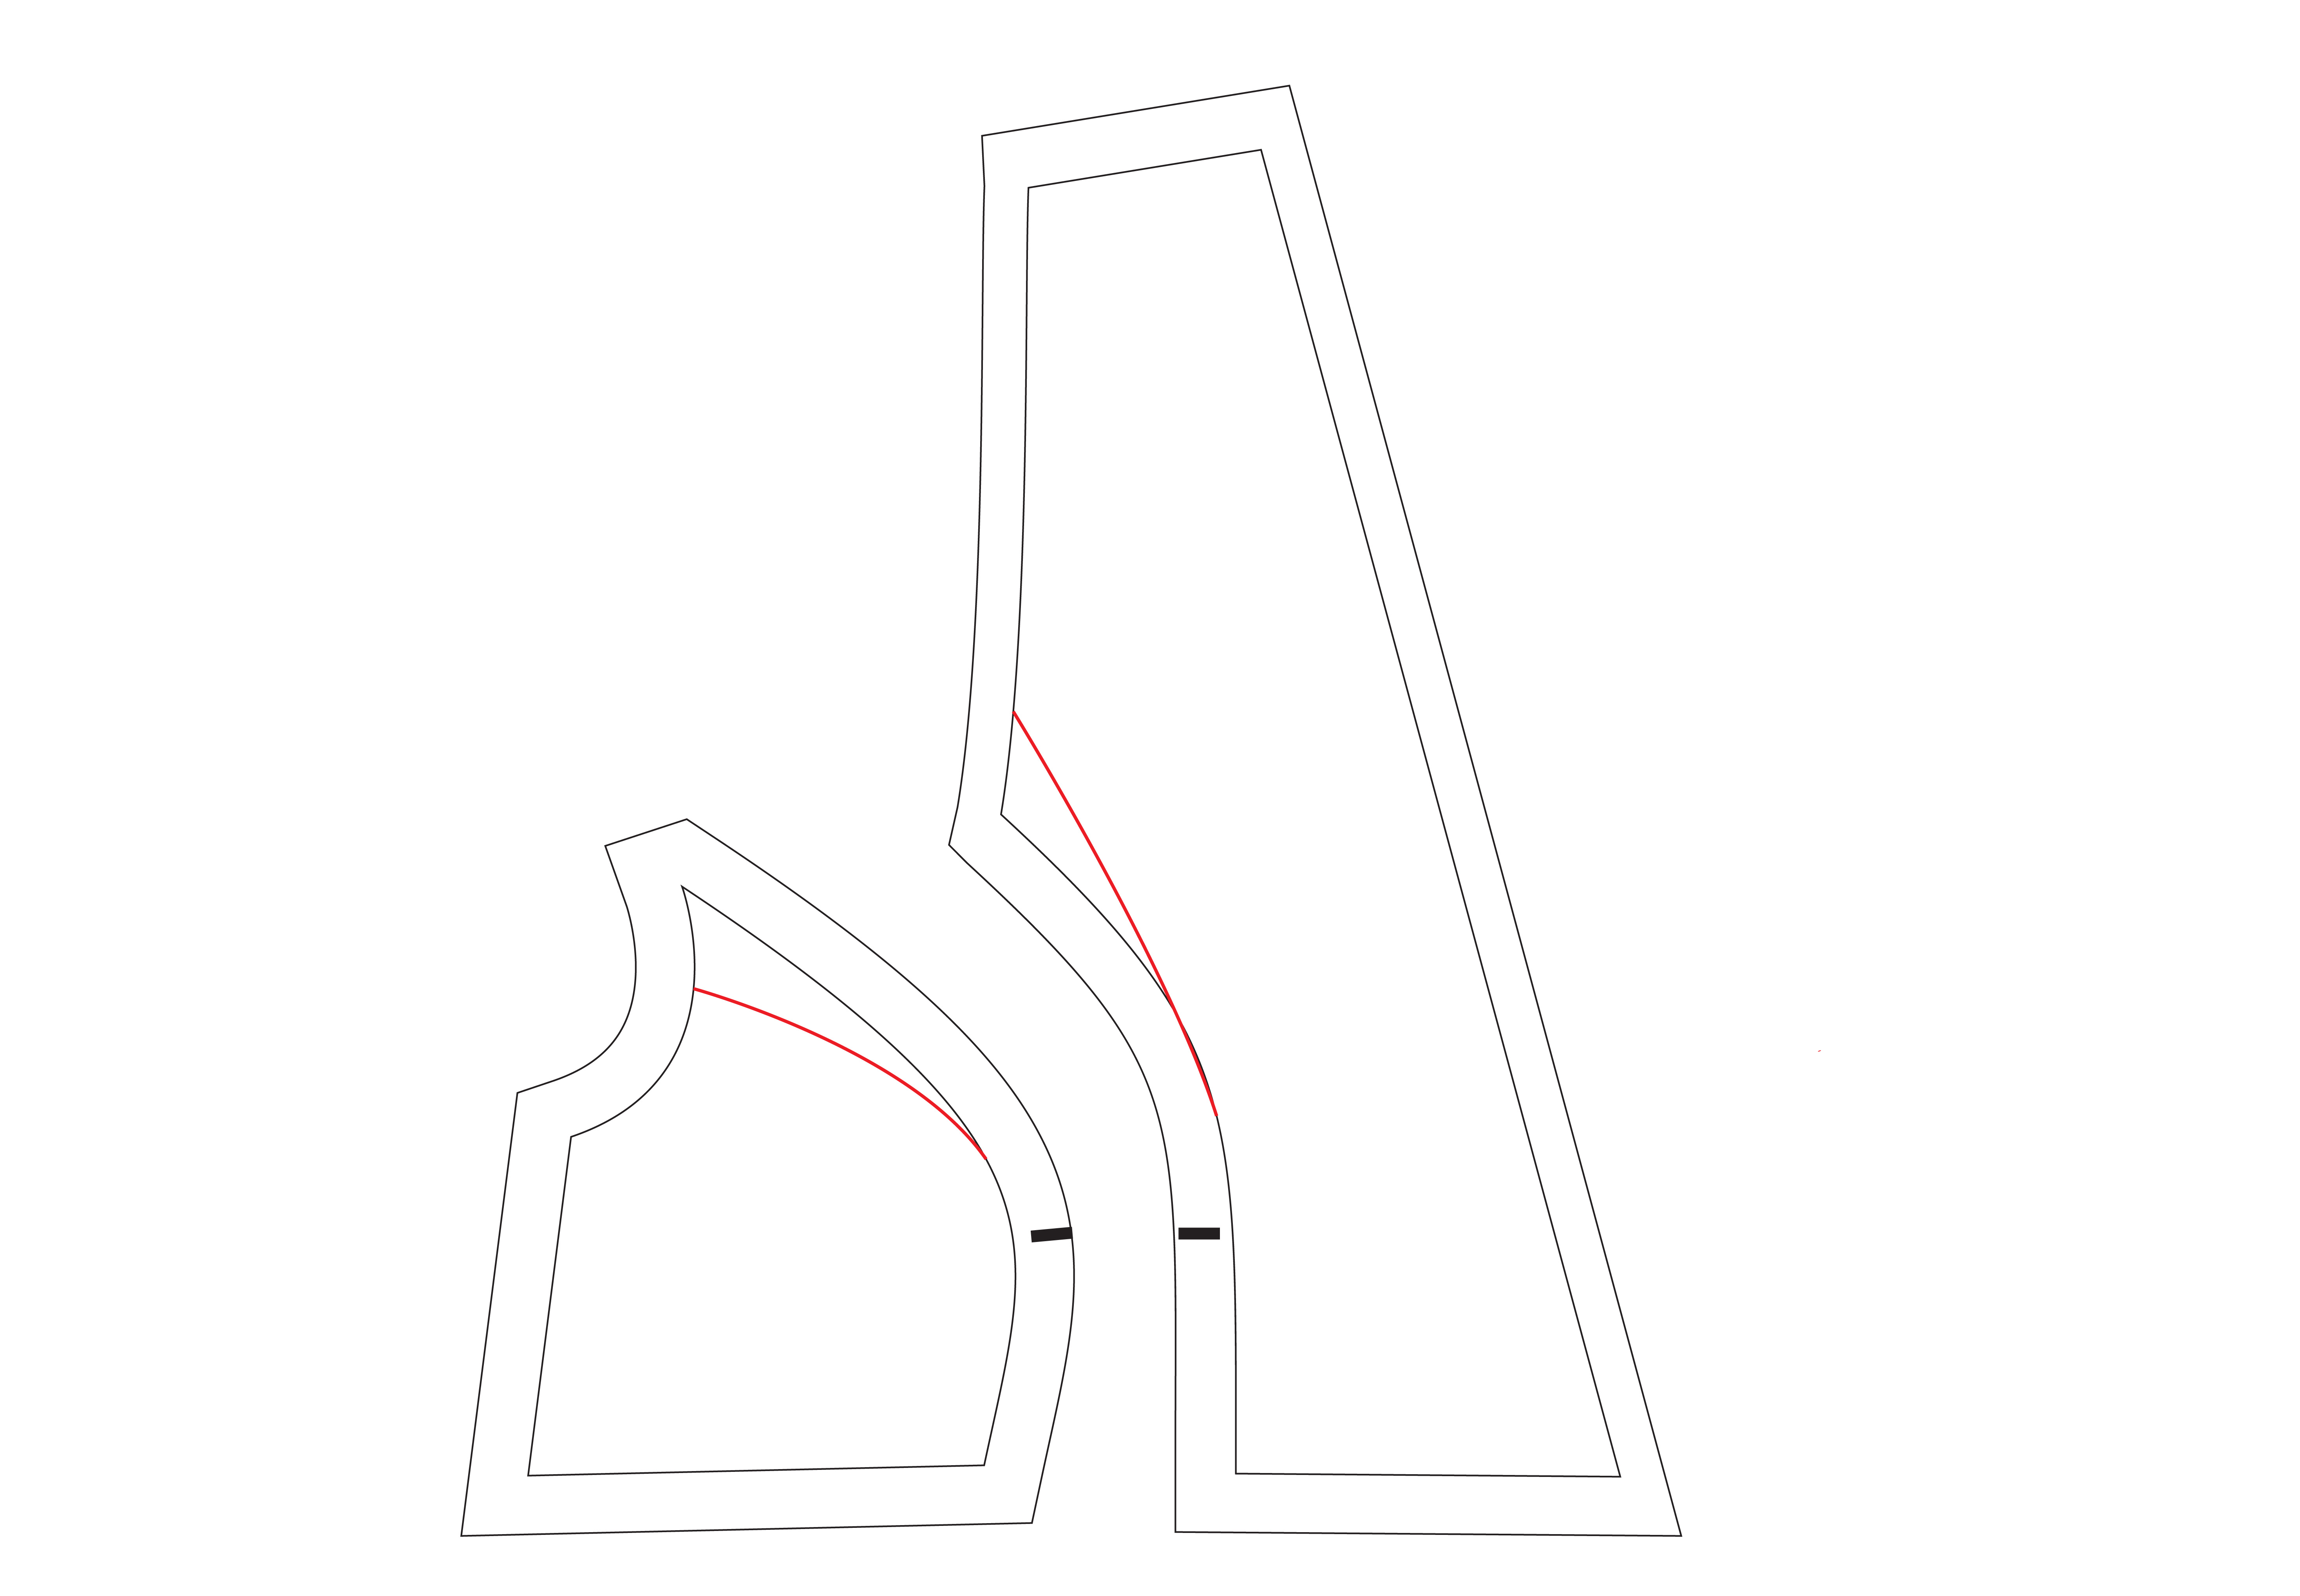
GAPING UNDER THE ARMS AT THE PRINCESS SEAM
If you have under arm gaping focused at the princess seam, you can adjust the princess seam by taking it in at the armscye equal amounts on both front bodice pieces and blending the new line into the bust curve. Add in the new seam allowance when you are done.
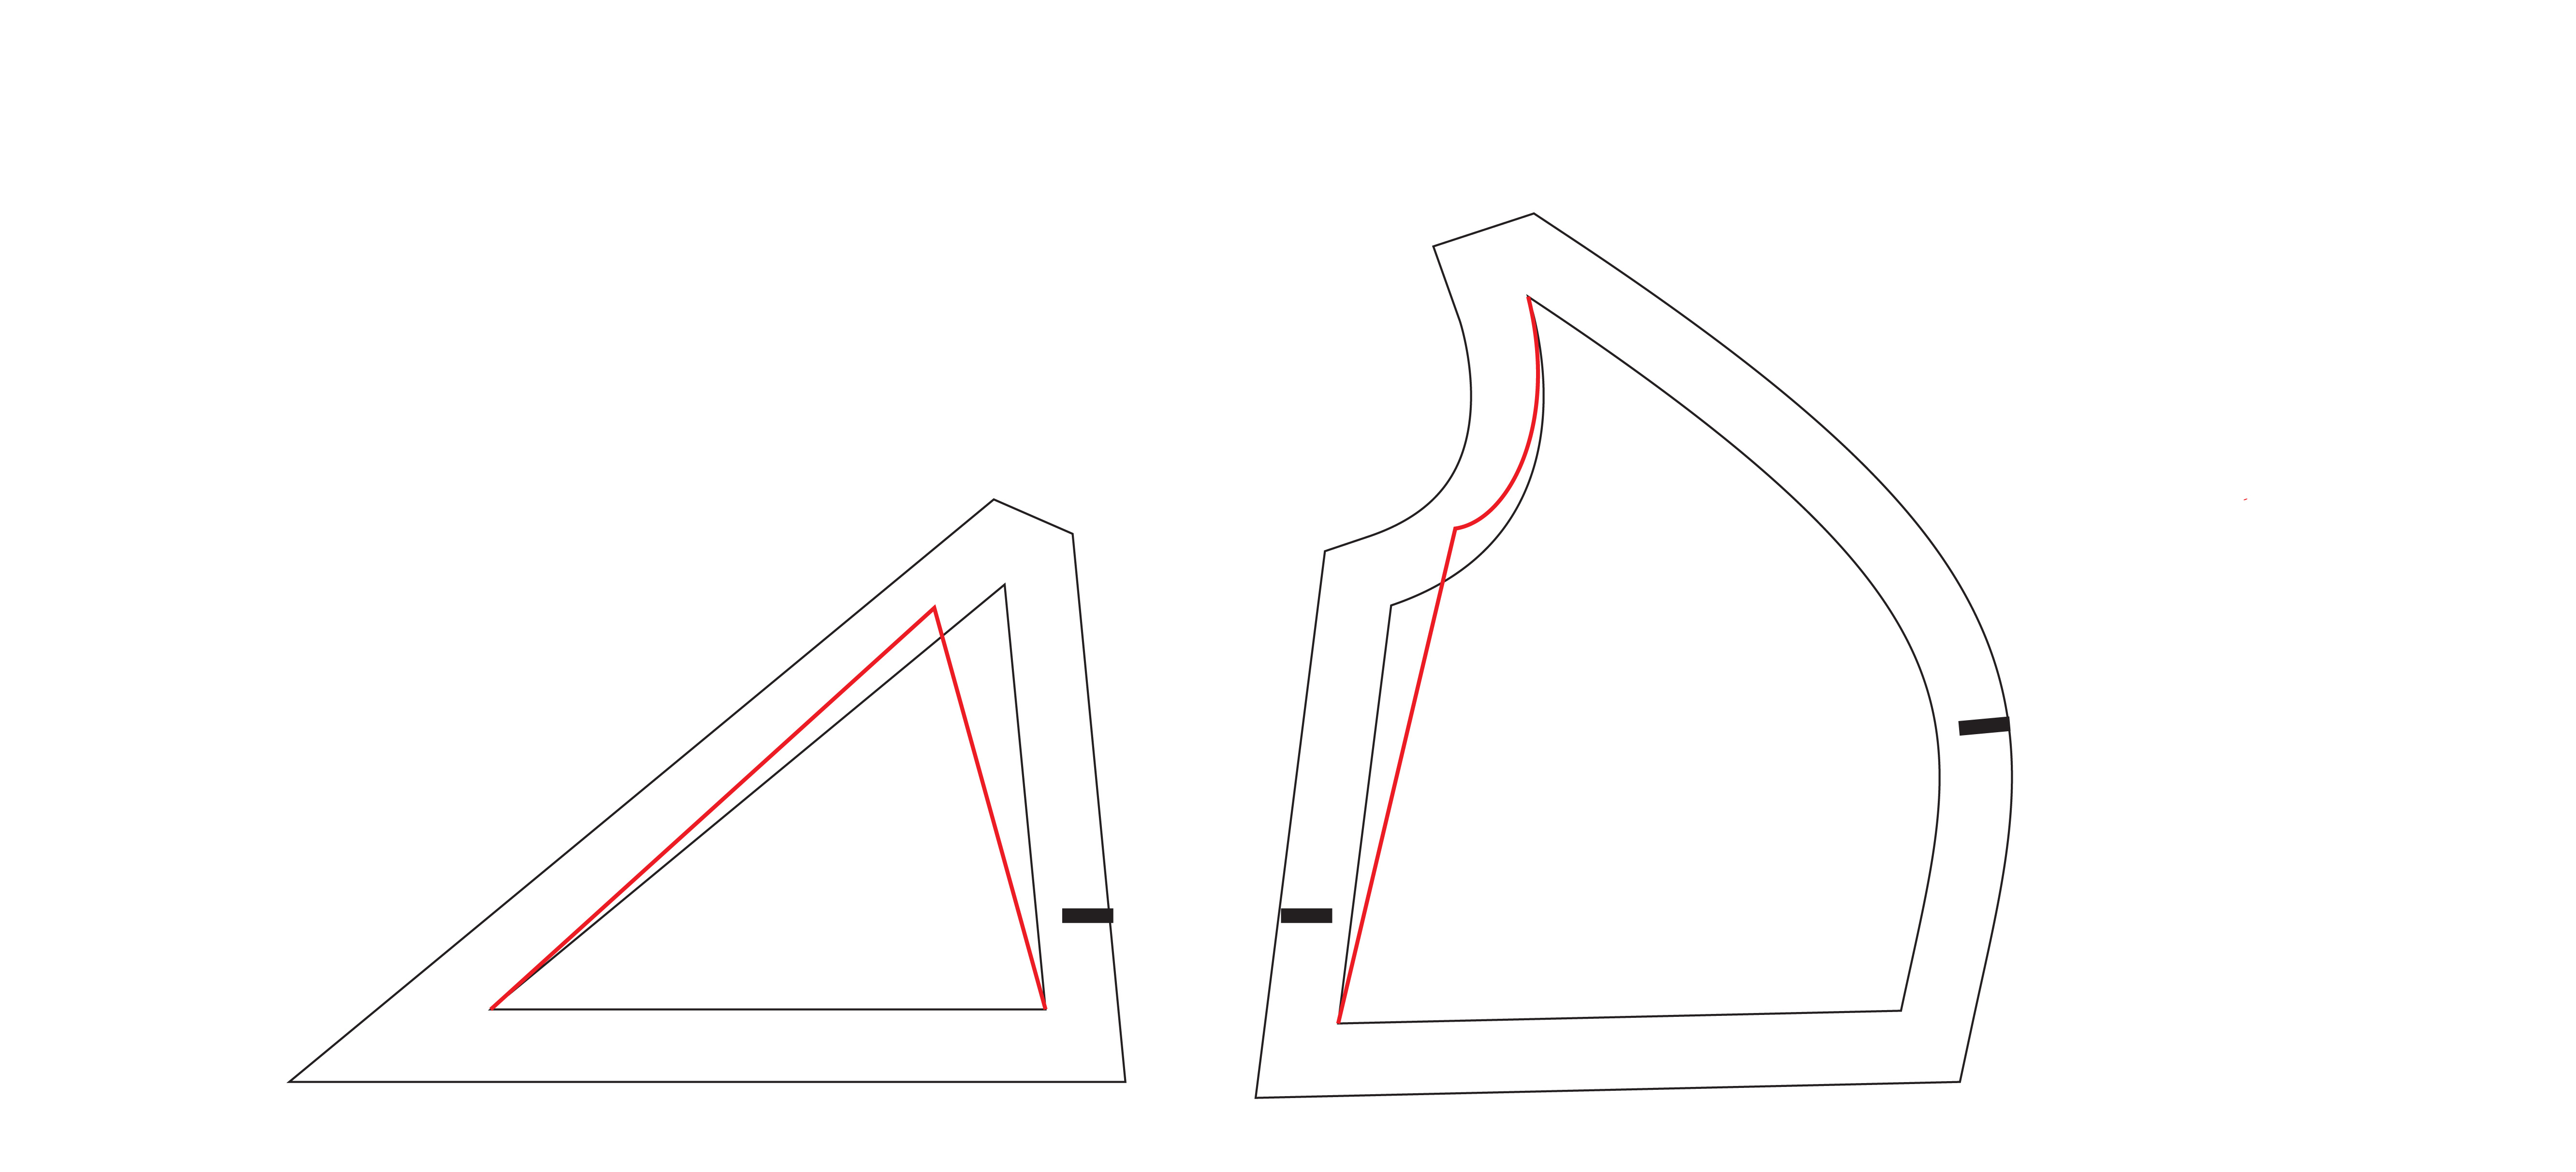
GAPING UNDER ARMS AT SIDE SEAM
Similarly, if your underarm gaping is more concentrated at the side seam, you would come in at the side seam from the under arm point the same amount on both the side back and side front pieces. In this instance, you may also want to raise the underarm seam as shown here to make up for the height you would loose from going over on the side back.
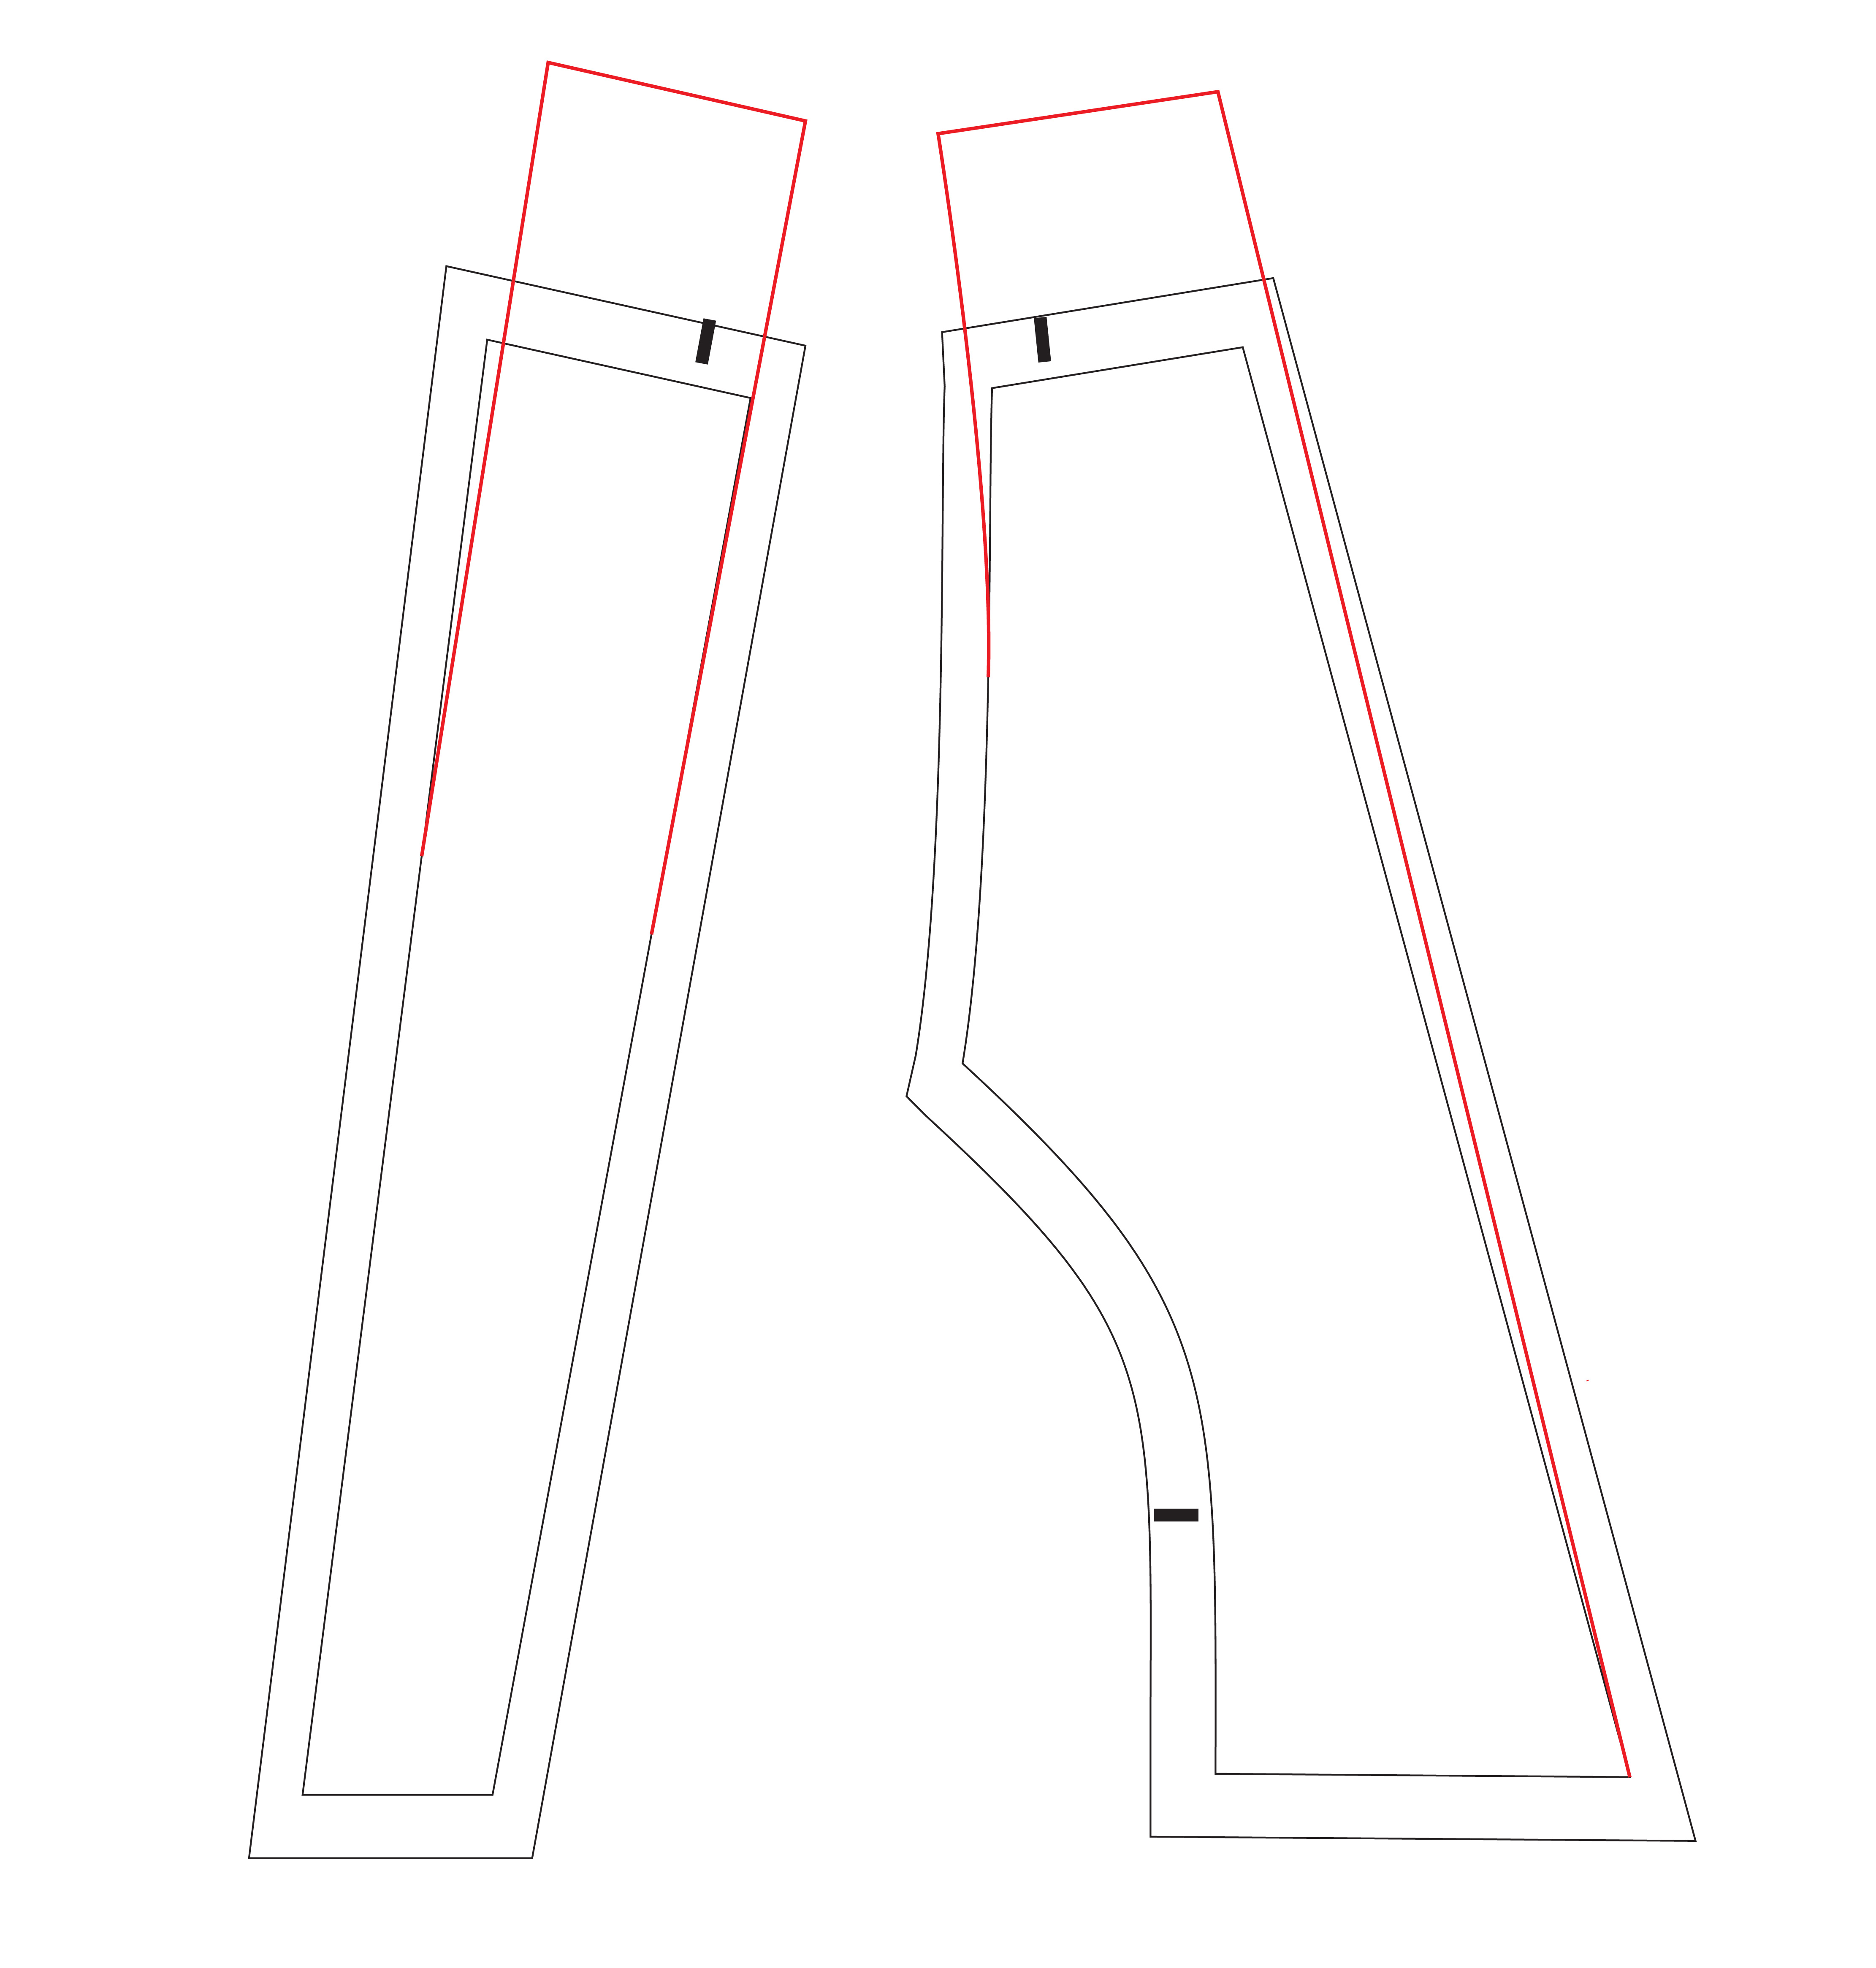
LENGTHEN SHOULDER STRAPS
If you are over 5’4″ or are particularly long in the torso, you may need to lengthen your shoulder straps. A tell tale sign of this is if the waistband of the dress is being pulled up at the center back instead of sitting straight across your back. When making this adjustment, be sure to connect the new front shoulder point all the way to the center point as shown above. Be sure to add the same amount to both straps. Again, add in the new seam allowances when you are done.
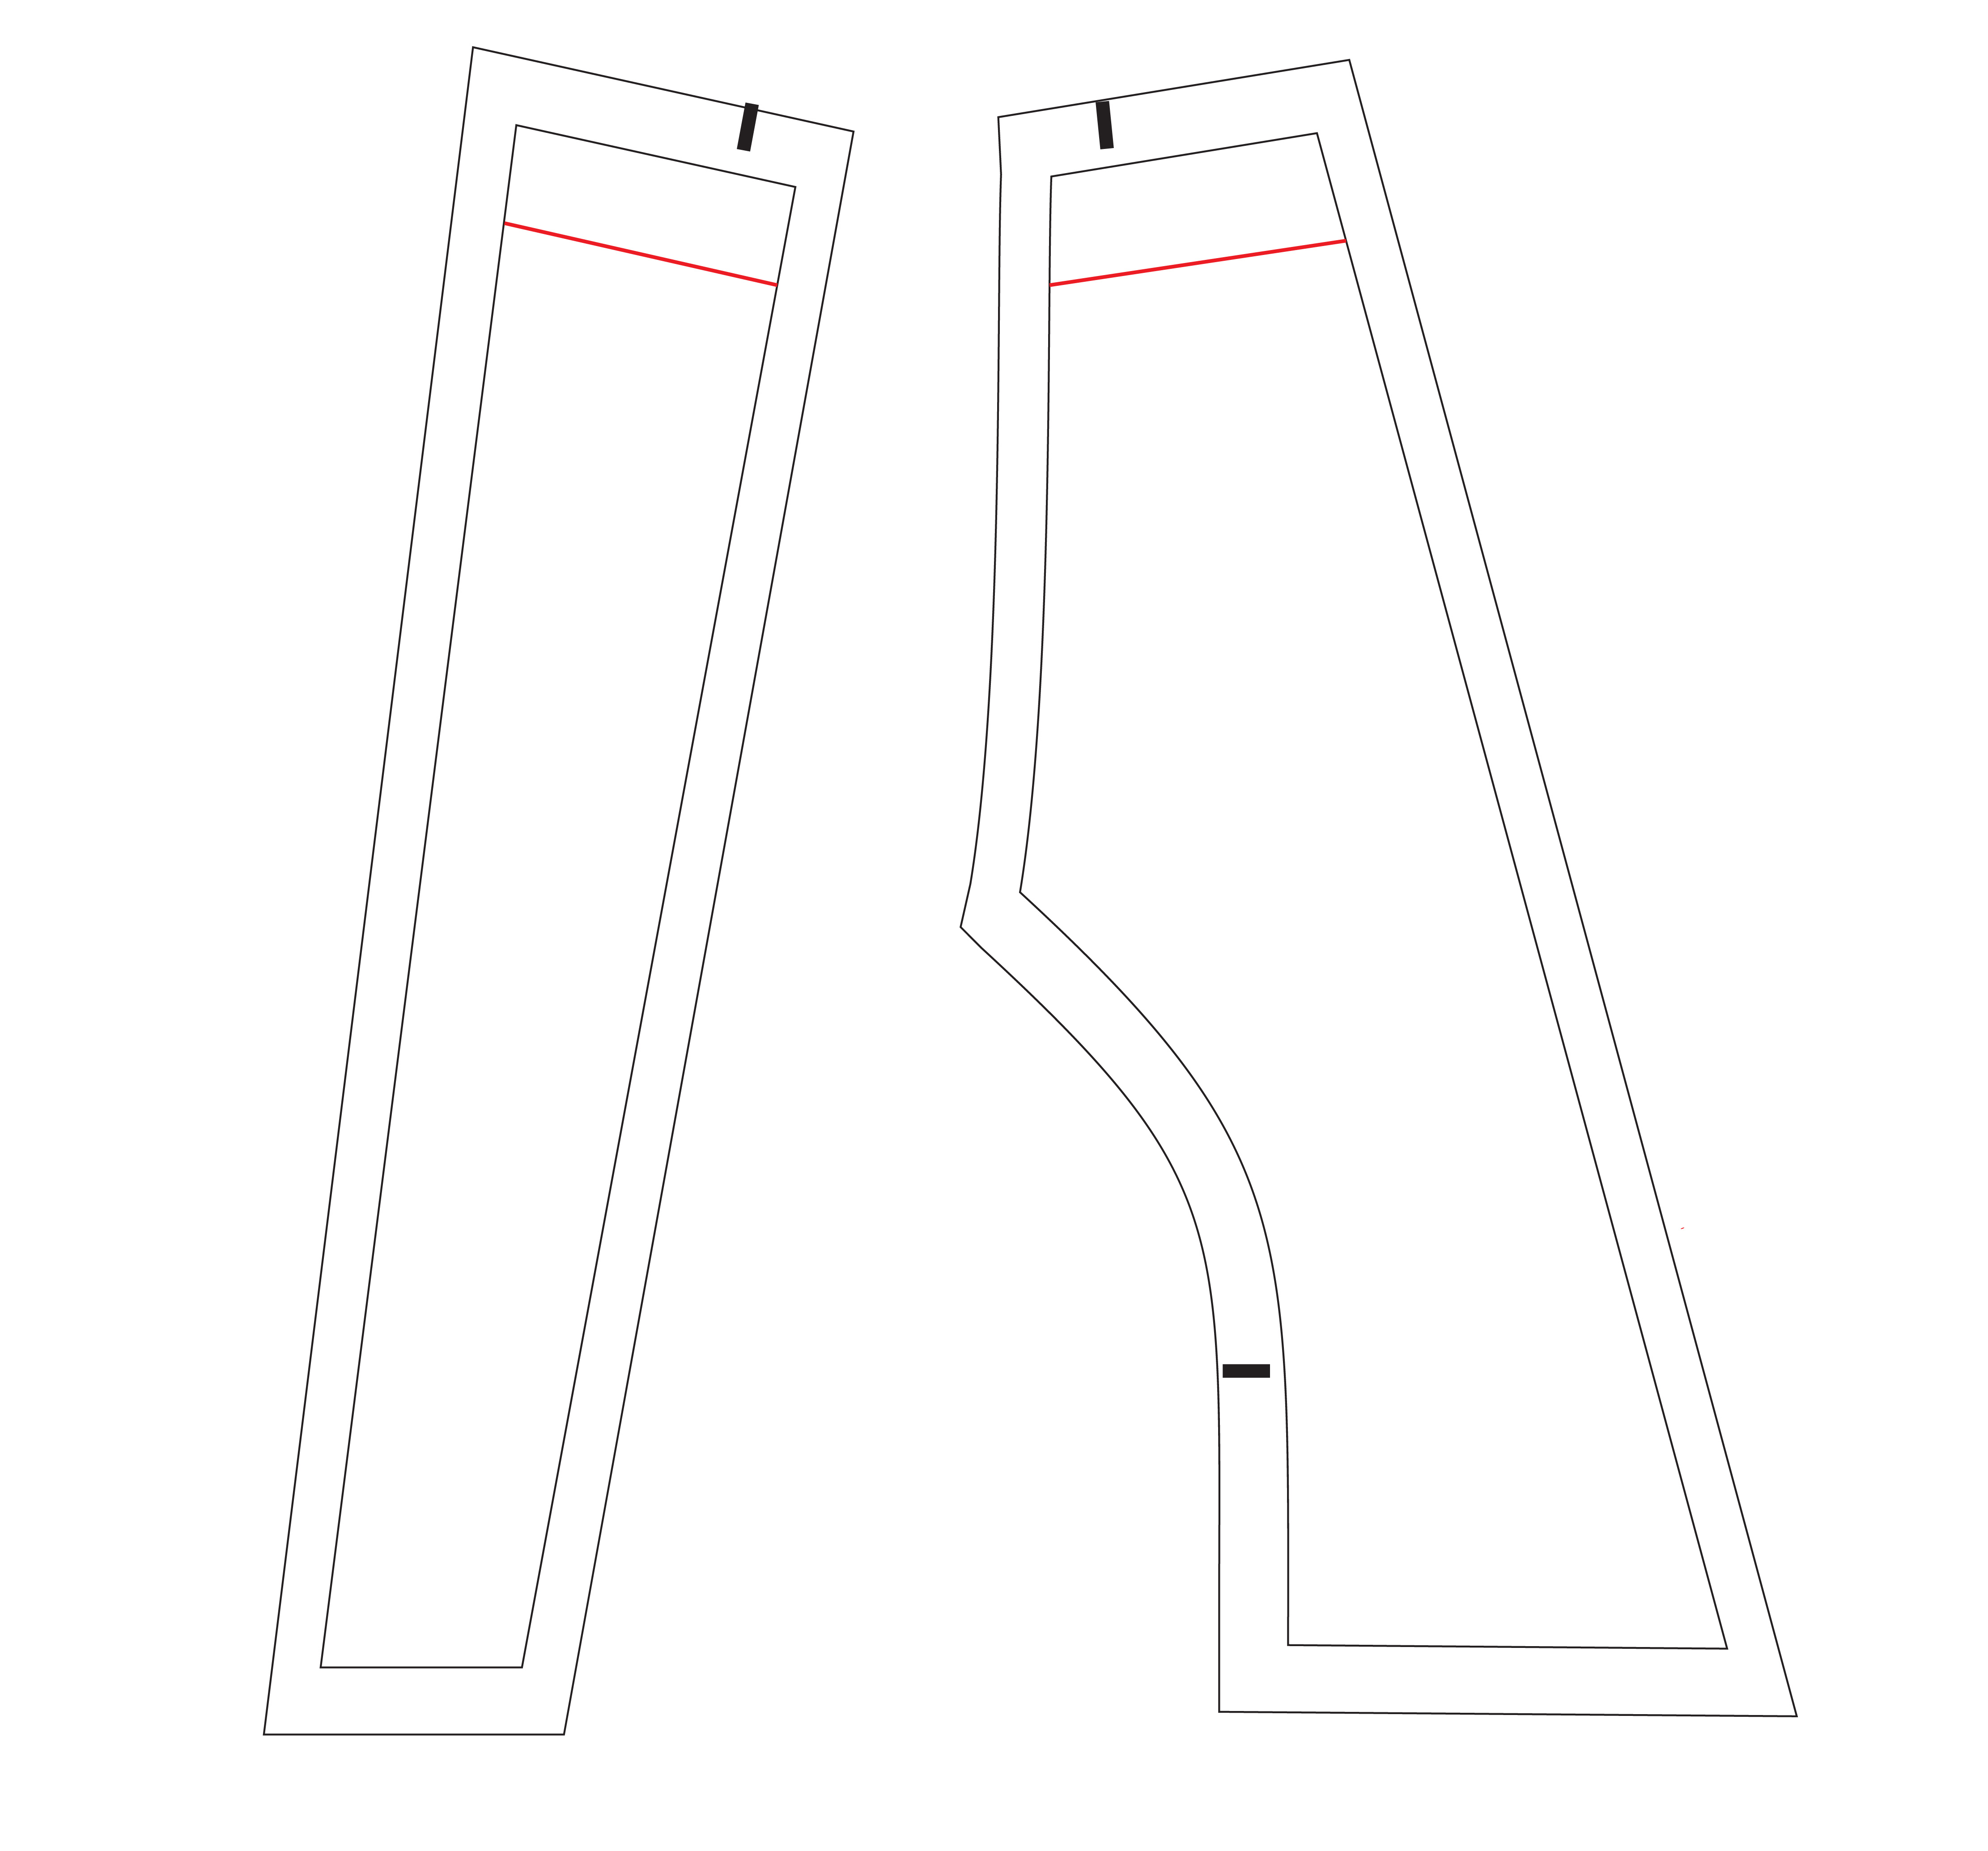
SHORTENING THE SHOULDER STRAPS
Conversely, if your straps seem to want to slip off, or are not sitting snug on your shoulders, shortening the straps may be what you need. This adjustment is quite simple. Though make sure you measure the new strap width on both the front and back to make sure they match. The back strap narrows as it goes down while the front strap gets wider, so you may need to adjust the width of the new top of the back strap accordingly.
OTHER FIT RESOURCES
Tomorrow, we will be covering the FBA for this pattern in detail!
If you need more fit help – especially with the bodice, here are a couple of great resources you may find helpful.
- Closet Case Patterns has a free ebook all about fitting princess seams.
- The Stitch Sisters just released a full e-course all about bust adjustments.
I hope this post has left you feeling more confident when making adjustments to your Chelsea Party Dress for the perfect fit! Tomorrow we will dive deep into the full bust adjustment for the Chelsea dress.
Happy Sewing!


Leave a Reply