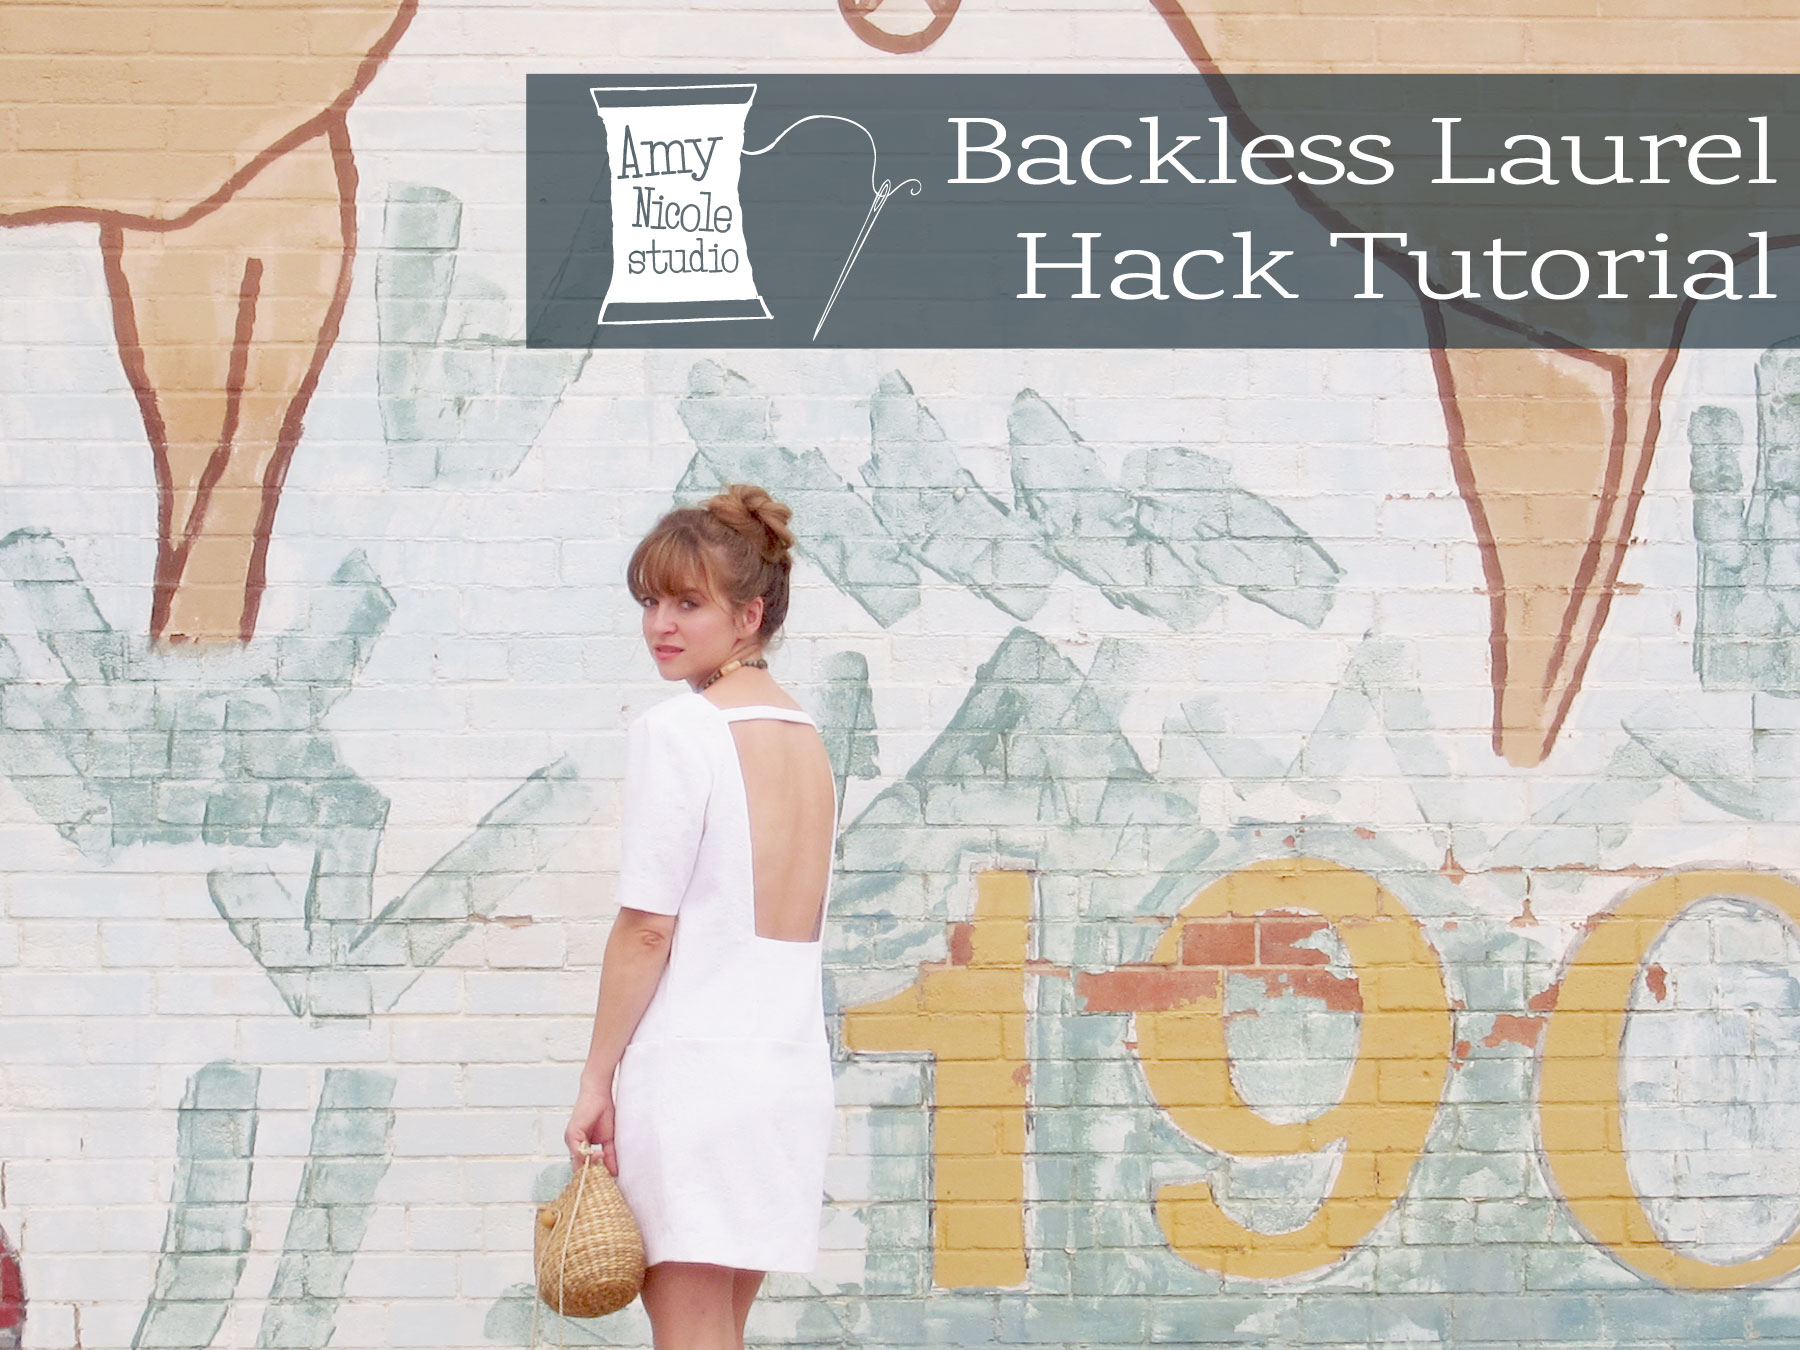
I had such great feedback from my post about my “Double Hacked” cut-out back Colette Laurel dress that I decided to make a tutorial post for you guys. This tutorial will help you create a simple shift dress with a open back cut out using some simple pattern manipulation techniques. As I said, this is a double hacked Laurel. So before you get going with this tutorial, you will first need to download Sarai’s free Mod-ified Laurel hack here. Follow her instructions to modify the original pattern, and before cutting out any pieces in fabric, follow my instructions below.
Aside from your regular sewing supplies, you will need:
- Paper Scissors
- Ruler
- Pencil
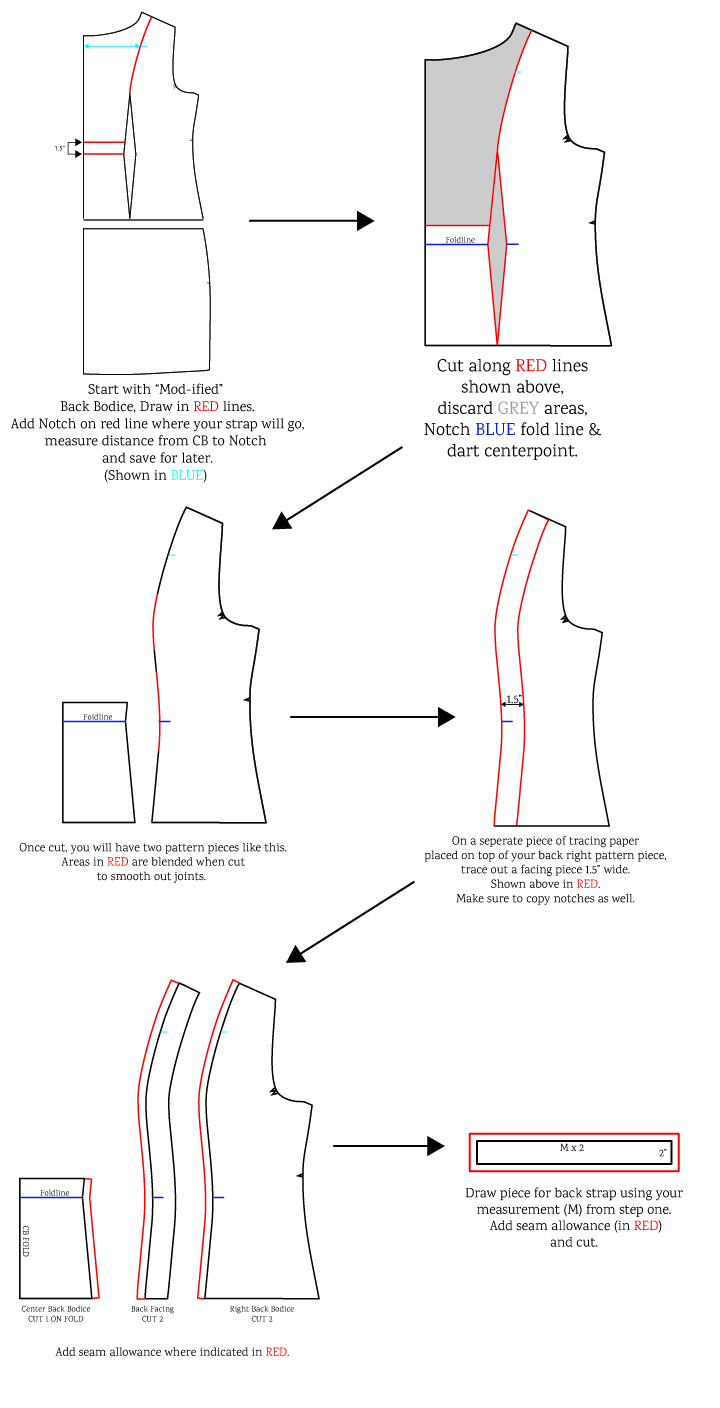
With your already “Mod-ified” Laurel pattern pieces, follow the diagrams below to make the additional adjustments to the pattern. NOTE: you will only be working with the upper back pattern piece.

Now that you have double-hacked your pattern follow the next steps to sew the upper back bodice together:
1.Cut out all pieces in fabric, note that center back piece is cut on fold.
2. If your fabric is lightweight, fuse back facing + strap piece.
3. Fold strap piece right sides together and sew along long edge at appropriate seam allowance to create an open ended tube.
4. Flip tube right-side out using preferred method.

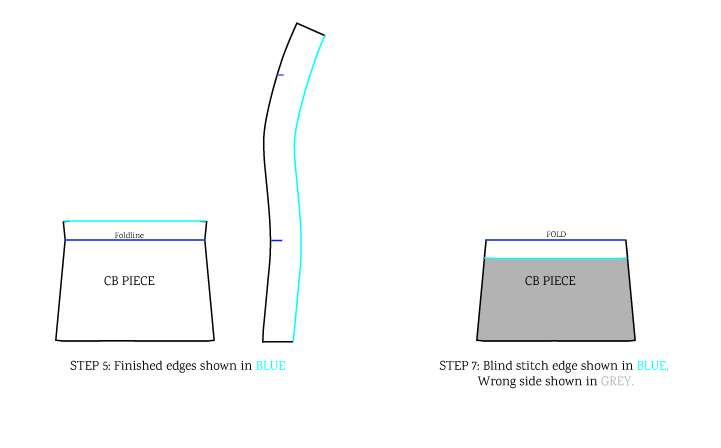
5. Finish top edge of Center Back piece and inside edge of back facing pieces with preferred method (mine is serged).
6. Fold center back piece where notched and press.
7. Blind stitch folded down edge in place (as seen above).

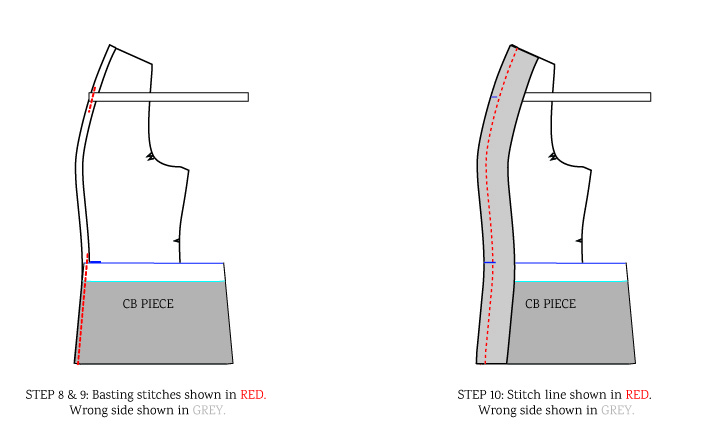
8. Baste back strap to one side pack piece at notch, right sides facing.
9. Baste center back piece to same side back piece with right sides facing, top of center back piece should meet notch made in step 1.
10. Place back facing on top of right back piece, sandwiching center back piece and strap in between facing and right back piece, Sew in place. (as seen above)
11. Backstitch seam allowance to back facing 1/8” away from seam.
12. Press facing to inside.
12. Repeat with other side.
Now sew up the rest of the dress following the instructions in the mod-ified tutorial.
NOTE: I ended up taking my dress in at the hips to slim it down an also reduce the gaping in the back cut out (it was a straight down view of my undies!) If you have more gaping than you would like, try taking in the side seams as much as you are comfortable to compensate.
Voila! You now have an adorable cut-out back shift dress! You can adjust the height of your center back piece if you don’t want quite so much of an open back, just be sure to follow the dart legs.
If you follow my tutorial I’d love to see how yours Laurel turns out. Please link back to my post and tag me on instagram @the_amynicole. You can even use the hashtag #doublehackedlaurel. lets start a double hacked laurel movement!
Happy Sewing!

Leave a Reply