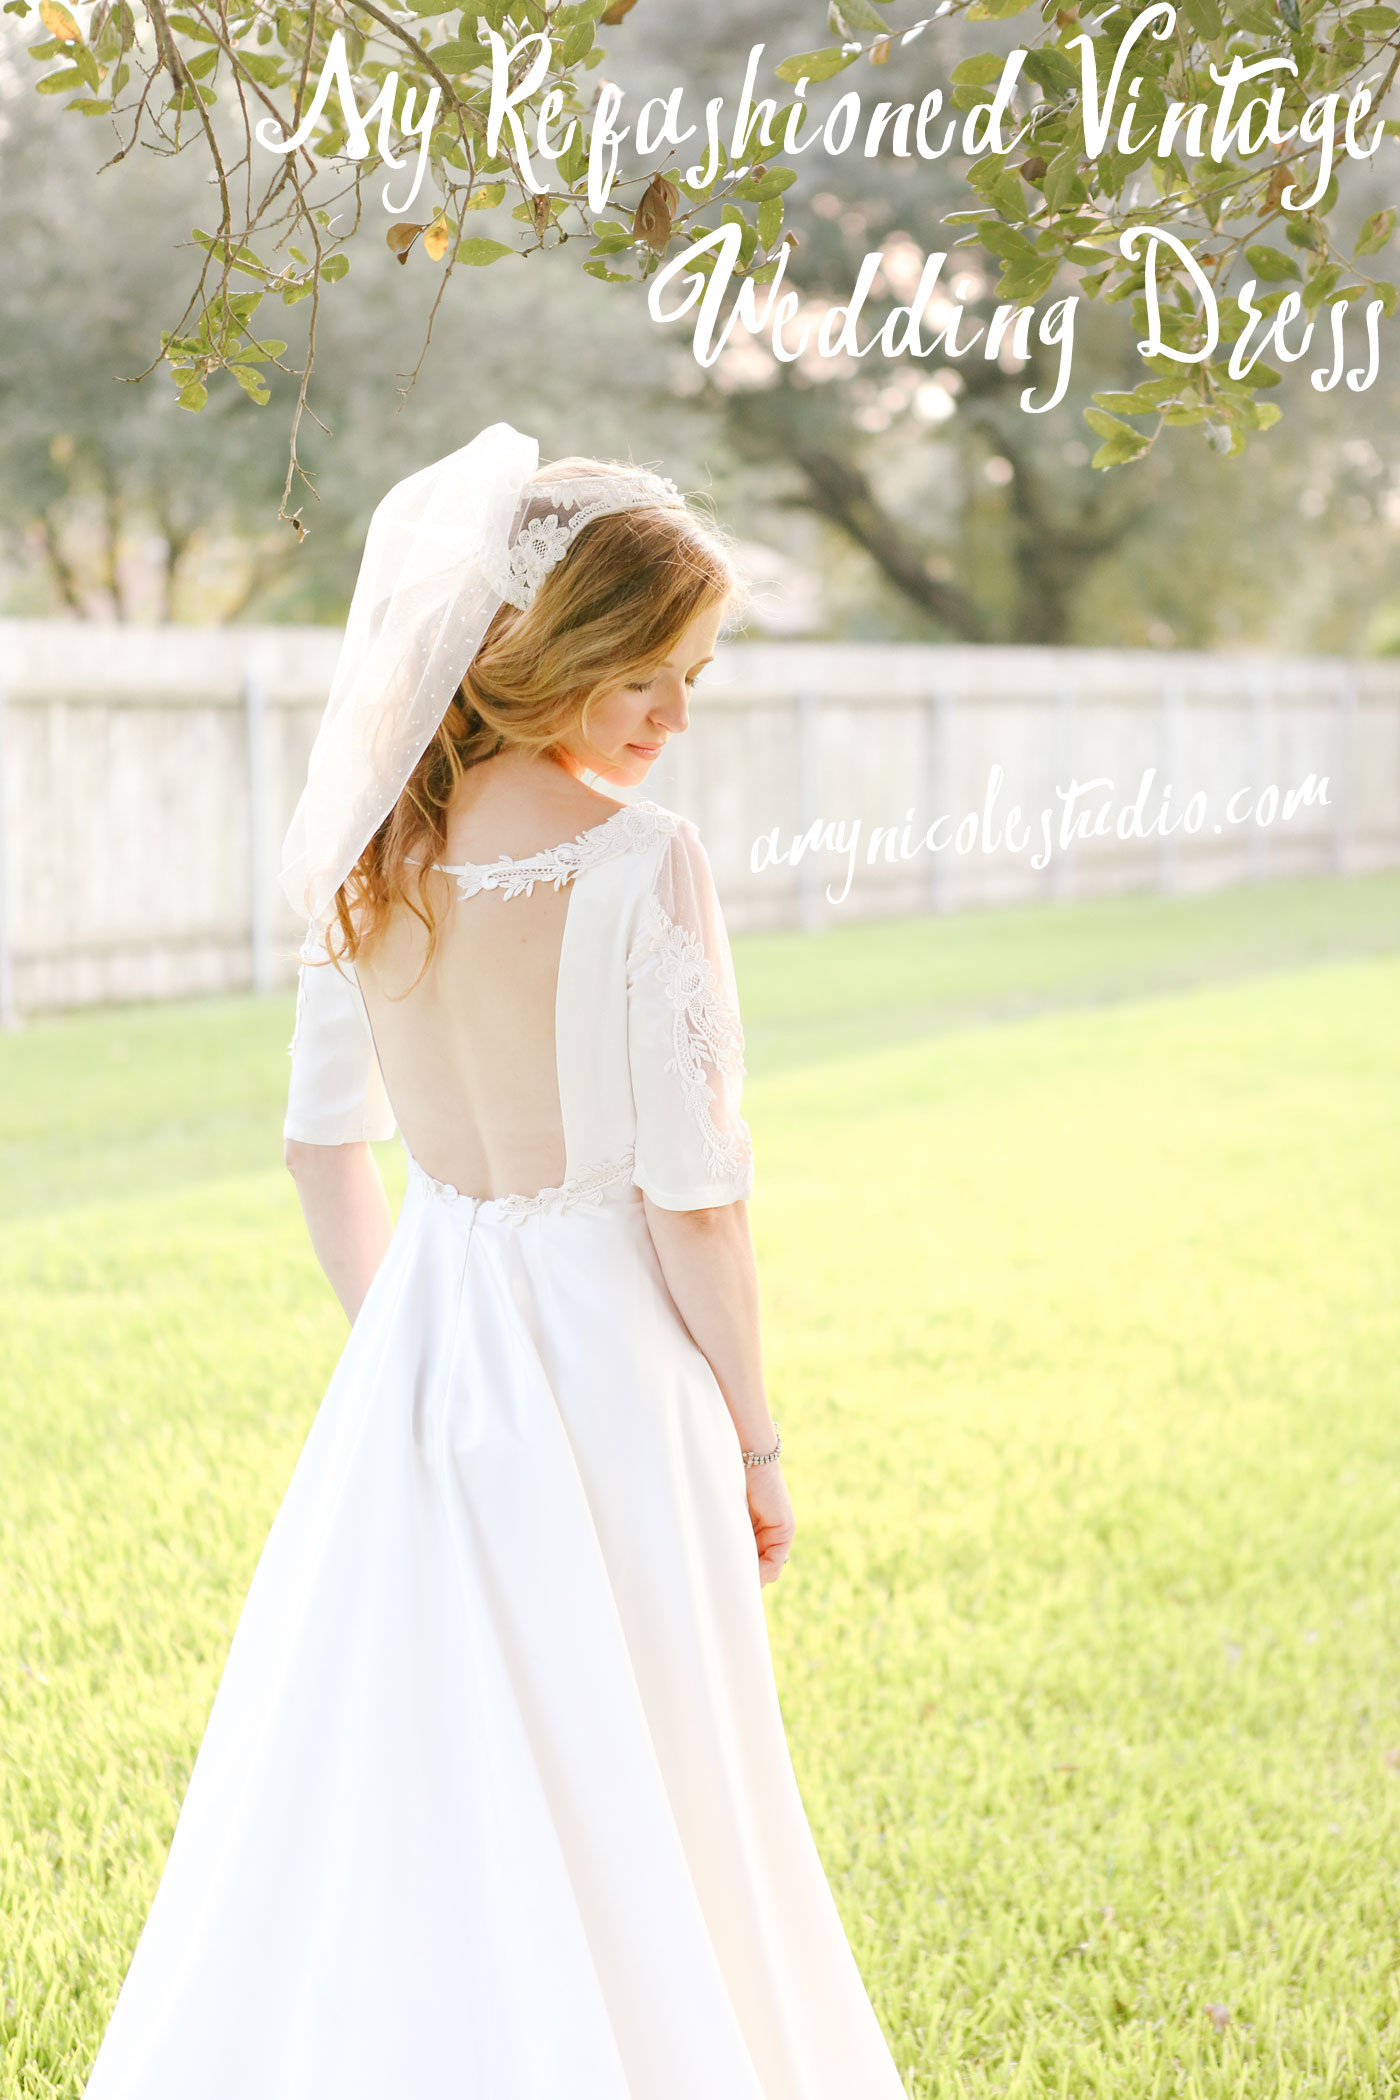
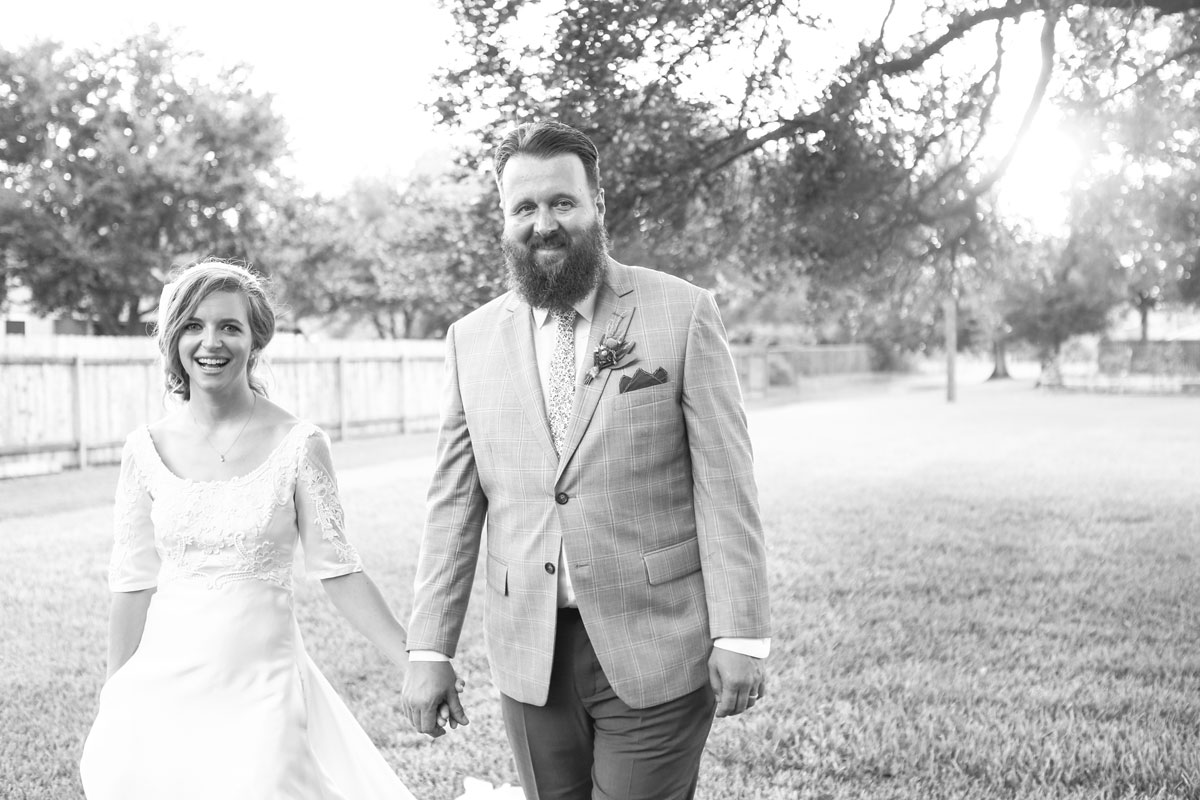
I’m finally sharing a bit of my wedding day today! Back in September my best friend and I got hitched under the huge oak trees in my grandmother’s back yard. Everything about the day was so perfect, but one of my absolute favorite things was getting to walk down the aisle in my mom’s wedding dress which was made by my grandmother in 1981. I wanted to share with you all my process for updating it and why I chose to change what I did.
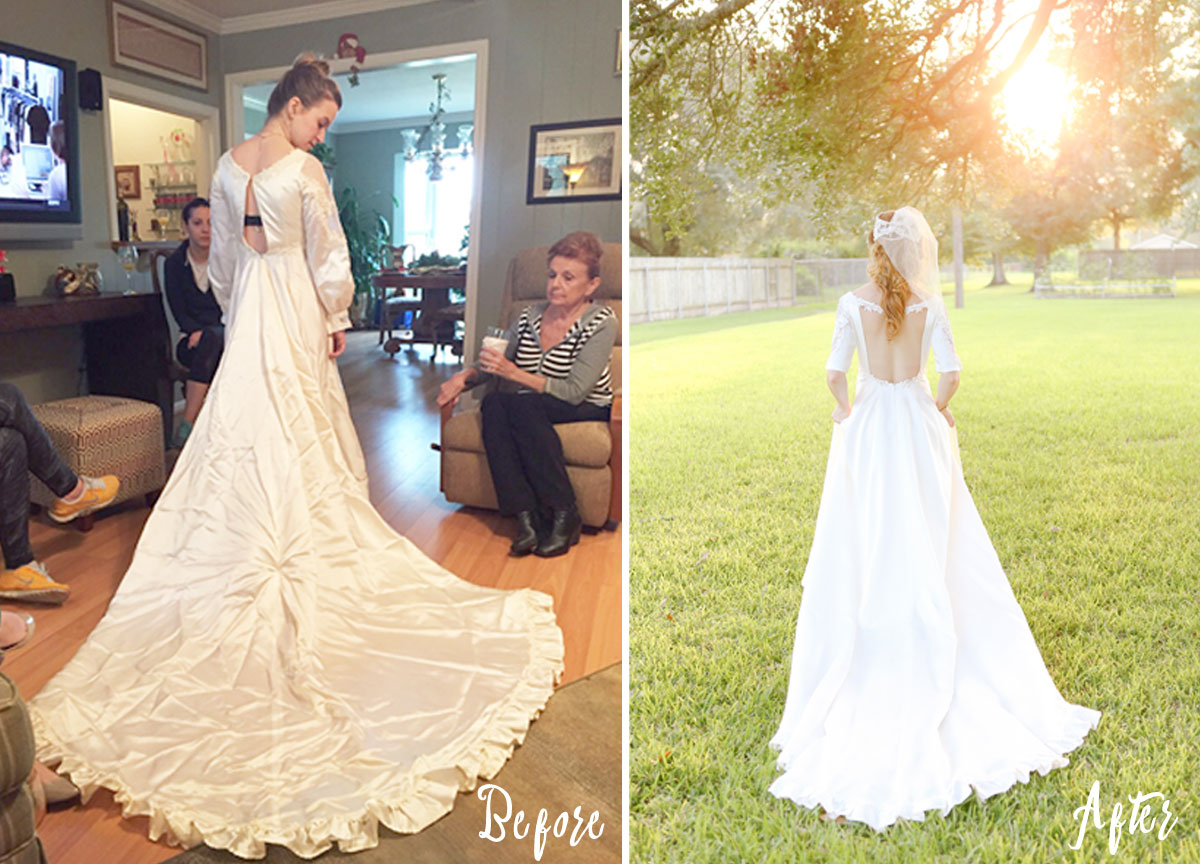
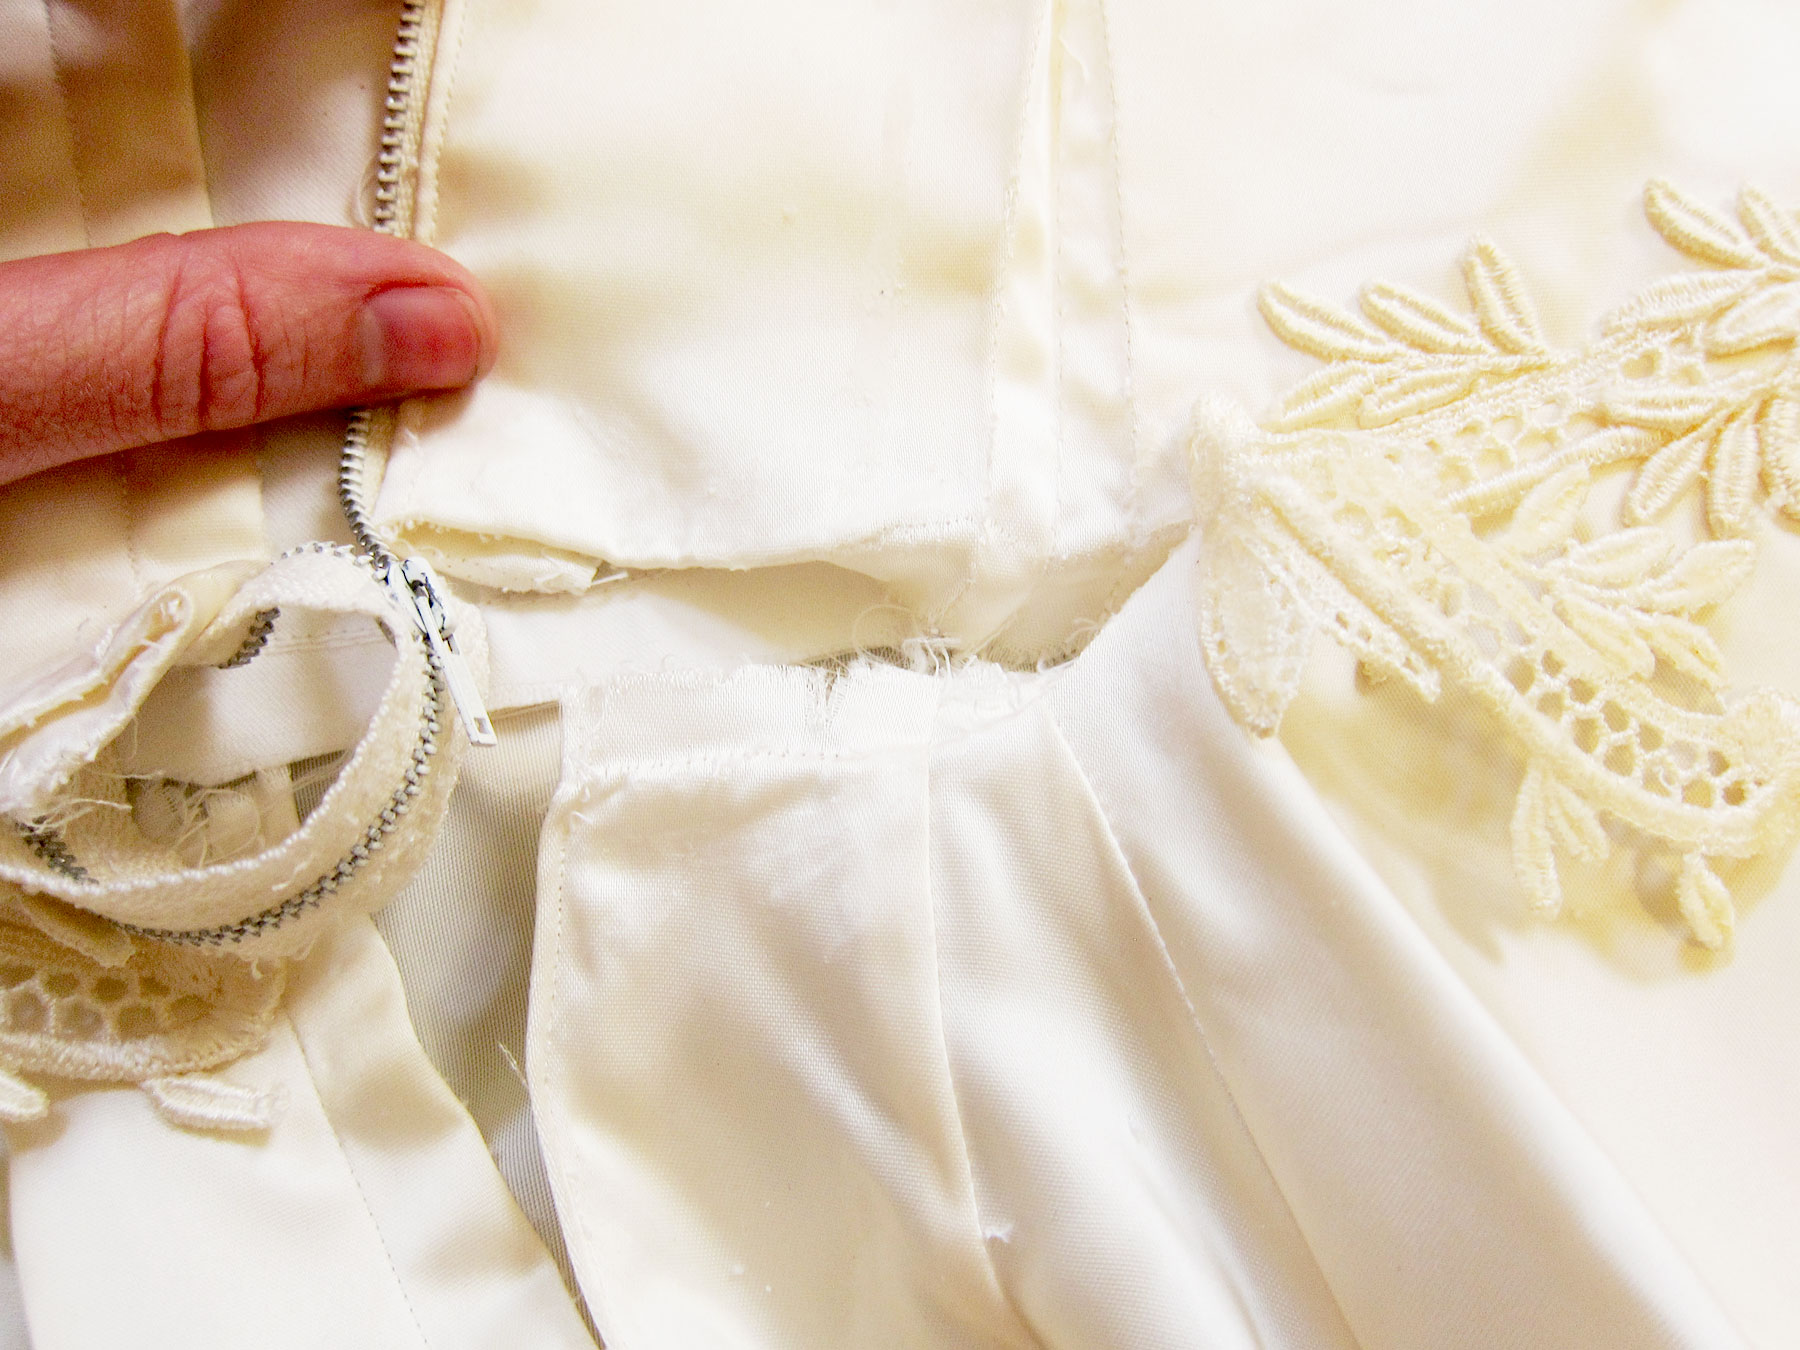
Since I was little, I always thought it would be so cool to wear my moms wedding dress one day. I would pull it out from under her bed, preserved all neatly in its box and just gaze at it through the plastic window. When the time came to try it on and see if it would work I was a little nervous. I had no idea if it would fit (my mom was smaller than me when she got married) and I had never seen it up close in person. Sure enough.. it was a little snug. You can see in the above picture on the right how it wouldn’t zip up past my ribcage. Luckily I had some tricks up my sleeve and it didn’t take much to make it fit beautifully.
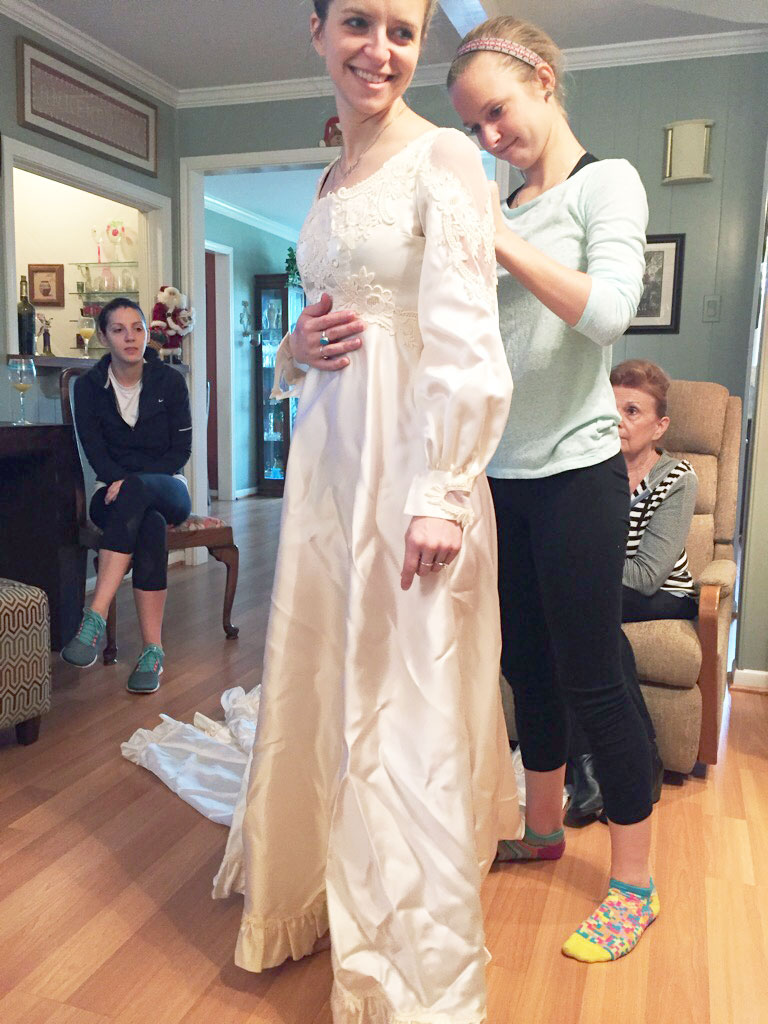
I made four fairly easy changes to the original dress. First I shortened and took in the sleeves. My parents were married indoors in May. Our wedding was going to be outside in September (in Texas). I knew I wouldn’t be able to tolerate those long sleeves in the potential Texas heat. I also knew a shorter, slimmer sleeve would modernize the dress a bit. I didn’t want to loose the beautiful lace details at the bicep, so I hemmed the sleeves just below where the lace ends. The original sleeves were a bit blouson toward the wrist so I also took them in at the under seam to slim them down. This change alone really updated the dress a lot.
The original dress was made to fit a huge petticoat underneath. I didn’t want a lot of fullness so I chose to slim down the side seams in the skirt quite a bit. I only worked with the side seams because I didn’t want to loose the pleating detail at the back. I only took out volume at the hips and slightly down the leg area, meeting back up with the original seam at the hem. I love the big train and didn’t want to effect the way it fell at the floor. Since I was already fidgeting with the side seams I of course had to go ahead and throw some inseam pockets in there (because, hello you need pockets at all times!) You can kind of see the pockets in the above picture.
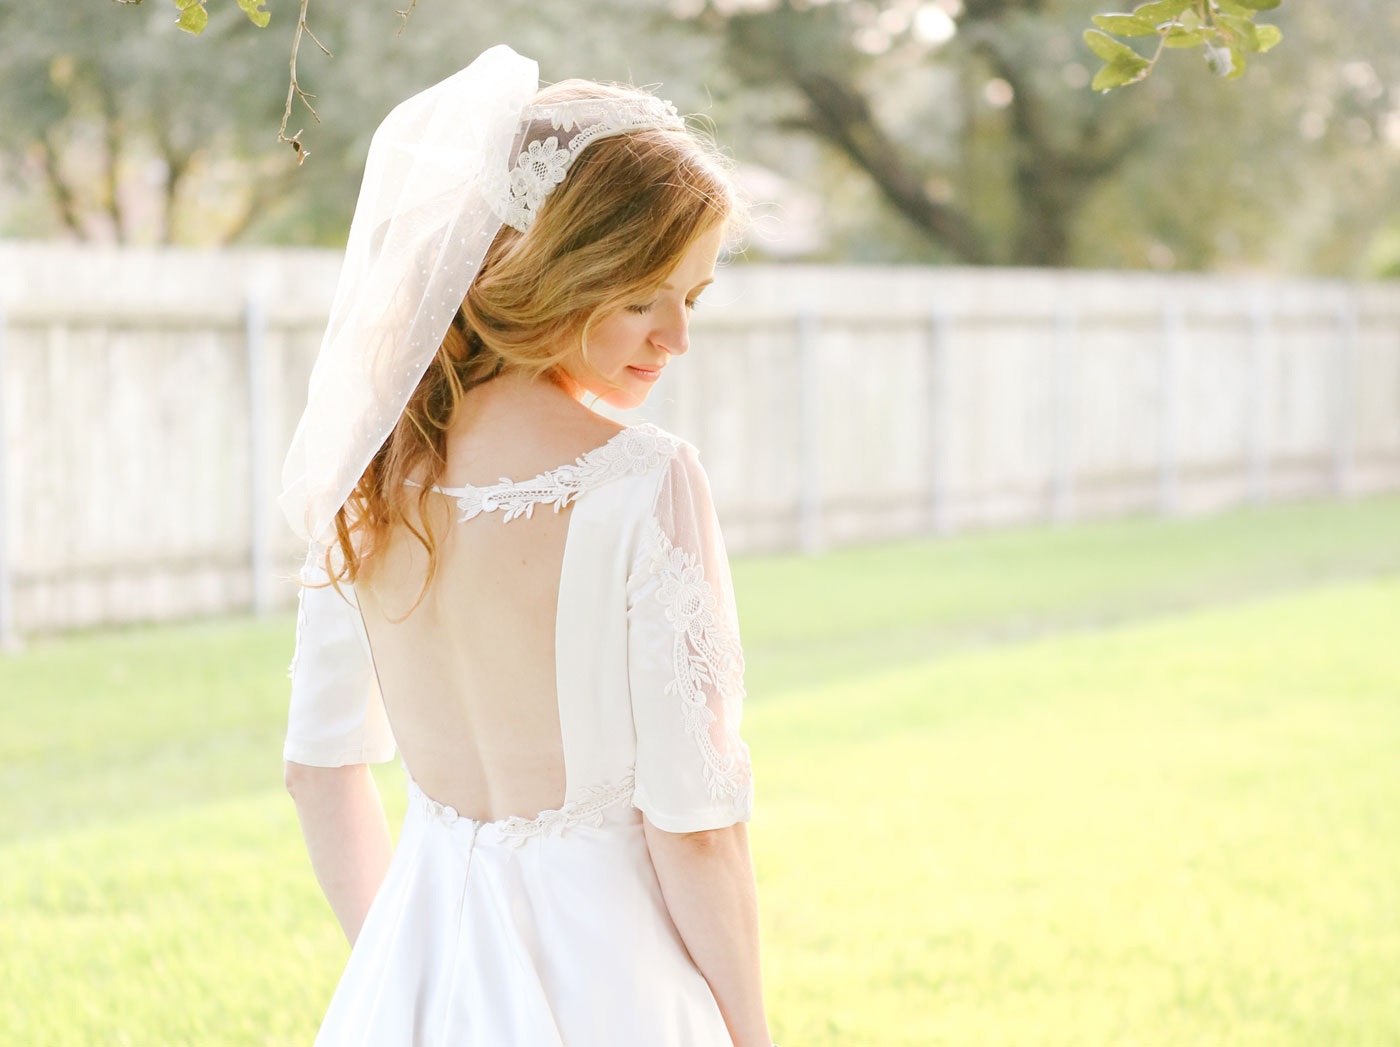
Lastly, I made some changes to the back. I needed to be able to fit into the dress, and there wasn’t really much room for letting out any seams. I was not deterred by this because I’m in LOVE with the open back look, and knew if I cut the zipper at the waist seam I’d be able to zip it all the way, and a cut out in the back would allow me to breathe up top. Luckily I was able to save the lace detail around the neckline by adding a small back strap across the shoulders and re-attatching the lace. I also left the lace along the waist line so it peeked up a bit over my skin. This was my absolute FAVORITE change to the dress. I adore the way the back looks with the little lace overlays on top and bottom. I really didn’t want to take it off!
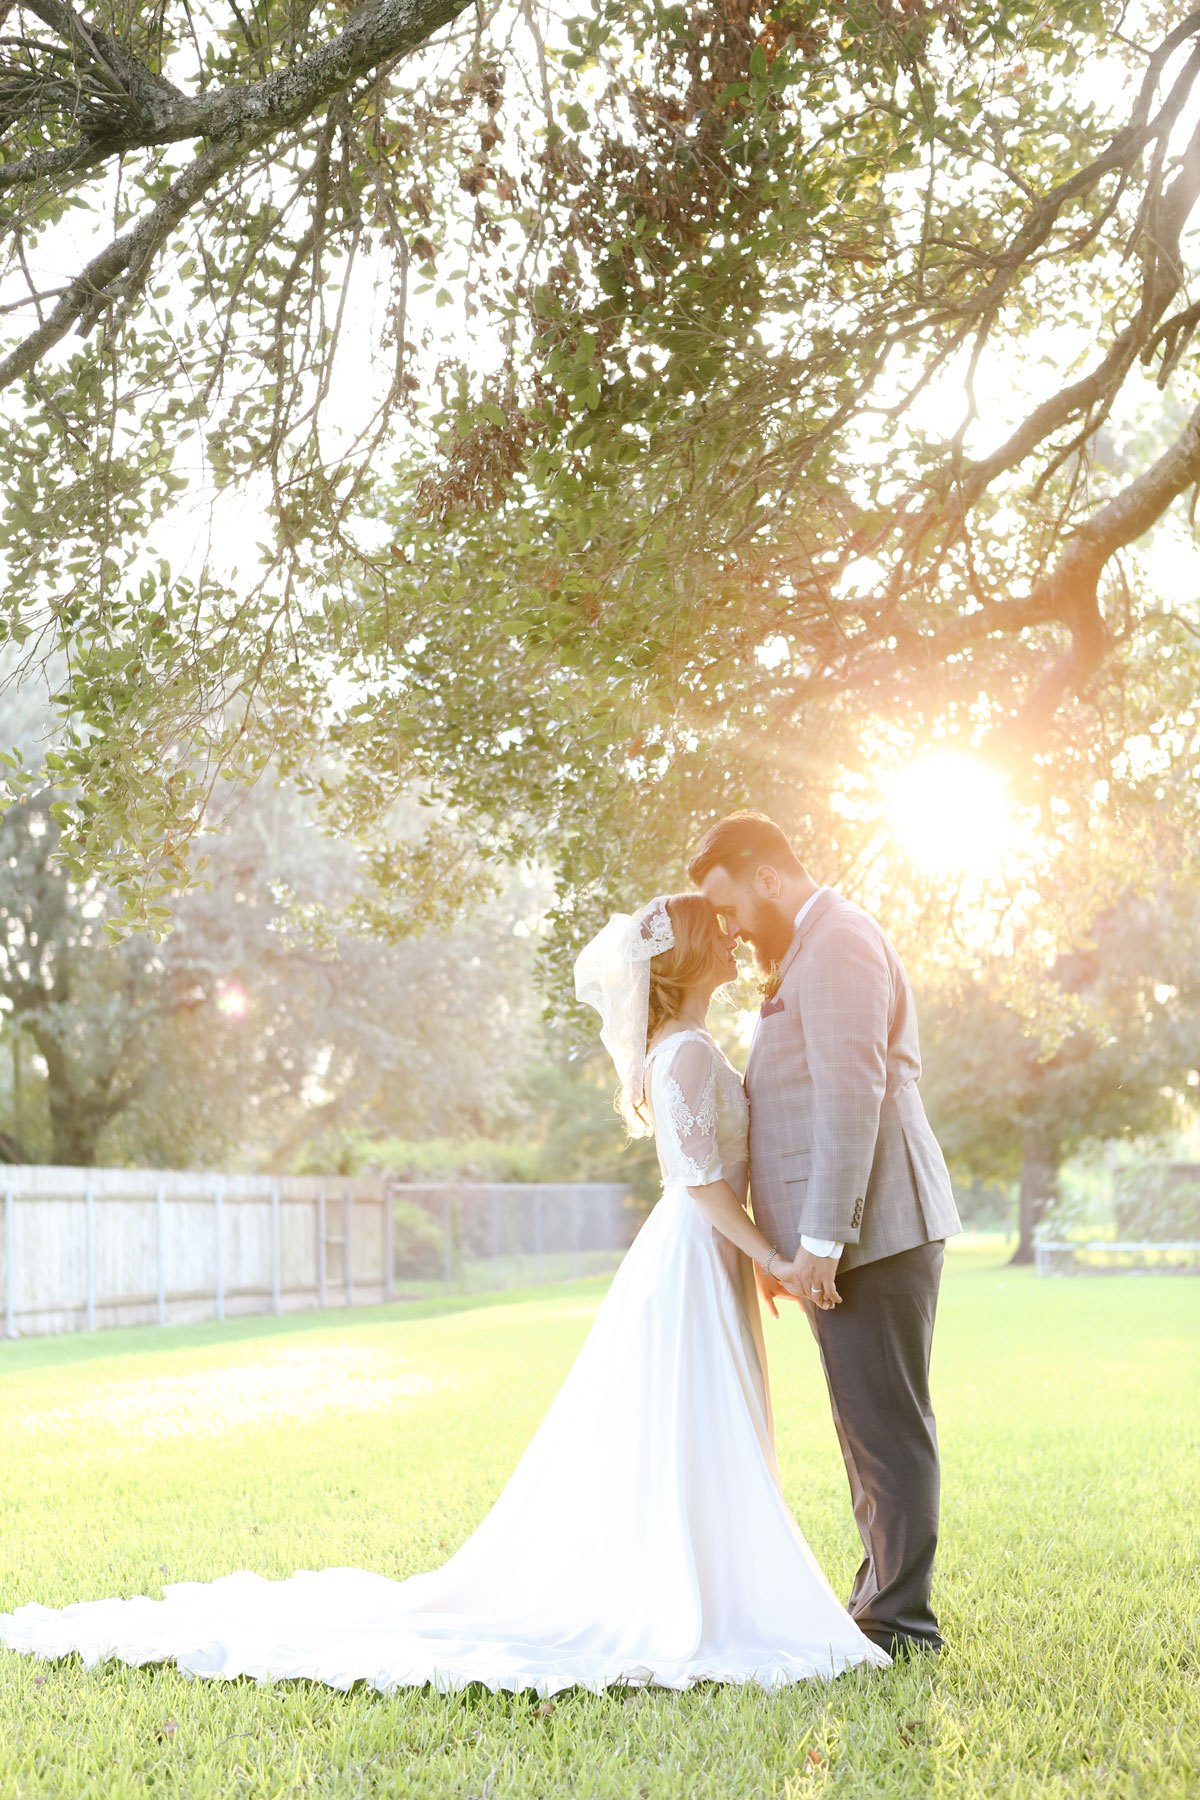
Our whole wedding day was absolutely perfect. Im in love with our photos by Mimi Nguyen. My only wish is that my mom was there to see me walk down the aisle in her beautiful dress. I know she was smiling from above. Soon I’ll be sharing the details of my second dress (yes I had TWO DRESSES!) that I made myself for the reception. And yes it also has pockets :).
Continue reading for some pics of the dress guts and how I made the changes I did.
This picture shows how I detached the zipper from the waist up, opened up the waist seam all the way to where the cut out would end, and re-attached the lace over the waist seam to keep it looking clean and pretty. You can see theres a back dart in the bodice that I opened up, and used the outer most leg of the dart as a guide for where I wanted my cut out to go.
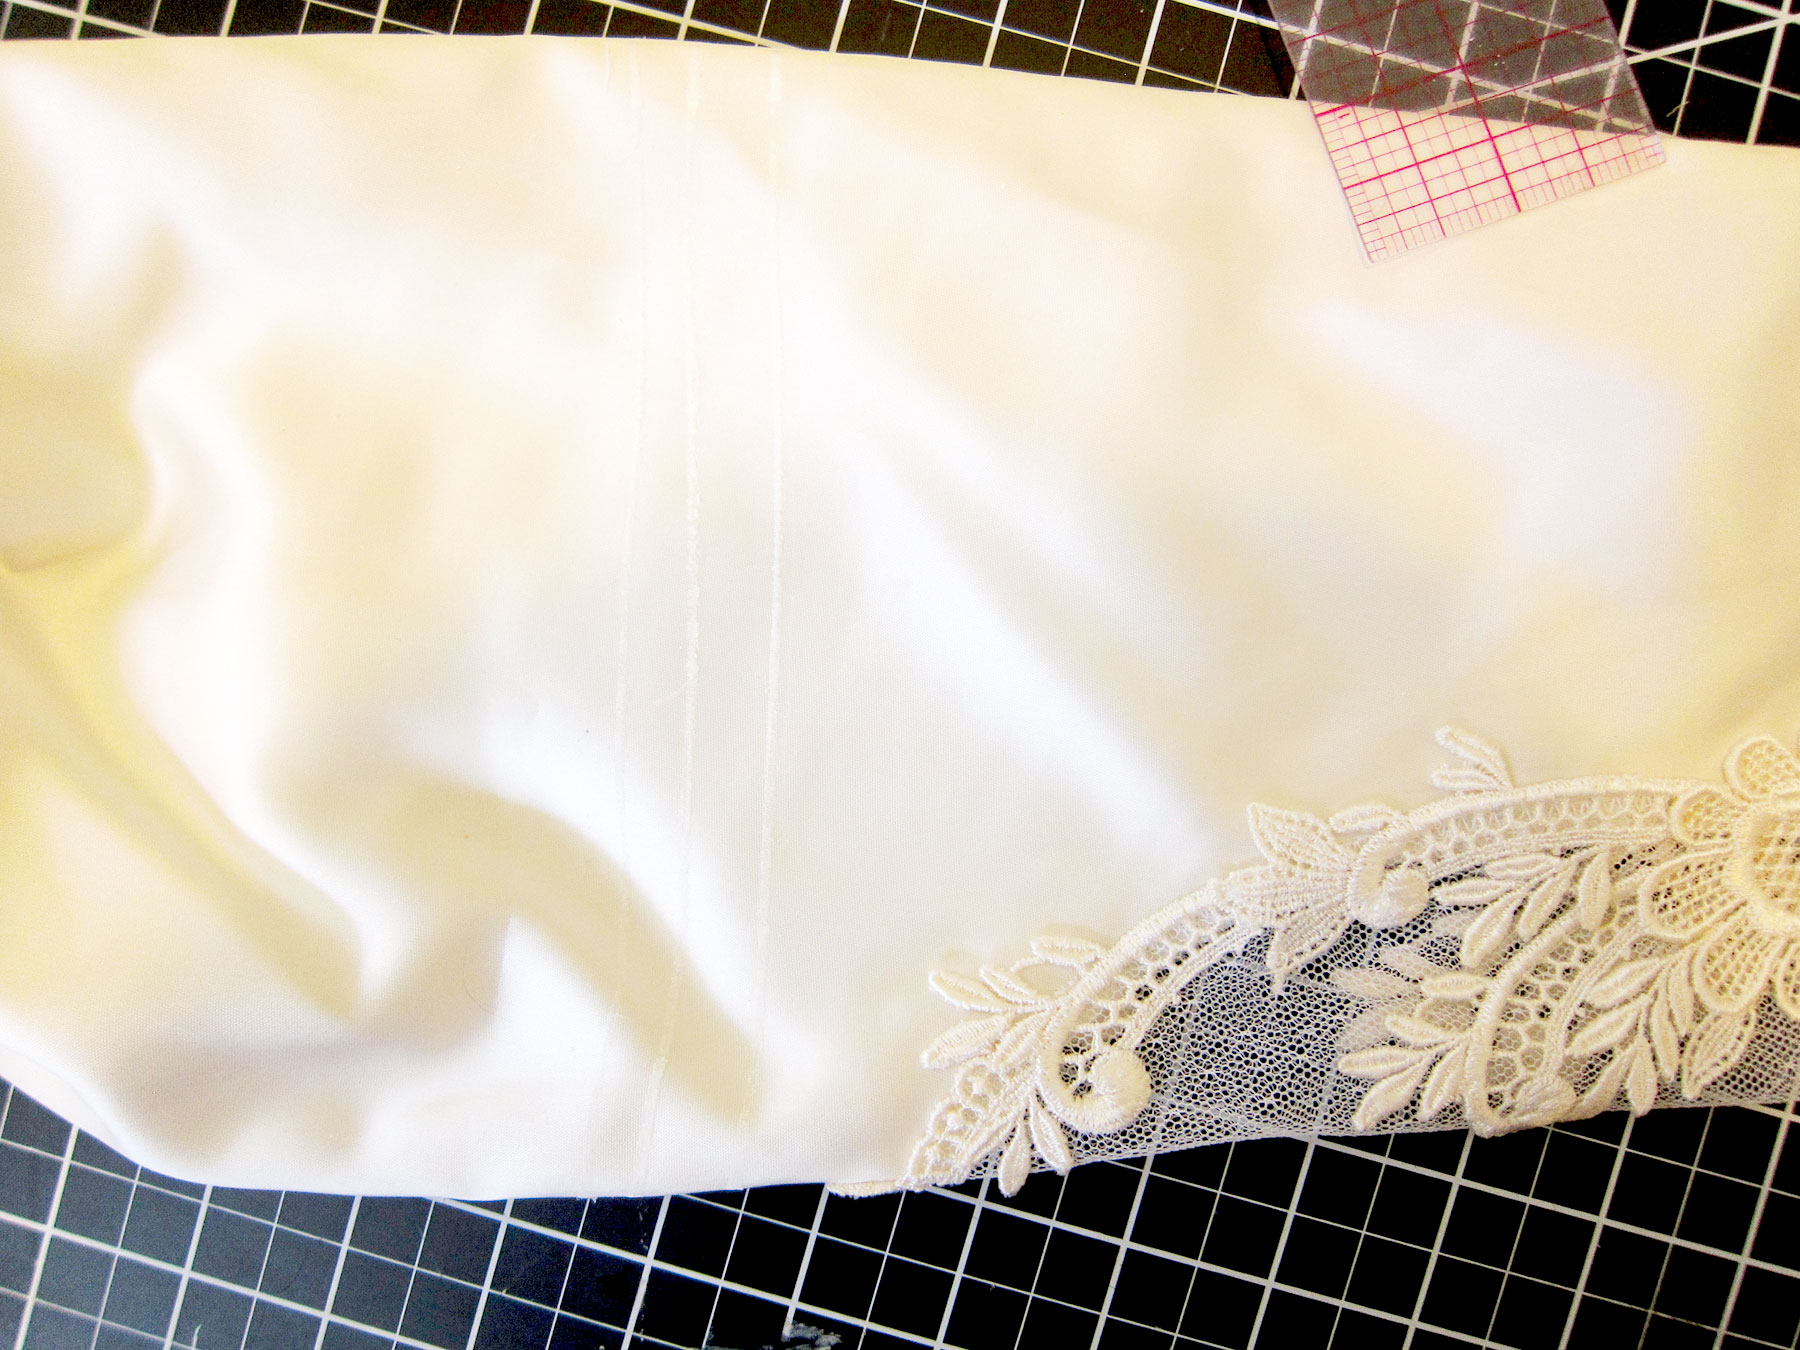
Above you can see the sleeve right before I cut it. I marked my new hem line with chalk (slightly visible) so the sleeve ended just after the lace inlay. Before I hemmed the sleeve I took out some of the volume at the under seam.
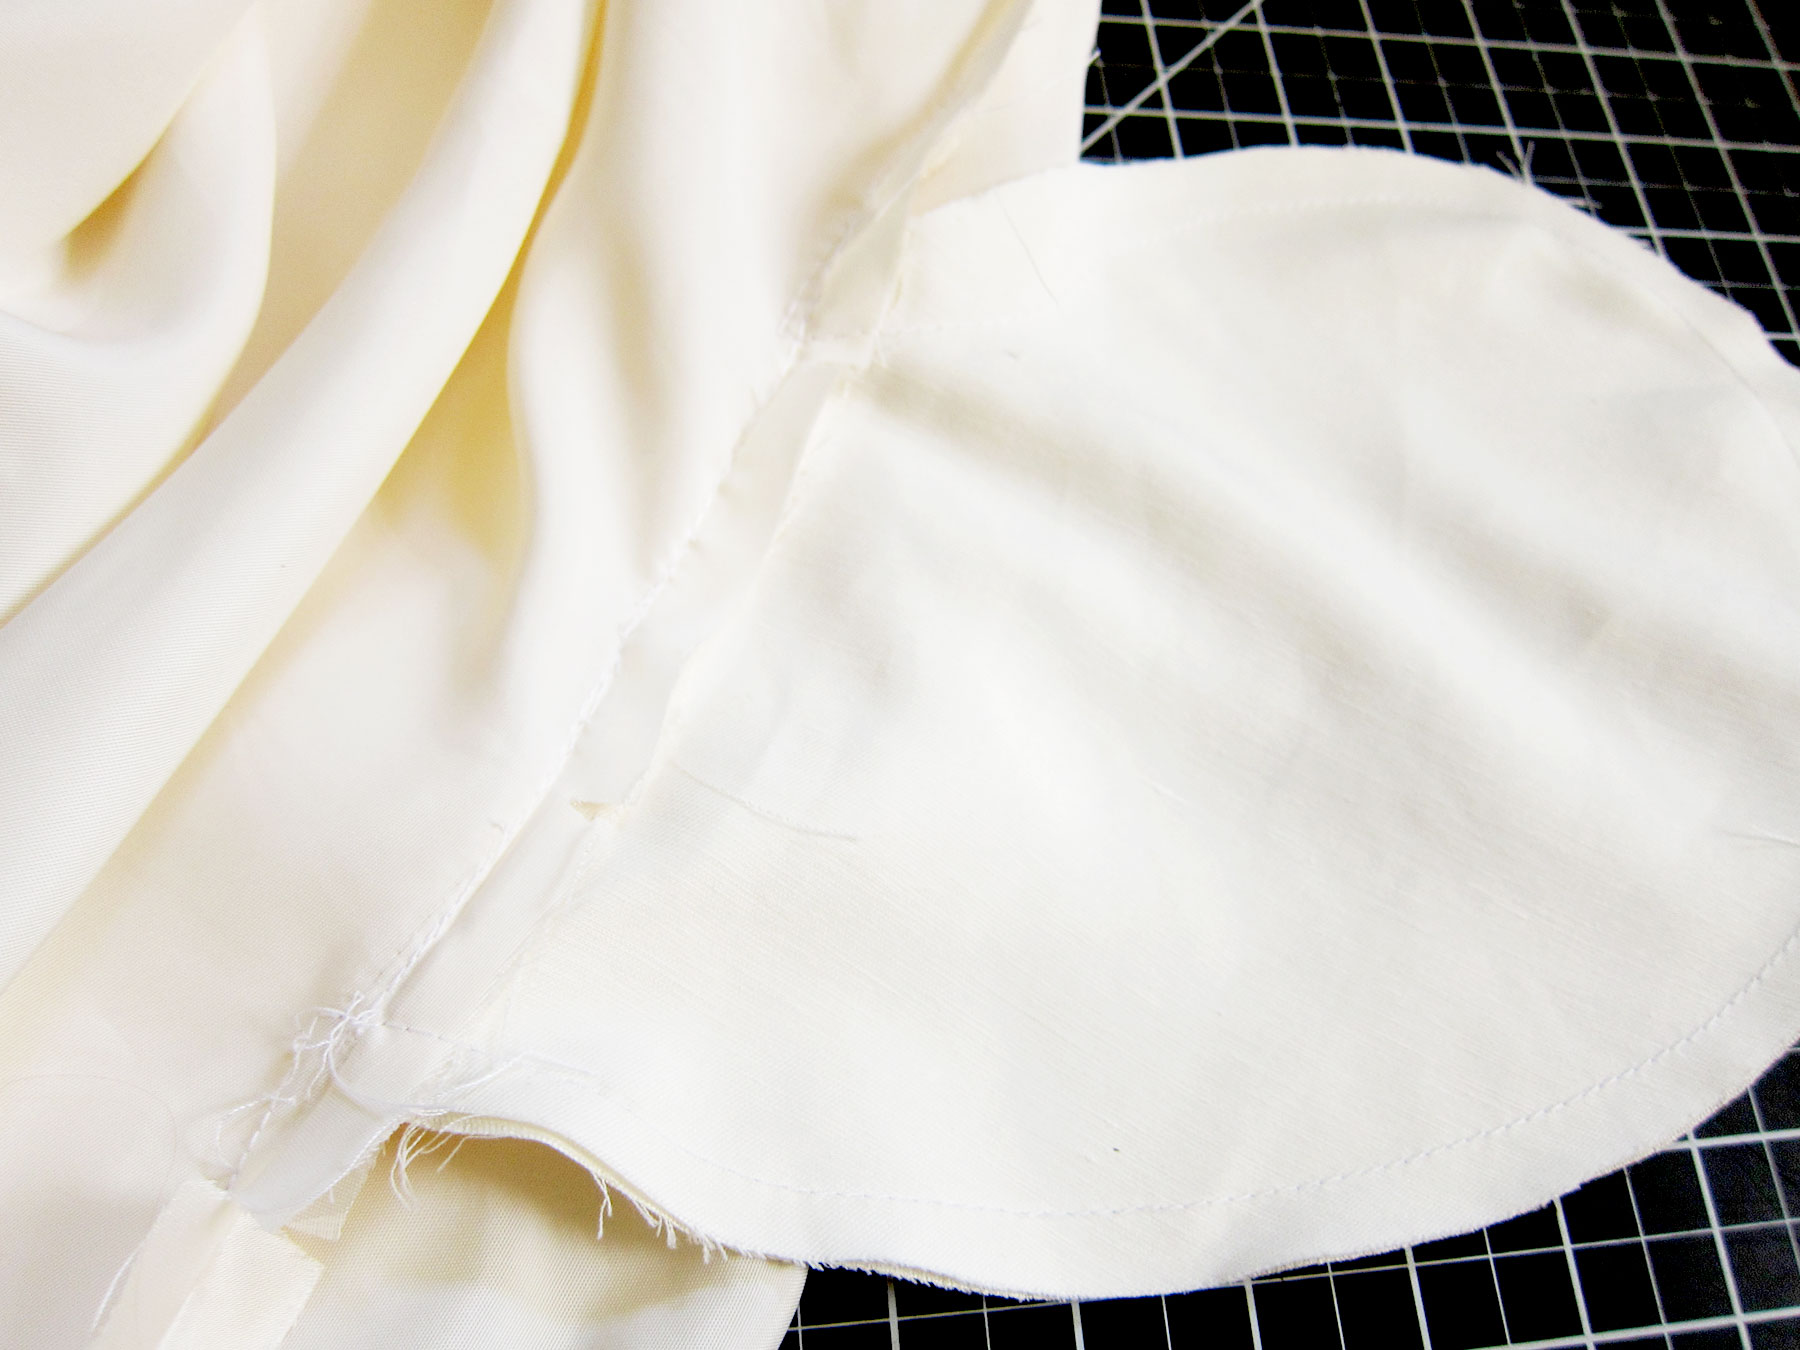
My wonderful pockets! I just drafted up a quick pattern for them by hand, and set them into the side seams after they were slimmed down.
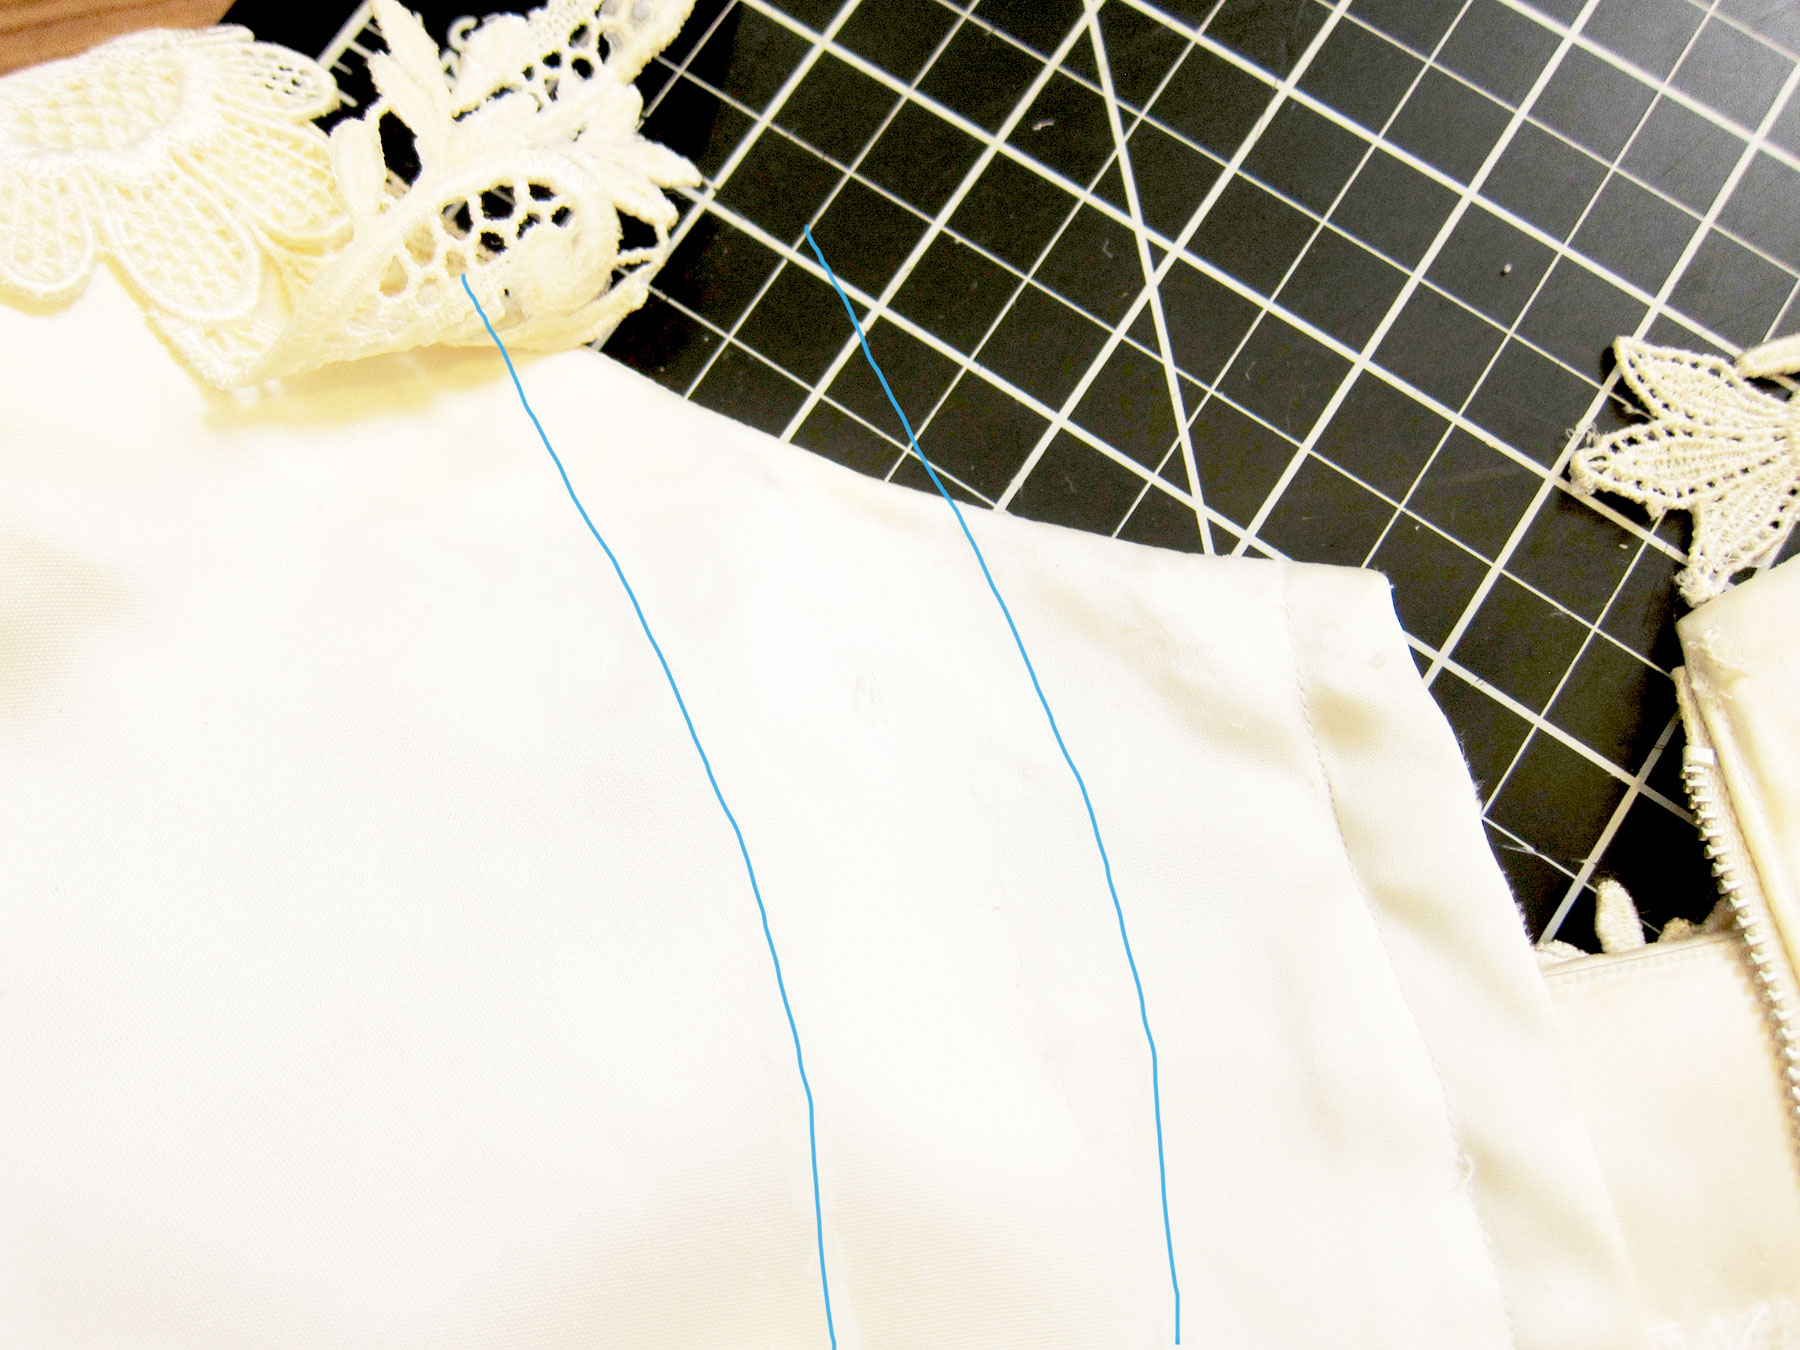
The blue lines above show my new markings for the back cut out. I pulled away the lace at the top so it was ready to re-attach to the new shoulder strap. The mark on the left is the edge line, the mark on the right is the seam allowance. I chose to just fold back the seam allowance and serge the raw edge instead of attaching a separate facing. Partly to save time but also I knew you wouldn’t be able to tell the difference!
If any one has any questions about my vintage wedding dress refashion, or you are working on your own and need guidance.. please contact me, I’d love to help! If you are in the Central Texas area and want me to work with you on updating a family heirloom I’m happy to offer that service as well.
Hope you like the outcome as much as I do!

This dress is breathtakingly gorgeous! I love the back!
Thank you so much!
Amazing job!
Thanks Victoria!
Beautiful, really truly beautiful. What a special project that must have been. I’ve starting planning my own wedding dress and am obsessively gathering inspiration – so thanks! 🙂 Will have to make mine from scratch though. Look forward to seeing your second dress!
Thanks so much Ingrid! Making one from scratch was equally fun! Looking forward to posting about it!
You did an amazing job and really brought the dress up to date, beautiful. I love the back, what an imaginative feature, good ideas always come from necessity. x
Thanks so much Dianne! I knew I wanted my wedding dress to have an open back, and it worked out that adding one to my moms dress helped me to be able to breathe!
I LOVE the changes you made to your mother’s wedding gown. The sleeves are simply beautiful, and I’m in love with the back of the dress too. I’m sorry your mom wasn’t there in person to see you in her gown, but I KNOW she was there in spirit, and I’m sure she loved the changes that you made to her wedding gown, not to mention the fact that you loved HER dress so much, that you wore it on your special day. May God Bless you with a long and happy marriage!
Always,
Candi
This is so sweet and just made my day! Thank you Candi
I am 80 years old and have a doll I’ve had since I was very small and her dress and hat are yellowish brown with age. I s there some way I can get that out. I washed it and alot came out but you can still see some it.
Try soaking it in a warm bath with mild detergent and a little vinegar! You may have to repeat a few times to get it fully clean. Oxiclean is also a great product to try. If it’s white try drying in the sun for extra brightness!