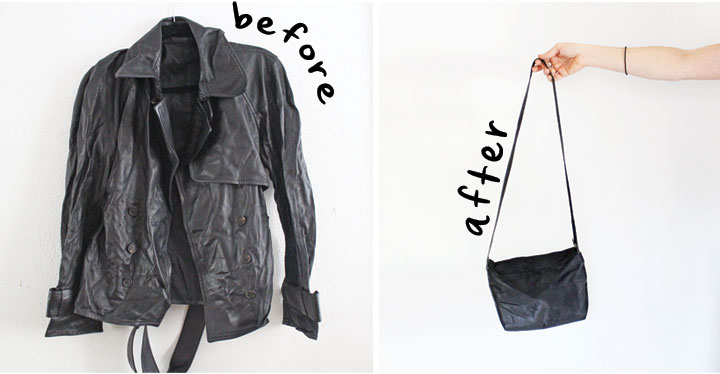
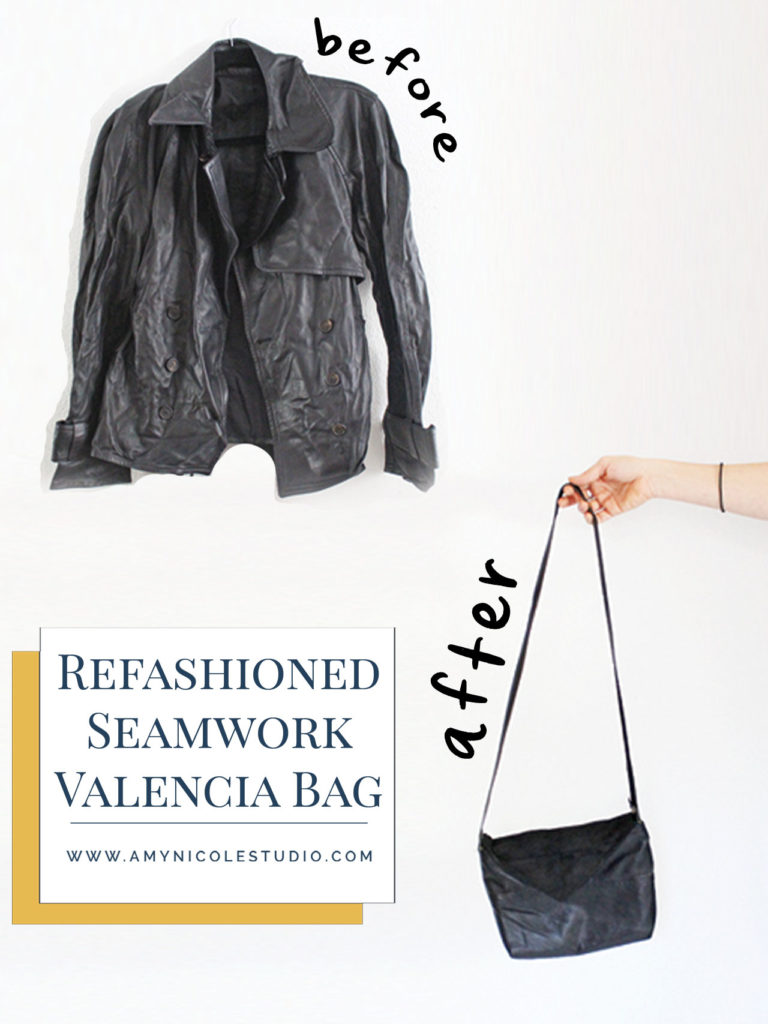
I never tire of a good before and after! When people know you sew, they tend to just throw things they don’t want your way. It’s both a blessing and a curse (no I don’t want your hole-y mud stain splattered jeans thank you very much). One thing I NEVER say no to is good leather… its always good to have around.
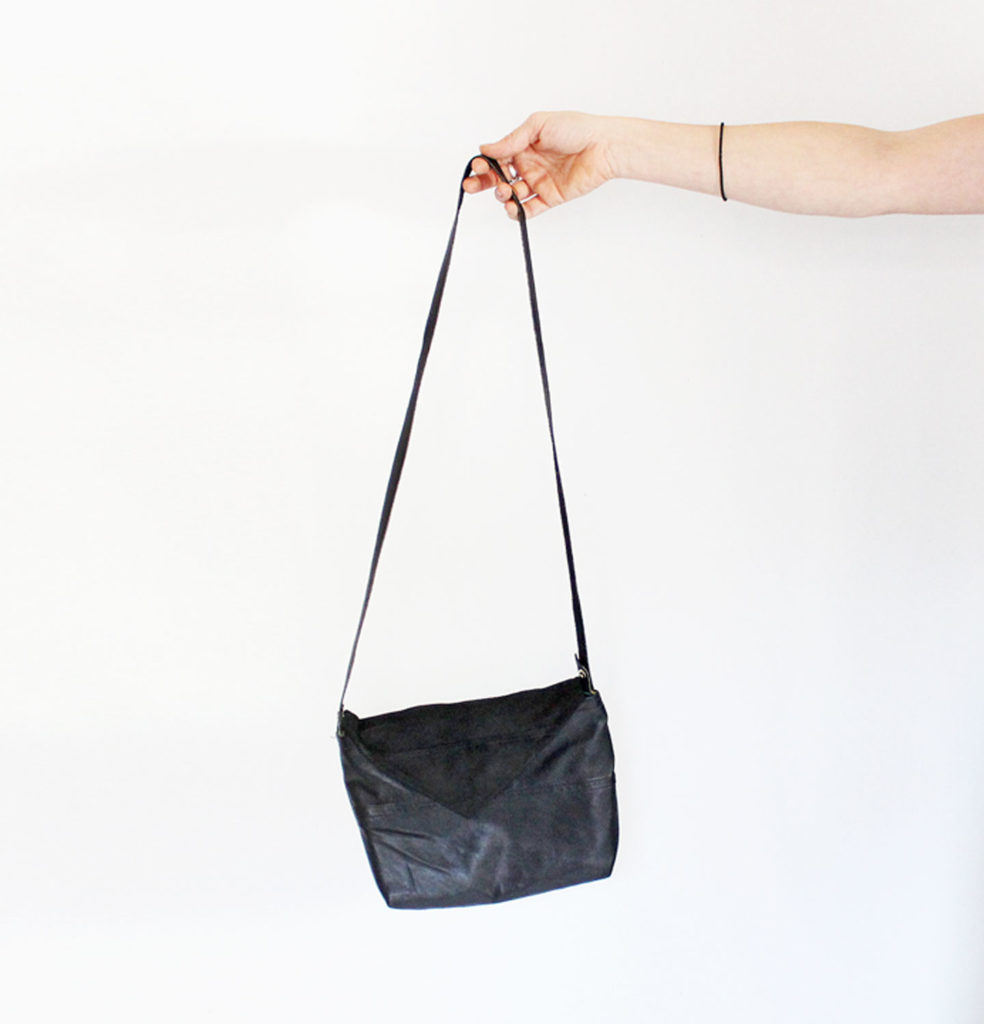
I had been wanting a versatile cross body bag for a while when I came up with this idea. Then my aunt passed on this beautiful but dated black leather jacket she no longer wanted and I knew I had my bag. I liked how the leather is soft and not too shiny. It also had a bunch of great seamlines I knew I’d be able to have fun with.
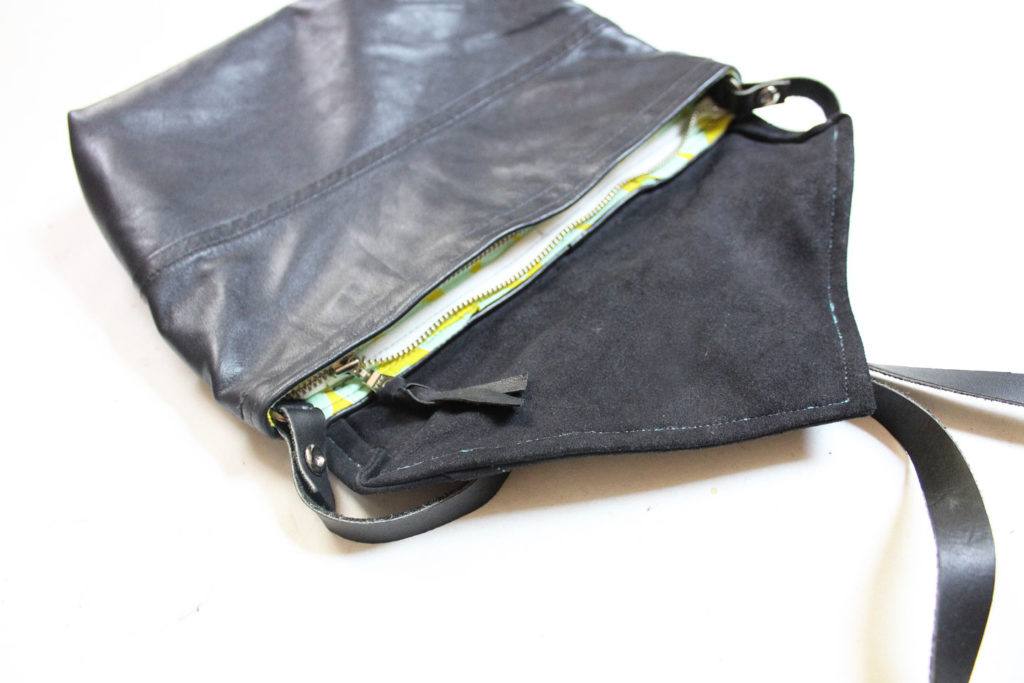
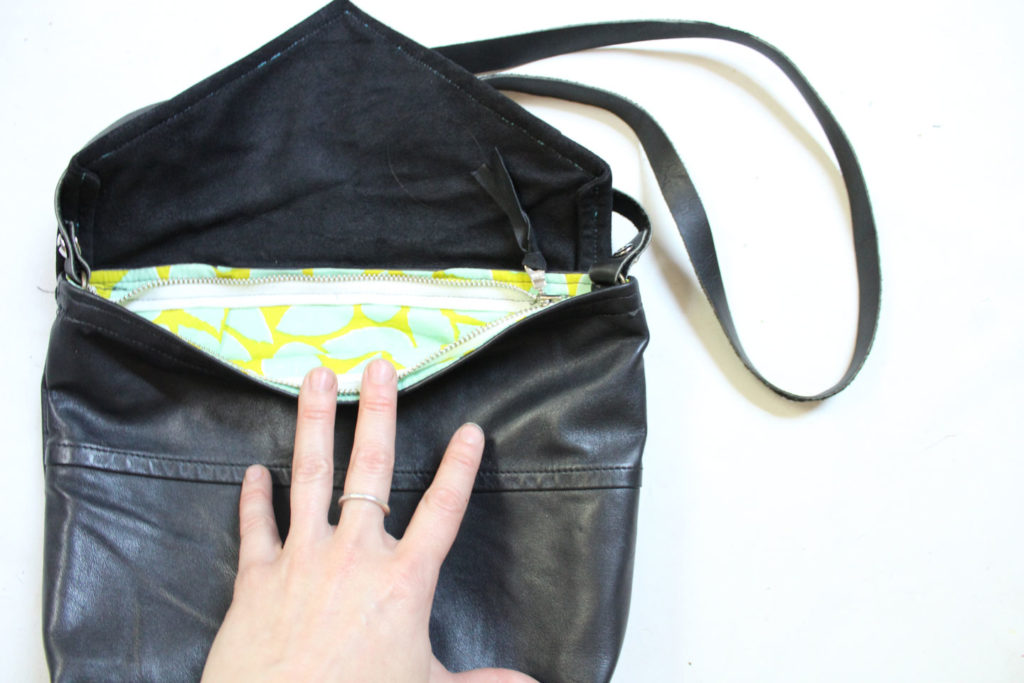
I did have a little trouble sewing with the leather in spite of owning a teflon foot (which I’m starting to think is not real teflon cause it never works – I’d like to try something like this* next). I ended up doing all my topstitching through tissue paper which worked fine except I only had blue on hand and it didn’t all come out (as you can see in the above photo). Not a big deal because its on the inside of the flap but a little annoying.

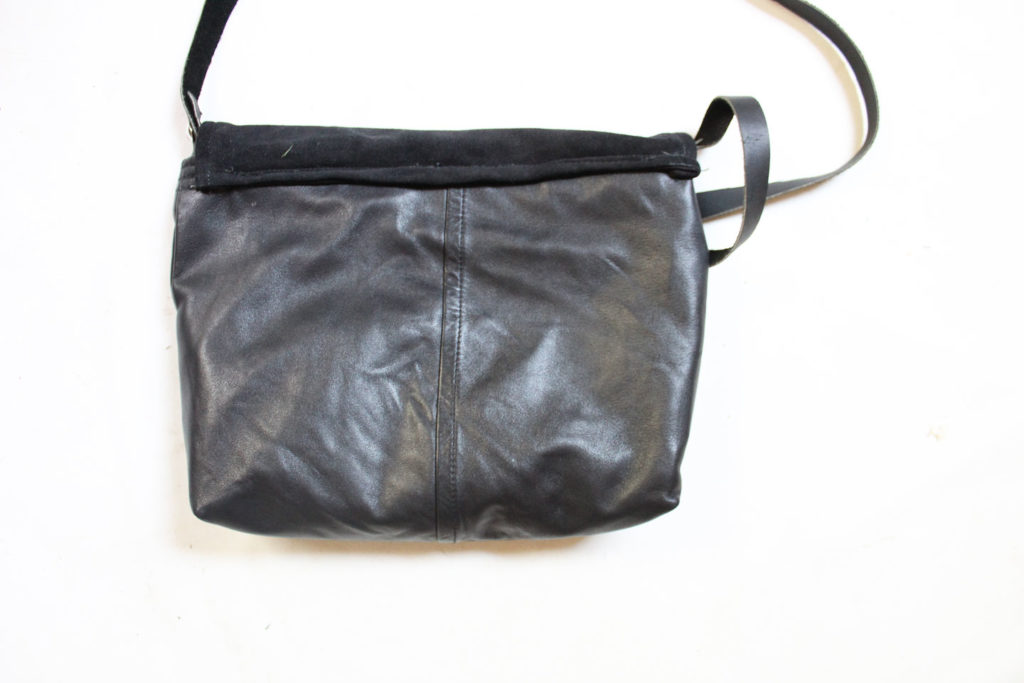
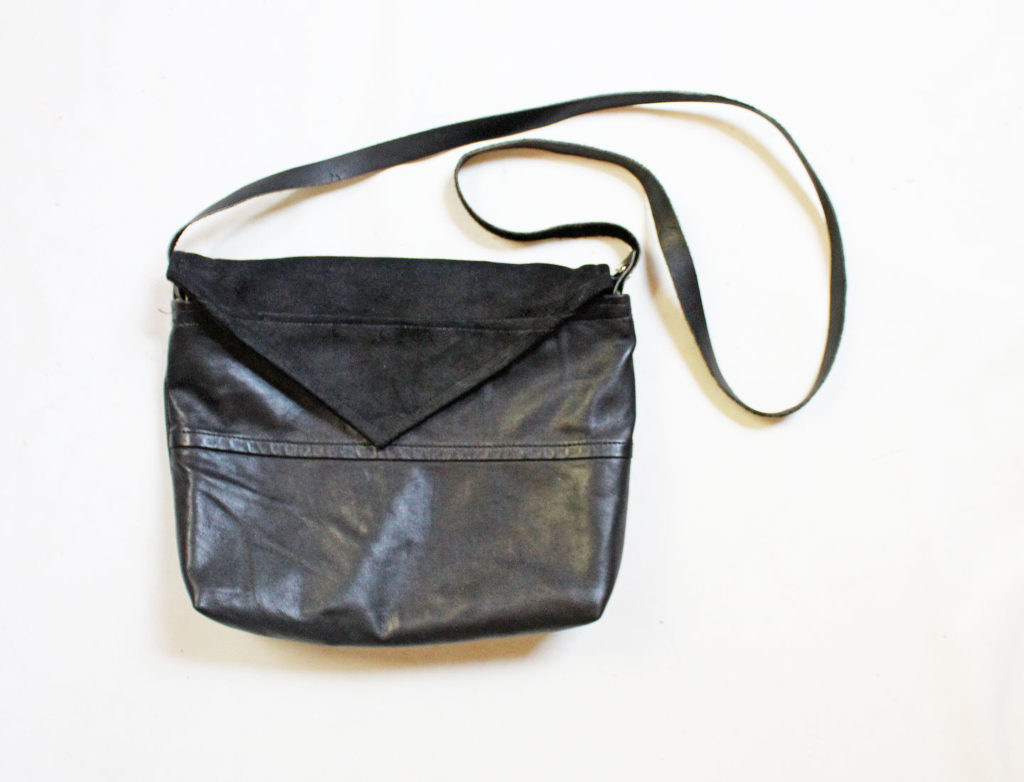
I chose the Valencia bag by Seamwork Magazine for two reasons. I liked that it had a flap and that the shape was slender and minimal. I also already had the pattern and had used it before so I knew I’d be able to make a few simple adjustments to get what I wanted.
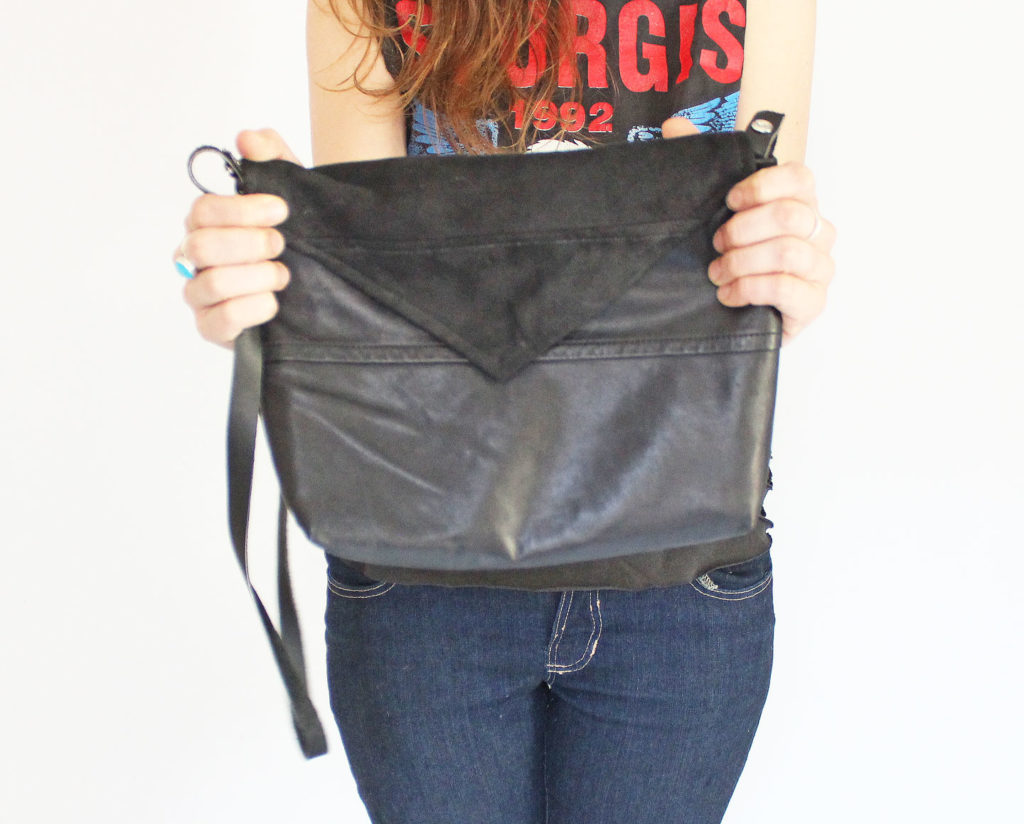
The main changes I wanted to make involved adding more room to the bag. I added about 2″ to the depth of the bag for more vertical space. Then during construction I boxed out the bottom corners about 1.5″ for extra internal volume. Its the perfect size now for market days, concerts, and date nights.
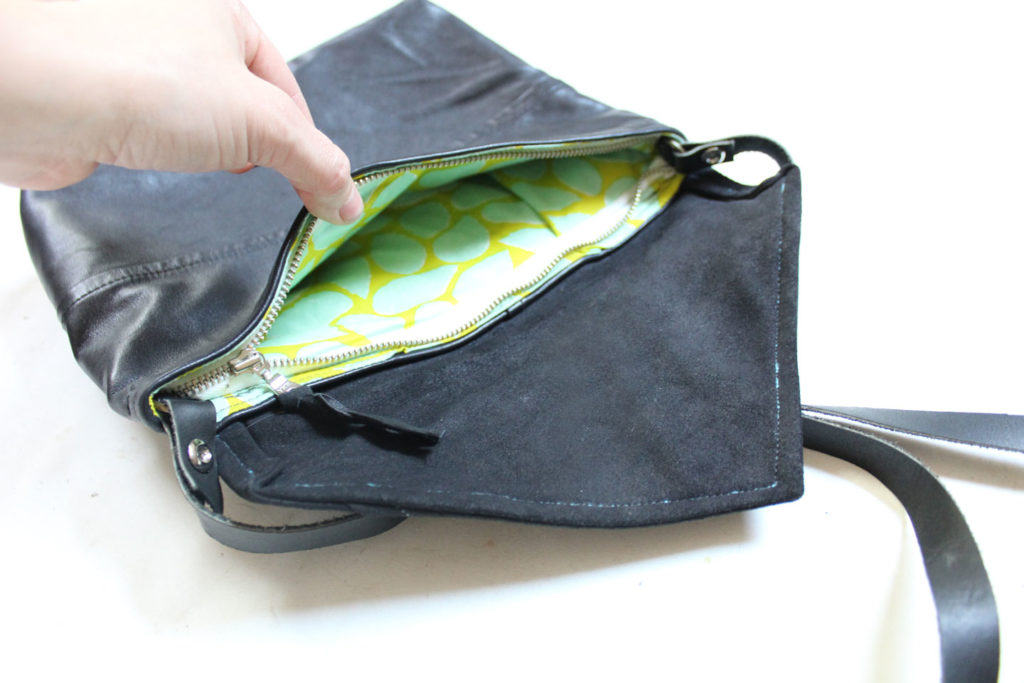
I also added an internal zipper because I didn’t want to have to worry about anything small slipping out. (Plus I’m clumsy and it seemed like a logical safety net) I wanted the zipper to sit down in the purse so instead of sewing it in between the leather and lining like you would a normal zipper pouch I just top stitched the zipper just below the open edge of the bag. The flap just folds over nicely and with the zipper closed I have no worries!
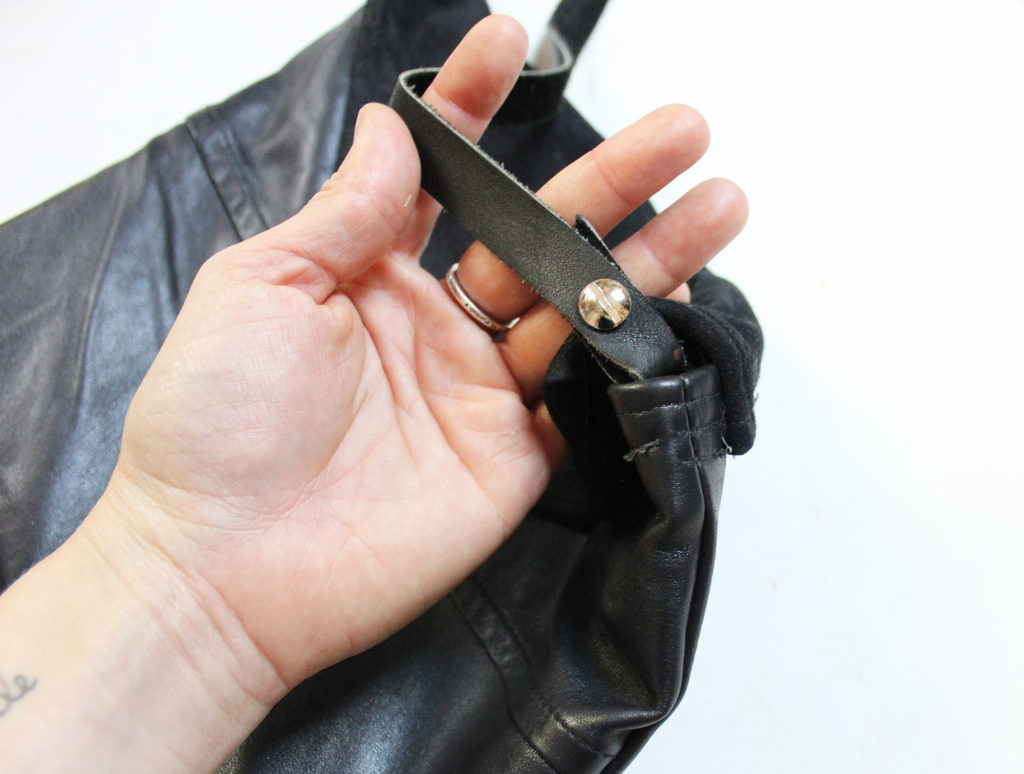
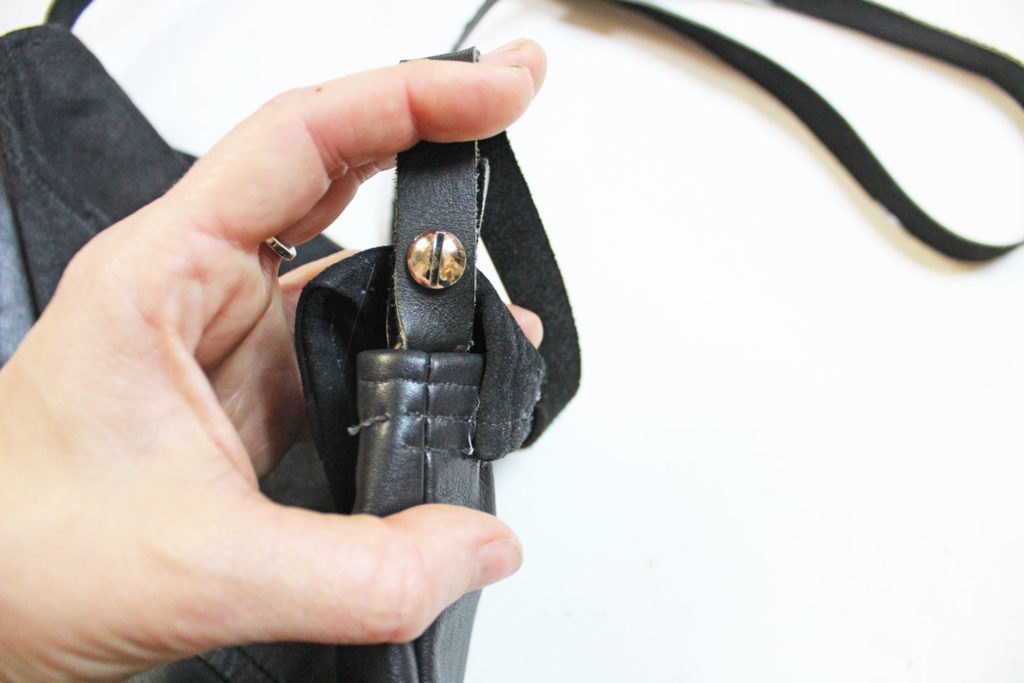
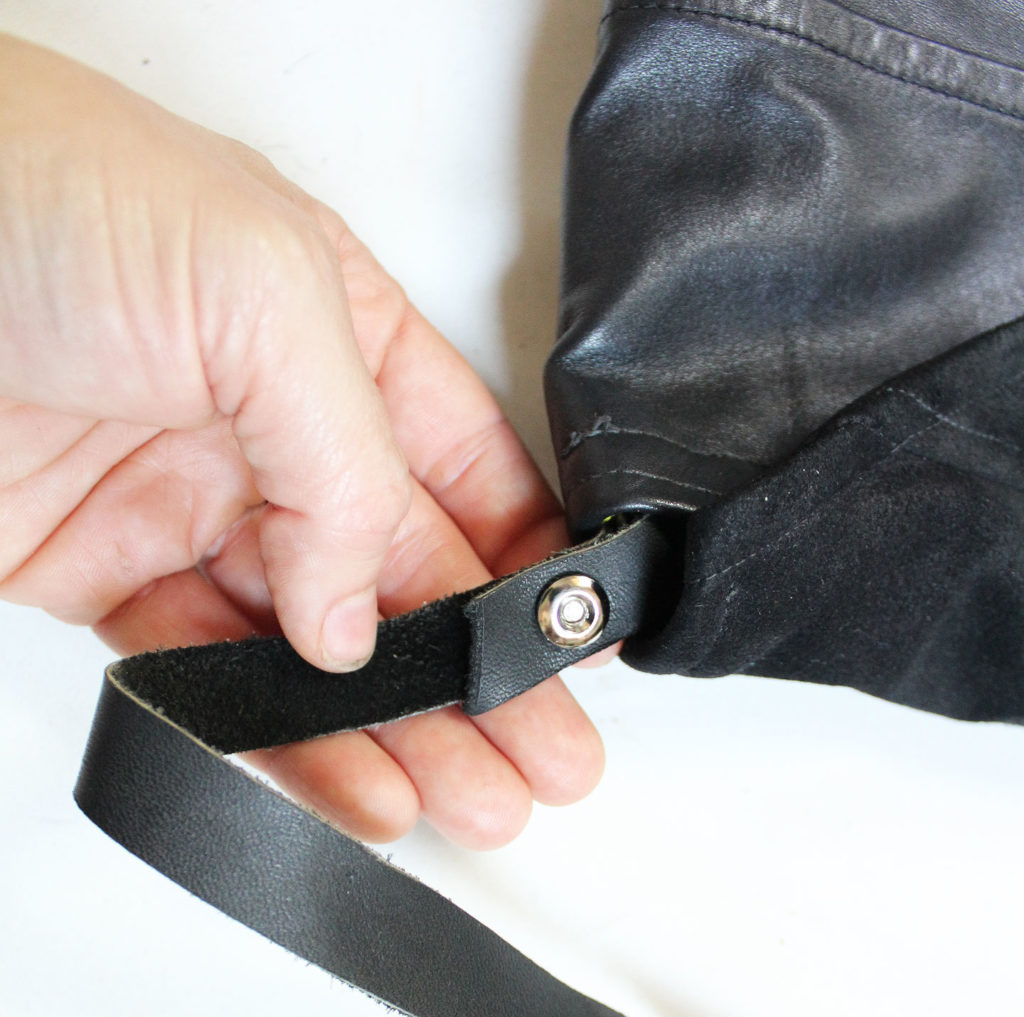
I had a local leather worker friend help me with the strap. I sewed on the D rings (from my stash) and he cut a long, thicker black strip of leather to thread through them. He then attached these really cool screw-brad-things (which I’ve discovered are actually called “Chicago screws” and you can find similar ones here*) that you can easily unscrew and re-use if your strap stretches out and you need to re-adjust! I was just going to attach them with some basic grommets lol. I had no idea these things existed and I’m super happy with the result!
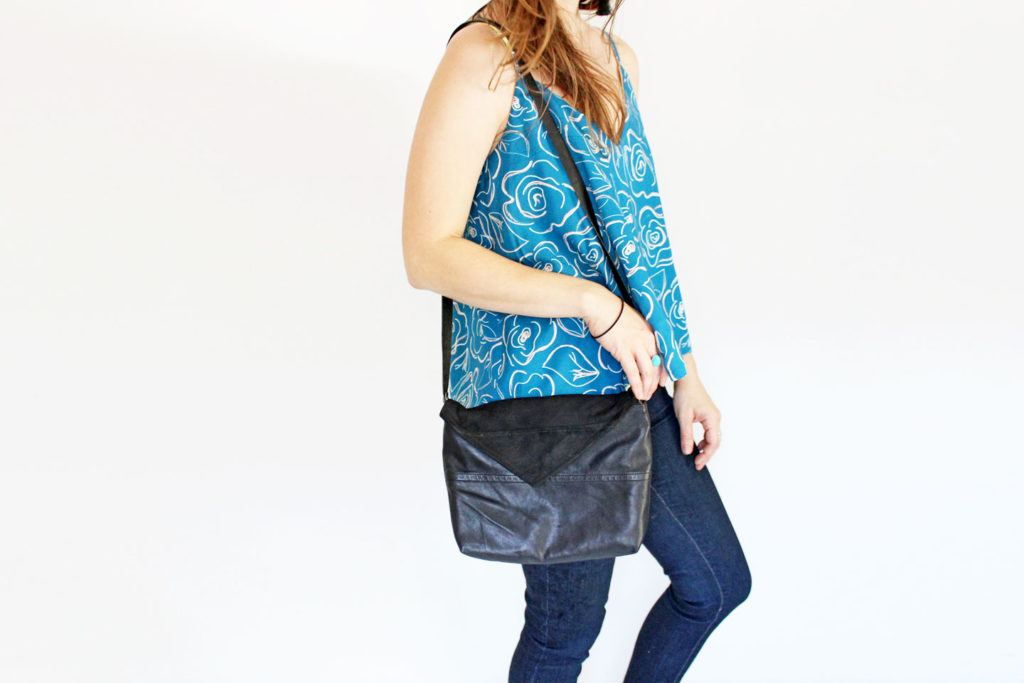
See this bag in action:
SKIP TO THE END?
Pattern: Seamwork Magazine Valencia
Fabric: Refashioned leather jacket and cotton shirting from stash
Notions: D rings, Chicago Screws, metal zip
Difficulty: Intermediate
Adjustments: Lengthened 2″, boxed out bottom corners, added zip
Finishes: Fully lined
Time: 2 hours
Sew it again? Yes! I think I want a lighter colored one for more versatility!
Happy Bag Sewing!

** this post contains affiliate links!
Awesome! 💟 love it!