
Yeay pants! It’s been a while since I made a pair of pants, and I believe this is my first pair of pants with a lower waistband. My goal with this project was to find a basic pant pattern that I could use over and over again to make well fitting “lady trousers” as I like to call them. Slim leg, cropped at the ankle, non denim. I’m super pleased with these pants and this pattern. Bare with me because I have so much to cover with this pattern so it’s going to be a wordy post.
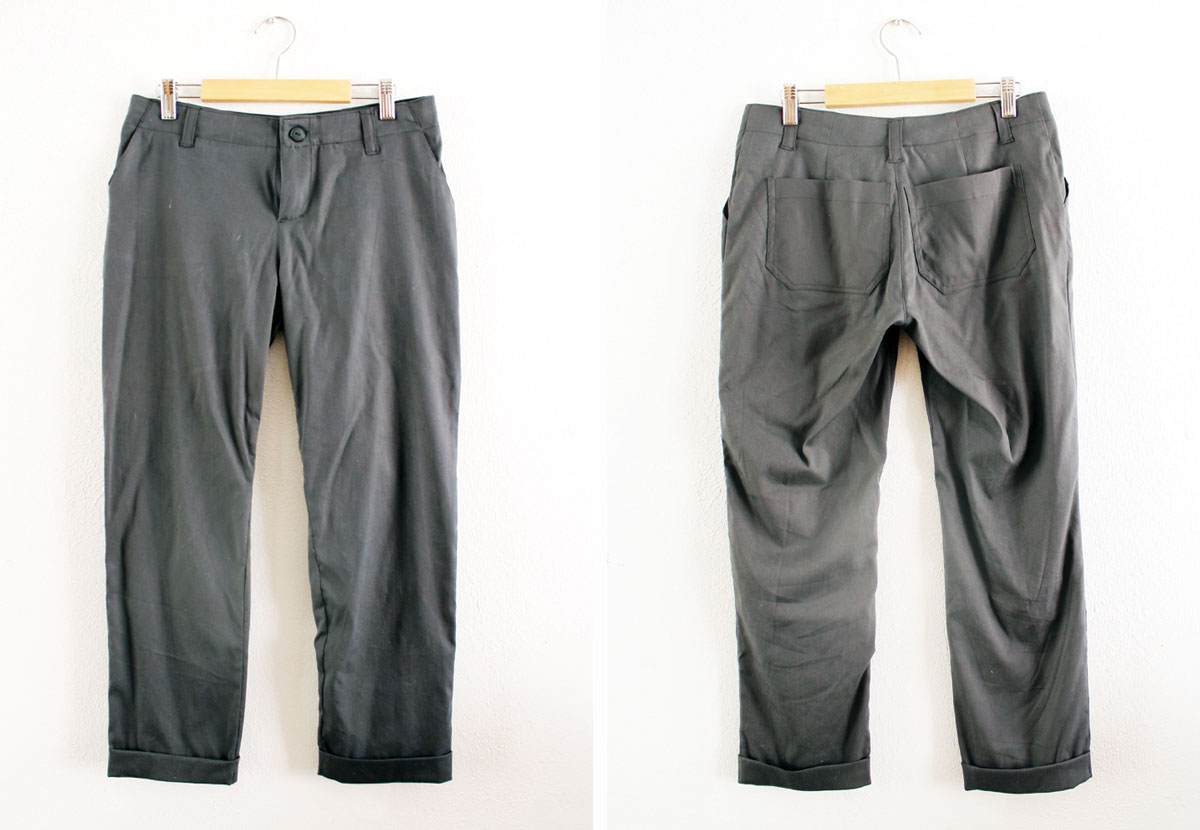
There were a lot of patterns I debated between before I landed on this one. I looked at the Port Trousers by Pauline Alice and the Hampshire Trousers by Cali Faye. All of the patterns seemed like they could be great for what I was trying to achieve – it was SO HARD to decide! In the end, however, I chose the Chi Town Chinos by Alina Design Co. because they were the simplest in detail and offered a lot of variations (I’m planning on making the shorts later this year). I’m sure either of the other two are also great patterns and could get you this same look, the Chi Town Chinos just happen to be what I chose. Obviously I had to purchase both the original chi town chinos pattern and the expansion pack. But Alina offers a bundle which makes it very affordable considering how many variations you are getting.

I’m not one to make a muslin. Usually I just skip that step and pray. But I do believe that with pants, especially if it is your first time making a certain path, you should always make a muslin. What helps this seem less tedious for me is to make a wearable muslin- as in something in a cheaper fabric that you will still be able to wear if all goes well but you won’t be disappointed if all does not. Especially in a pattern like this that has a lot of intricate details (welt pockets, zipper fly) I was able to test both the fit and the construction techniques before I moved onto my nicer fabric.

I chose a gray rayon twill from my stash for this wearable muslin. I love the drape of this fabric, and the dark color keeps them from looking too casual. Guys this fabric is so soft and comfy. I have no idea where I got it, but I chose it for this project at the last minute and I’m really happy I did. At first I was worried the drape of the fabric might be to slinky and make the construction difficult. But everything came together rather nicely… The only place I had a little trouble was keeping my belt loops straight.

Now let’s get to the dirty details of this pattern. This was Alina Design Co’s very first pattern release, and I have to say I am so impressed. Pants like this is such an intricate pattern to take on for a first release and I think Alina did a really great job. Not only is the pattern really good, but the instructions are super clear and concise. I usually glaze over the instructions on a pattern if I read them at all. But since it was my first time making pants (and welt pockets) in a while I decided to carefully read and sew as I went to make sure everything came together seamlessly. The instruction illustrations are very easy to understand, and the instructions themselves really break down each step so there’s no confusion with each step. I highly recommend this pattern for the first time pants sewers. You will be whipping up welt pockets and zip-flys in no time!

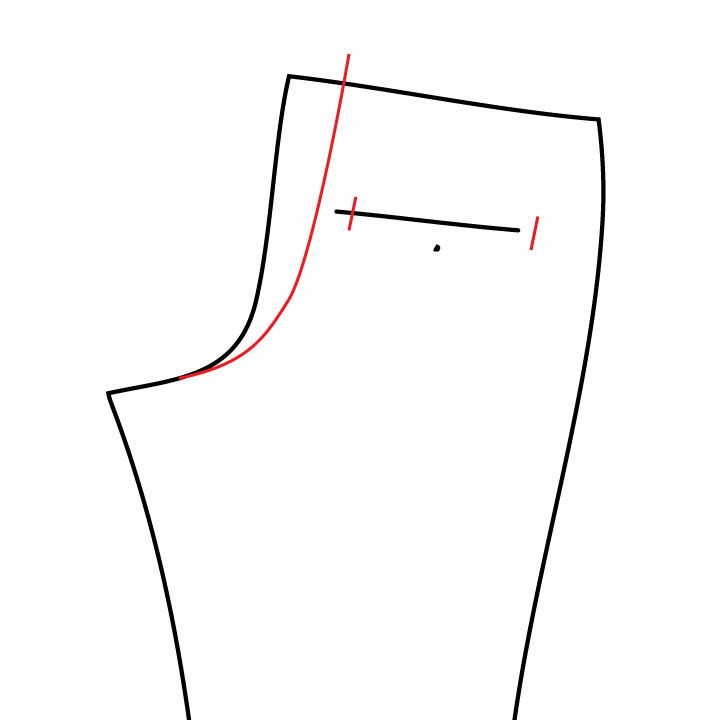
Since every body is different, especially in the below the waist region, I am of course still had to make some pattern adjustments. Luckily it was mostly taking in so I was still able to use my muslin for everyday wear when I was done. The first adjustment I made was to take 2″ out of the center back as I had quite a bit of gaping there at the waistband. #bubblebuttprobs I did this by removing one inch from the center back pant seam at the waistband and blending that down into the back crotch (as marked in red in the diagram below). I also had to remove 1″ from the center back seam on the waistband facing pieces. (NOTE: these pattern pieces are cut two so when I remove 1″ from the pattern piece I at removing 2″ from the pants overall). Altering this center back same brought my pockets really close together (I did patch pockets on my muslin). So I made sure to adjust the pocket placement on the pattern for my next pair. Short red lines below indicate my new pocket placement.
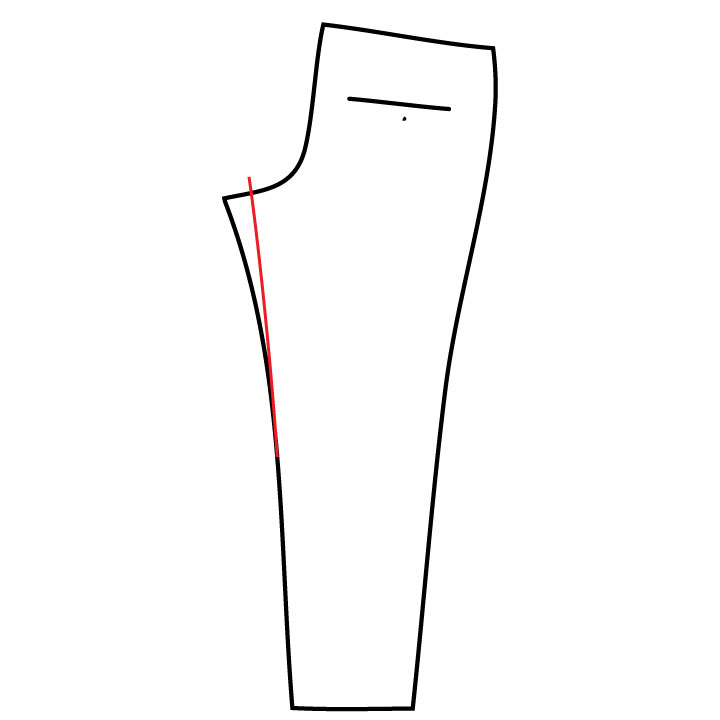
The next big adjustment I did was to take 1 1/2″ out of the back rise. I did this because after my first fitting there was a lot of bagginess on my back leg right underneath the bum and I wanted more of a slim looking fit. To accomplish this I removed 1 1/2″ from the back inseam at the crotch and then blended that down into the knee, creating a new back inseam (as marked in red below).
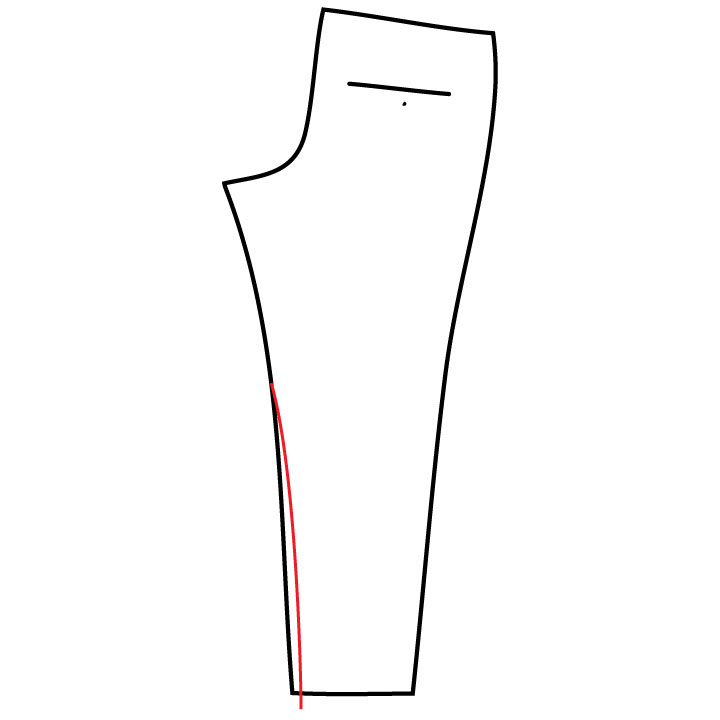
After wearing these a couple times I decided I wanted the legs to be a little bit more tapered. So I went back to my pattern and went in 3/4″ from the bottom of the pants leg opening on the inseam and blended that up into the leg (as marked in red below). Really I should have divided the 3/4″ and took some from both the outer seam and the inseam but I’m a lazy sewist so what can I say. At some point I plan on going back and altering these legs to be more tapered but again… lazy sewist.
As you will notice I also decided to do a cuffed hem on these trousers. I went back-and-forth about this but I decided that I would probably always roll them up anyways so I might as well make the cuff look nice. I’ve had this epiphany as I’ve gotten older that ankle length pants work better on my small frame. Plus I just want to be Audrey Hepburn every day and I feel like this gets me a bit closer. Maybe I’ll do a tutorial on cuffed hems at some point?

One other change I made to this pattern was not a fit adjustment but a construction change. Alina chose not to add fusible interfacing to the waistband facings of this pattern. I’m not sure what the reasoning was behind this but in my professional opinion some part of the waistband always needs to be fused. And since I was using light weight fabrics I knew this was a definite must. So I just made sure to fuse both waistband facing pieces on the wrong sides of the fabric for that extra strength.
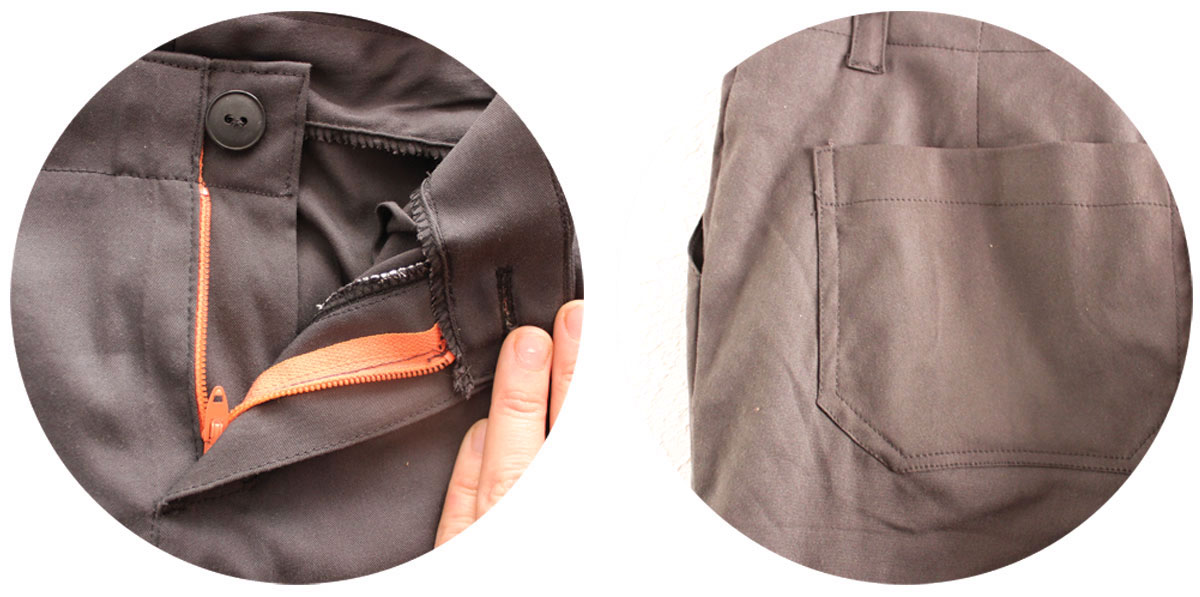
One quick note about notions. I decided to do a button and button hole closure because I was out of pants hook and bars in my stash. 🙂 Also the fun colored zipper is a result of the same stash busting conundrum… no matching zipper. But I kind of like it that way, I feel like it adds a fun little detail that only I get to see.

And that about wraps it up! This will definitely be a pattern I return to as I like to keep a stash of non-denim pants in my wardrobe. Especially now that I have the fit worked out perfectly. Look out for my “real” version of these coming up in a couple weeks, as well as the shorts variation later this summer!
Pattern: Alina Design Co Chi Town Chinos expansion pack
Fabric: Rayon twill from stash
Notions: Button and mismatched zipper from stash
Difficulty: Intermediate/Advanced
Adjustments: Took in center back and back rise, tapered leg
Finishes: Serged raw edges, cuffed hem
Time: 5-6 hours
Sew it again? Definitely, I already have another coming down the hatch!
Happy Sewing!

Great write up, thanks for sharing your fitting tips. I have my eye on this pattern for the same reasons as you – I’d love a go-to spring trouser pattern with great fit. Will have to give these a try.
Thanks Jenny!
I definitely recommend it 🙂
Thank you for a thorough writeup! I was deciding between Ginger jeans and these for my first lady trousers after having a rough time with Seamwork Weston’s fit and this helped a bunch.
You are so welcome! I just made three more of the shorts version so I definitely approve of this pattern!
any one suggested best chino pants?
I really like this pattern for Chinos!