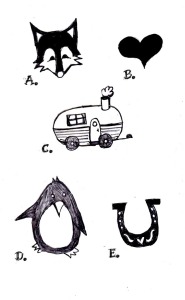
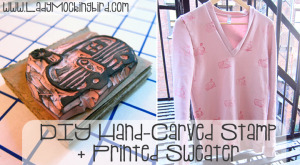
Oh what a mash up of crafty-fashion-goodness I have for y’all today! Remember a while back when I introduced the #PickmyProject series? Well just to remind you (and for those who missed it – shame on you!) I had you guys participate in helping me to pick out a design element for my next project. I was planning to fancy-up a plain American Apparel sweatshirt I acquired from a clothes swap with a self-carved stamp. Guess what?! Nows the time when you FINALLY get to see which design won!
… and the winner was… *drumroll*…
C. THE VINTAGE CAMPER!!!
To tell you the truth, I was rooting for the fox – mostly because that camper looked pretty tricky for a first time stamp carver, and I was a little nervous to attempt it. Especially after the Gentleman so kindly pointed out – “that camper looks hard” – cue crafty jitters. But, thats not how the game works. #PickmyProject was designed to encourage participation from YOU – my lovely readers 🙂 And I have to say you guys did me good. I am super pleased with the end result, and I think you will be too!
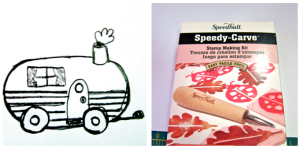
I’m not going to give a super detailed tutorial here, mostly because there are already so many good ones out there. Minna May has a pretty cohesive and clear tutorial here, and I also used this Printing by Hand book as a guide (a truly amazing book I plan to use again and again).
So.. onto the fun with this two-part post!
MATERIALS:
Some other tools that may come in handy:
- a plain t-shirt or sweater to stamp on
- masking tape
- fabric paint
- sponge brush
- band-aids … those dang carving tools are sharp!
- tailors chalk
- iron
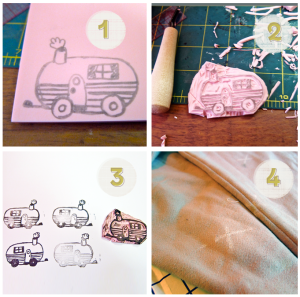
Generally I followed the same steps from Minna’s tutorial, but just so you get an idea…
- This is my doodle once I rubbed it onto my carving block.
- My initial carving of the stamp.
- After the initial carving I did several test-runs to see where it needed some more shaving (I left all my lines pretty thick on the first go-round to leave myself some breathing room). Most of the corrections I made were to make the negative space deeper, as I was picking up a lot of ink in spots there still. The bottom right picture is my original doodle, starting from there going counter-clockwise are my revisions.
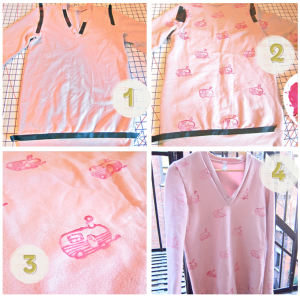
- I marked my sweater for stamp placement using tailors chalk. I used a half-drop pattern with a good amount of negative space since the stamp itself is fairly large (about 3×2 in.)
- I used masking tap to block off the ribbing and seams of each section as I stamped to give the appearance of the fabric being pre-printed before it was sewn.
- To apply the paint to the stamp I used a foam brush, lightly dabbed it in the paint, then applied it to the stamp in a sweeping motion (as opposed to dabbing). I found this gave me the cleanest, most even coverage. If you are only using your stamp for paper, you could just use regular stamp ink – you could even try this on fabric, I just figured the fabric paint would hold better. Has anyone done it the other way?
- The more I stamped, the more I got the hang of it (sort of wish I did more practices!). Let the paint completely dry, then heat set on the OPPOSITE SIDE with an iron.
- Finished product! After washing I got a little bit of fading, but thats also because I heat set my paint right on the print (hence the capital letters of warning above)
Now.. for the second installment of this post.. you get to see this baby in action!
*WARNING*
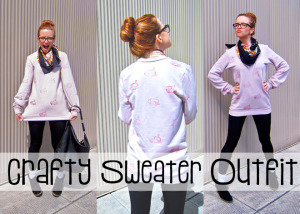
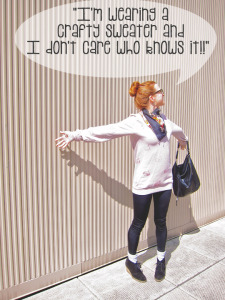
Wearing a Crafty Sweater Outfit can cause serious outbreaks of happiness + Silliness … proceed into public with caution!
**OTHER SIDE EFFECTS INCLUDE:
Breaking into the crafty dance

Add some layering to this outfit to create what I like to call…

 |
| Sweatshirt – American Apparel from clothes swap, Blazer – Thrifted, Scarf – Vintage, Leggings – American Apparel, Socks – Gap, Shoes – JCrew, Glasses – Warby Parker |
Linking up here:






You look so cute! I can tell that you have a lot of fun with your outfits.<br /><br /><br />-Karen<br />www.yourstylistkaren.com
Thanks Karen!