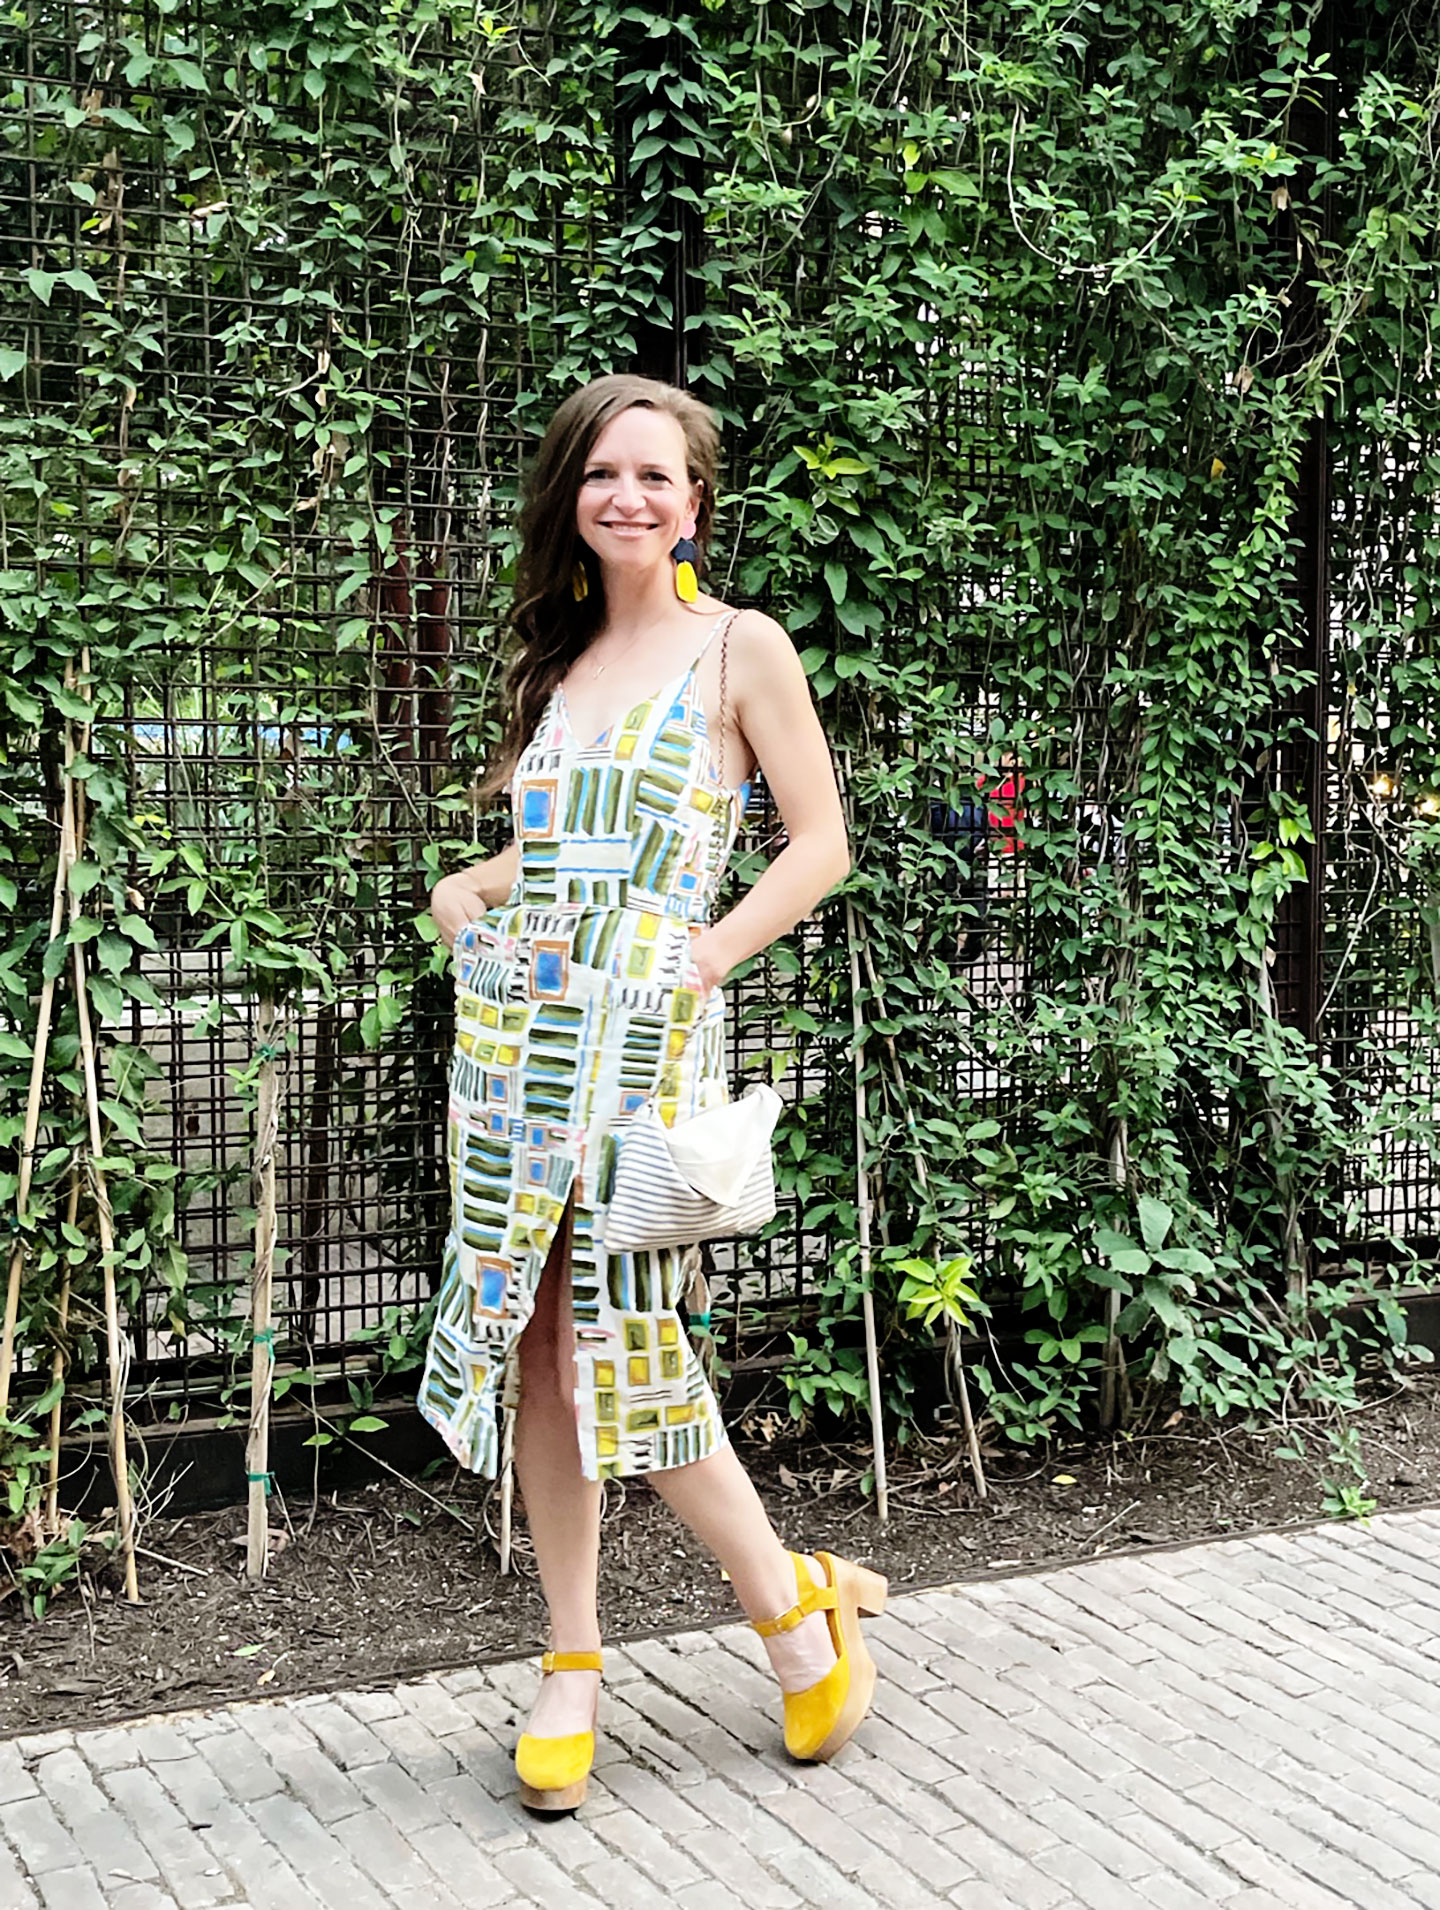
Welcome to the first Audie Playdress pattern hack! This hack will walk you through the process of using View C of my Audie Playdress pattern to make a chic and simple pencil dress with a split hem.
Supplies needed:
- My Audie Playdress pattern (or Audie Playsuit pattern with the Playdress Expansion Pack)
- All pattern pieces for View C except
- Pattern or tracing paper
- Pencil
- Ruler
- Scotch Tape
- Fabric (use the reqirements for View A of the dress)
- Zipper
Drafting the hack:
The only pieces we will actually be changing for this hack are the skirt pieces. Pull those out along with a piece of pattern paper big enough to double the width of the front skirt plus add some length. And a second piece to add length to the back skirt.
Start with the front:
First, make a copy of the front skirt by folding your pattern paper in half and placing the center front of the original pattern piece on the fold of your pattern paper and tracing. Go ahead and add the length at this point as well. I judged how much to add by holding the pattern piece up to my body and estimating. If you aren’t sure, overestimate rather than underestimate. (You can always hem off any extra.) Make sure to add 1.5″ for your hem seam allowance.
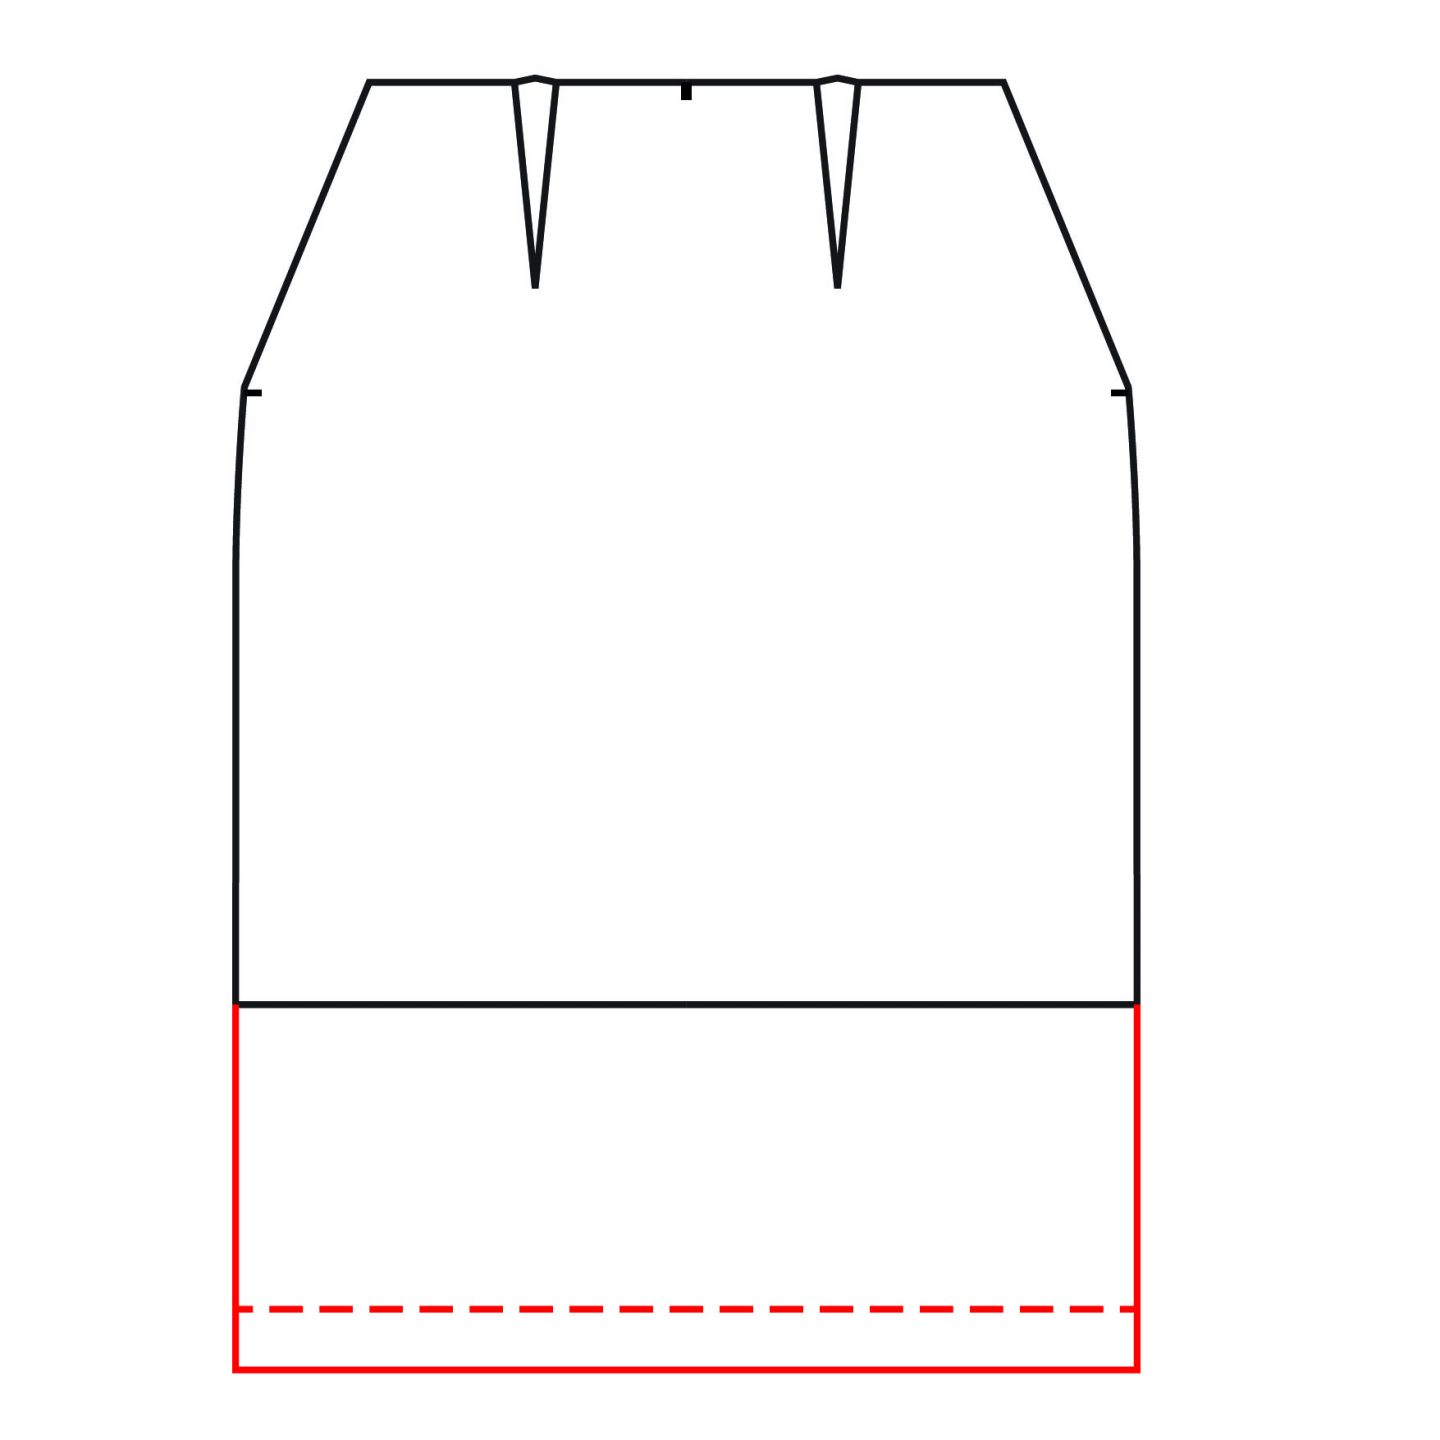
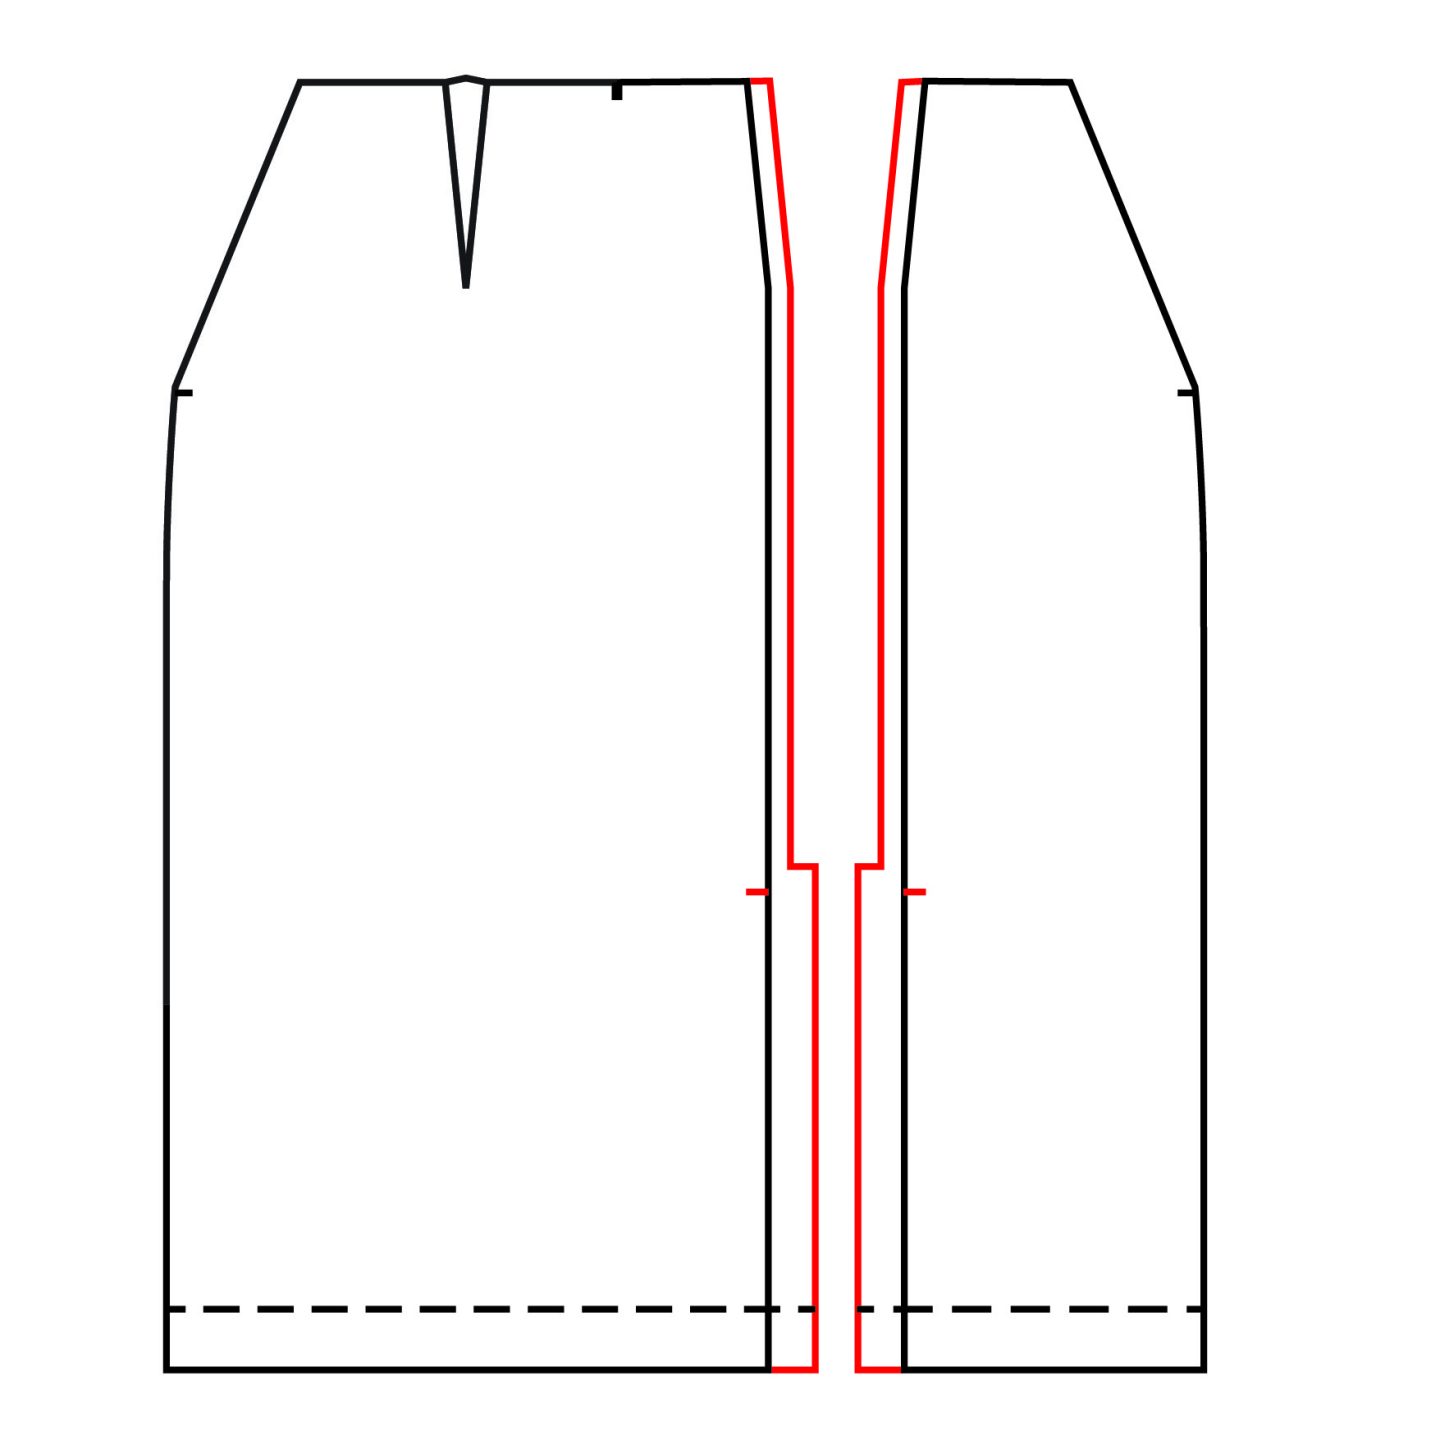
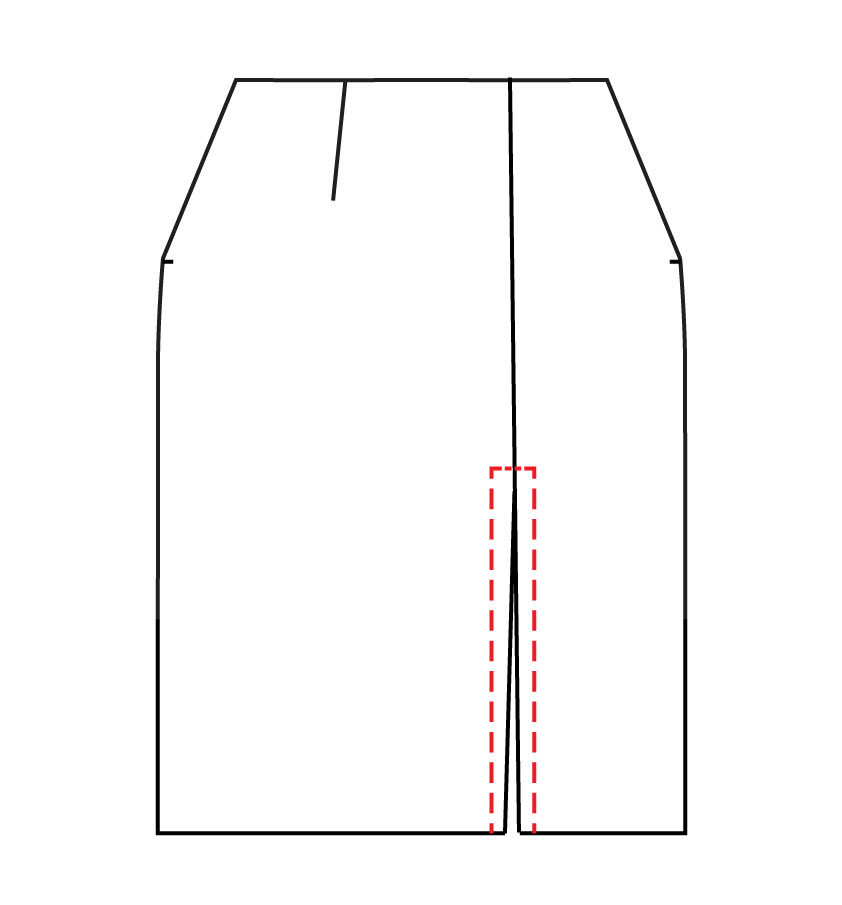
Once you have traced and cut out your new front pattern piece, draw a straight line down the middle of one of the darts (whichever side you want the slit to be on) all the way to the hem. Hold the pattern piece up to your body again and determine how high you would like the slit to go. Indicate this point with a short notch perpendicular to the previous line.

Next, cut the pattern piece in half along the line you just made. Now, we need to add seam allowance. Add 1/2″ seam allowance from the waist down to the notch for the slit. From the slit notch down, add 1″ seam allowance. As seen below the 1″ seam allowance extends slightly above the notch.
Now for the back
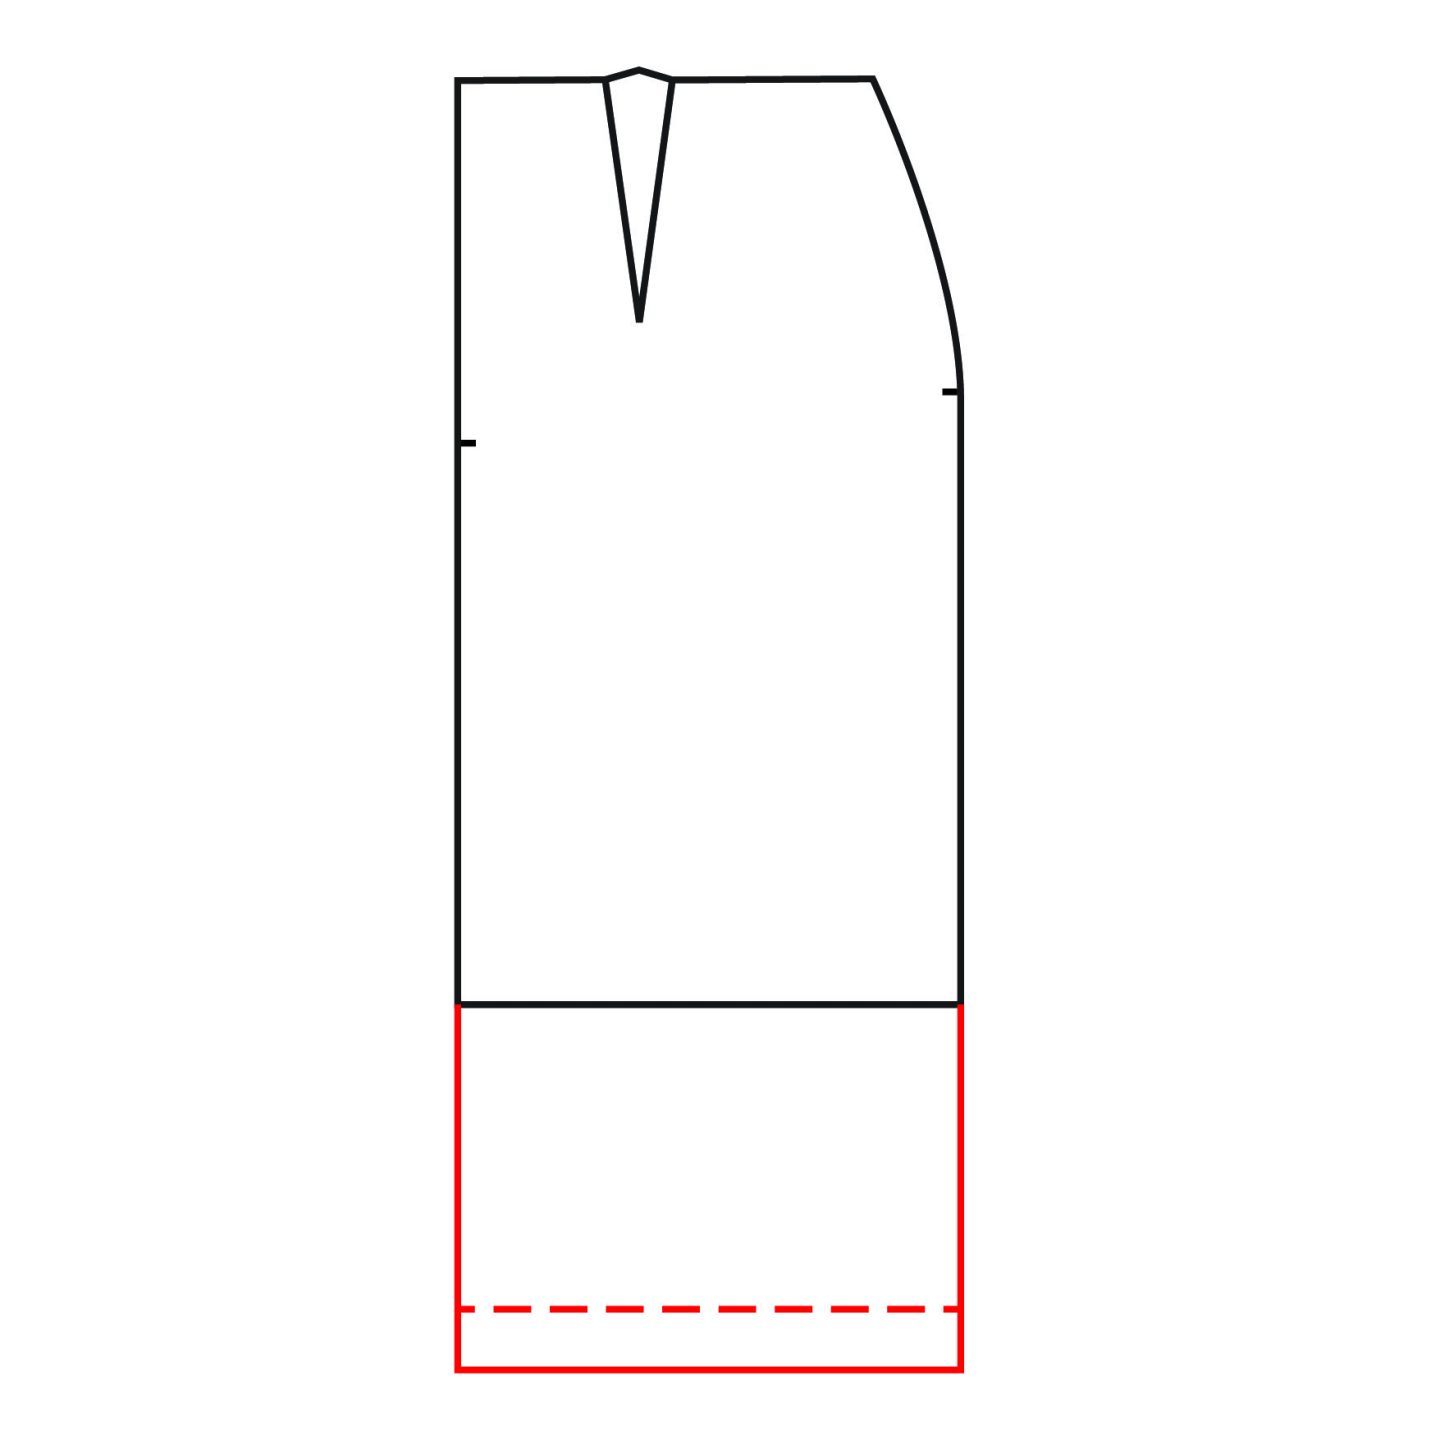
The back piece is easy, we are just going to extend the hem of the back piece the same amount you extended the front. You can trace a whole new piece or simply add paper on to your original pattern piece and remove it later. Again, dont forget your 1.5″ seam allowance.
When cutting,
Cut 2 of the back skirt as the pattern calls for. For the front, each piece will be cut 1. Make sure to have the pattern peice facing up on the right side of your fabric.
How to sew it:
- For the bodice, follow the instructions for View A. Nothing changes with the construction of the bodice or how it connects to the skirt.
- Sew the darts on the back skirt pieces and the wider front skirt piece.
- Serge or finish the seam we created on both front skirt pieces.
- Connect the two front skirt pieces by sewing them right sides together, starting from the waist down. Stopping about 1/2″ past where the seam allowance extends for the slit.
- Press this seam open.
- Top stitch the seam allowance around the slit
- Continue constructing the skirt as the instructions state, starting with the step to attach the slash front pockets to the front skirt.
- Follow the pattern instructions to construct the rest of the dress, continuing to finish the bodice and connect it to the dress.
Ta-da!
You’ve completed my first Audie Playdress Hack! If you have any questions about this hack feel free to leave them in the comments below or shoot me an email!
Happy sewing!

Thanks for posting this hack!
I think I understand this construction, but the explanation for the extra slit seam allowance and front seam sewing instructions tripped me up a little. A photo or drawing of the finished front skirt seam (from the inside) would help a lot!
I loooove this, Amy!!!!