Bias binding is such a quick and satisfying way to clean finish neck and arm openings in garment sewing. For the Krissa Crop I use 1/4″ double fold bias tape.
Preparation:
Before we start sewing on our bias tape, the following should be finished:
- Side seams & Shoulder seams sewn & finished
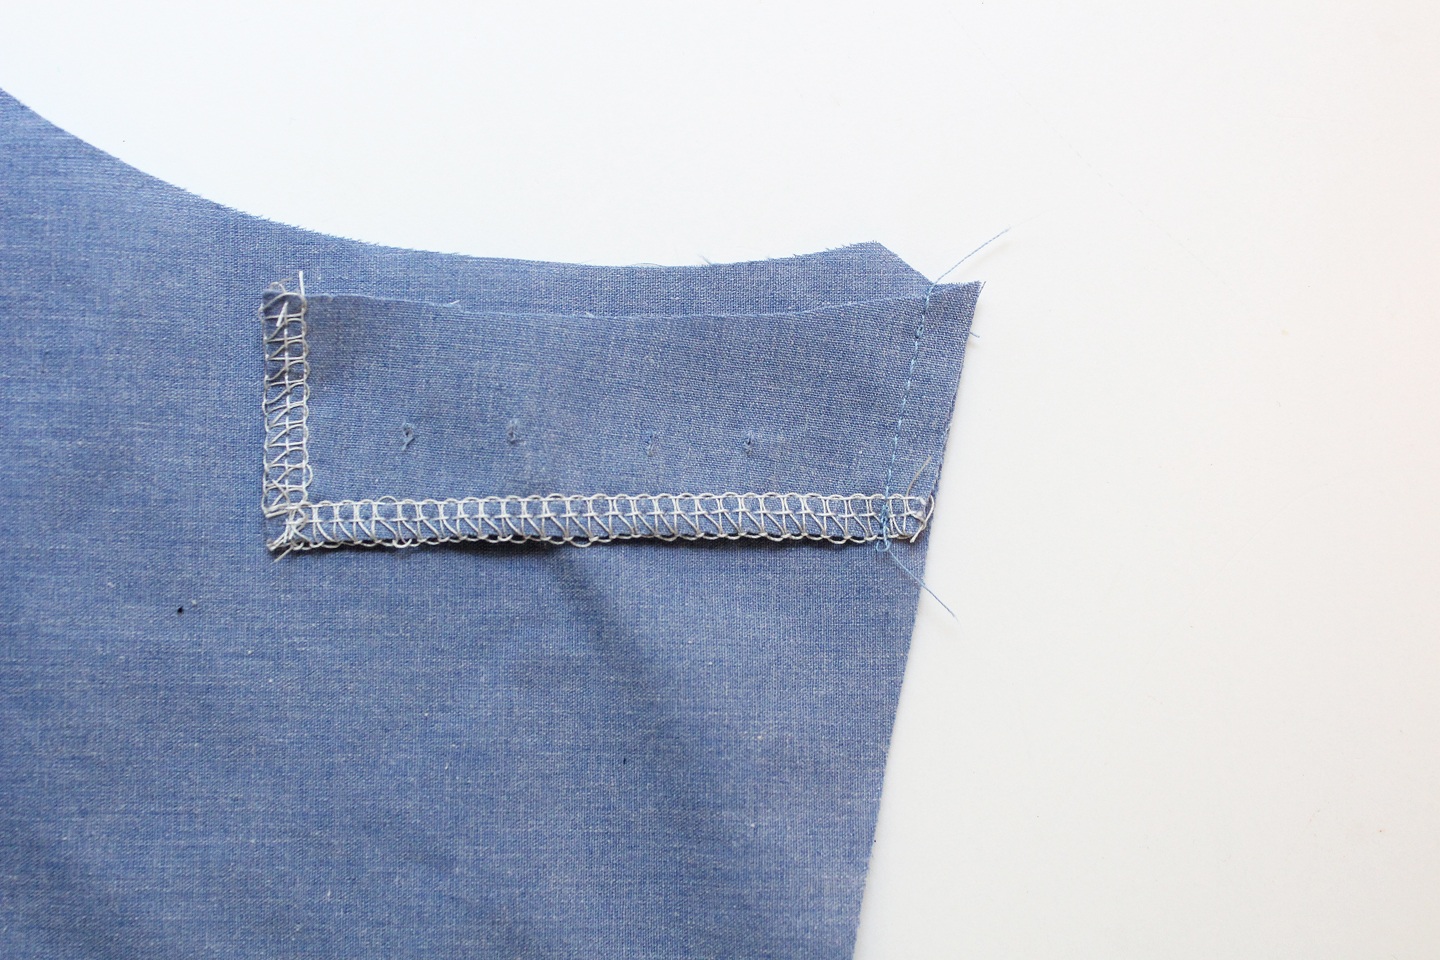
- Button facing stay stitched in place (see below)
- Split back finished with a 1/4″ turned hem
Armholes
We will start with the armholes because those are easiest.
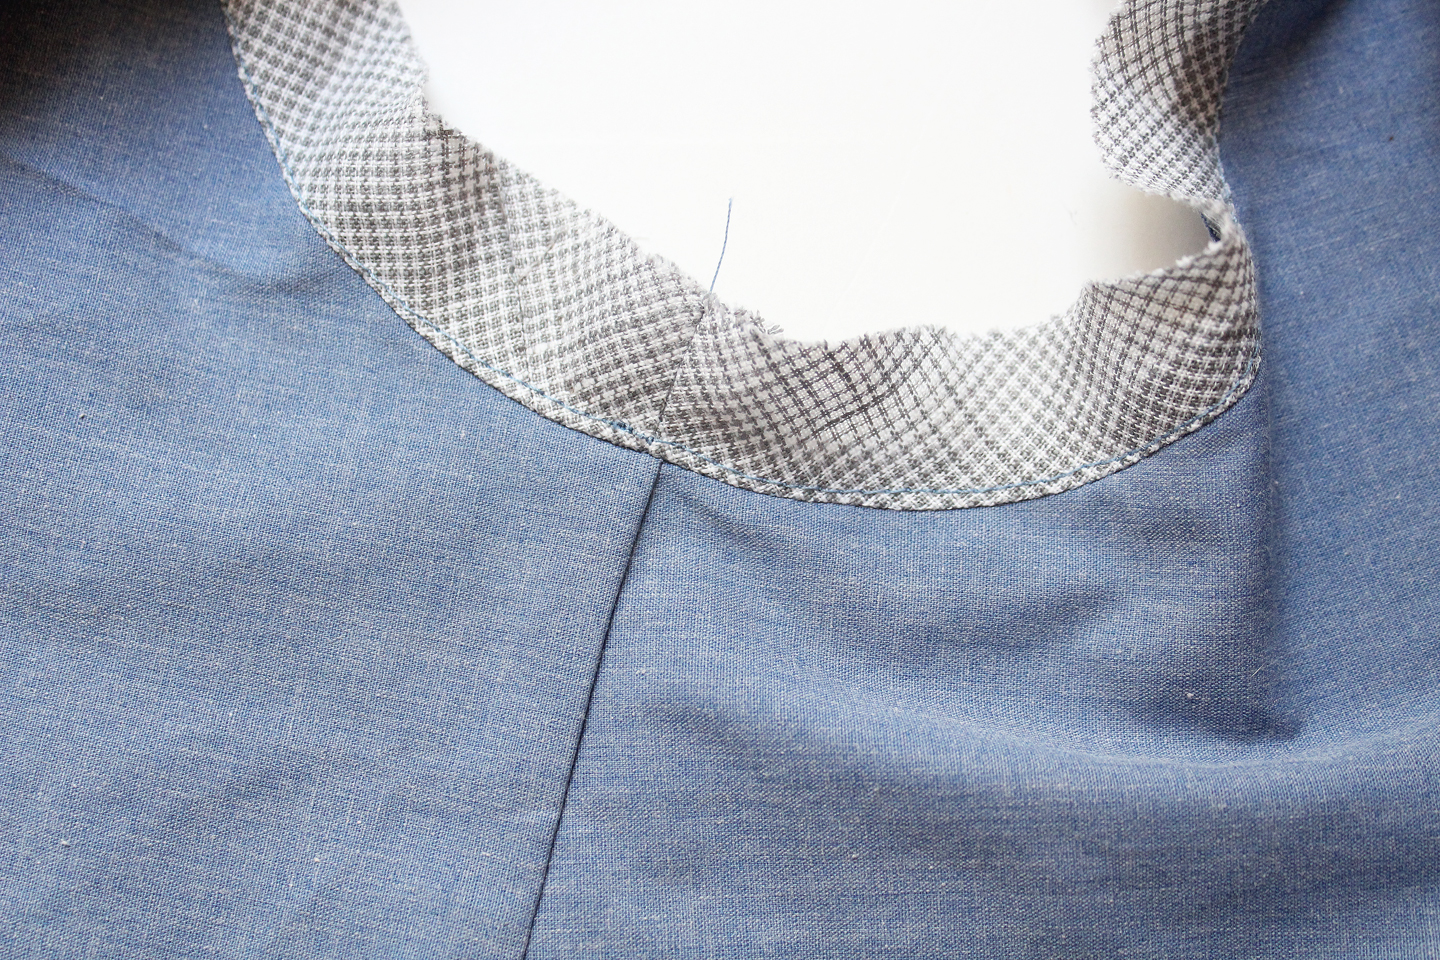
First, you will begin at the under arm side seam. Unfold your bias tape place at side seam, right side of bias tape facing right side of the garment. Leave a 1/2″ seam allowance past the side seam and match the raw edge of your bias tape to the raw edge of the under arm opening. Using a 1/4″ seam allowance, stitch the bias tape all the way around the armhole opening ending at the same point you began. Be careful not to catch the seam allowance from when you began under your stitching at the end. Clip remaining bias tape leaving 1/2″ seam allowance at end. **see image 1 below
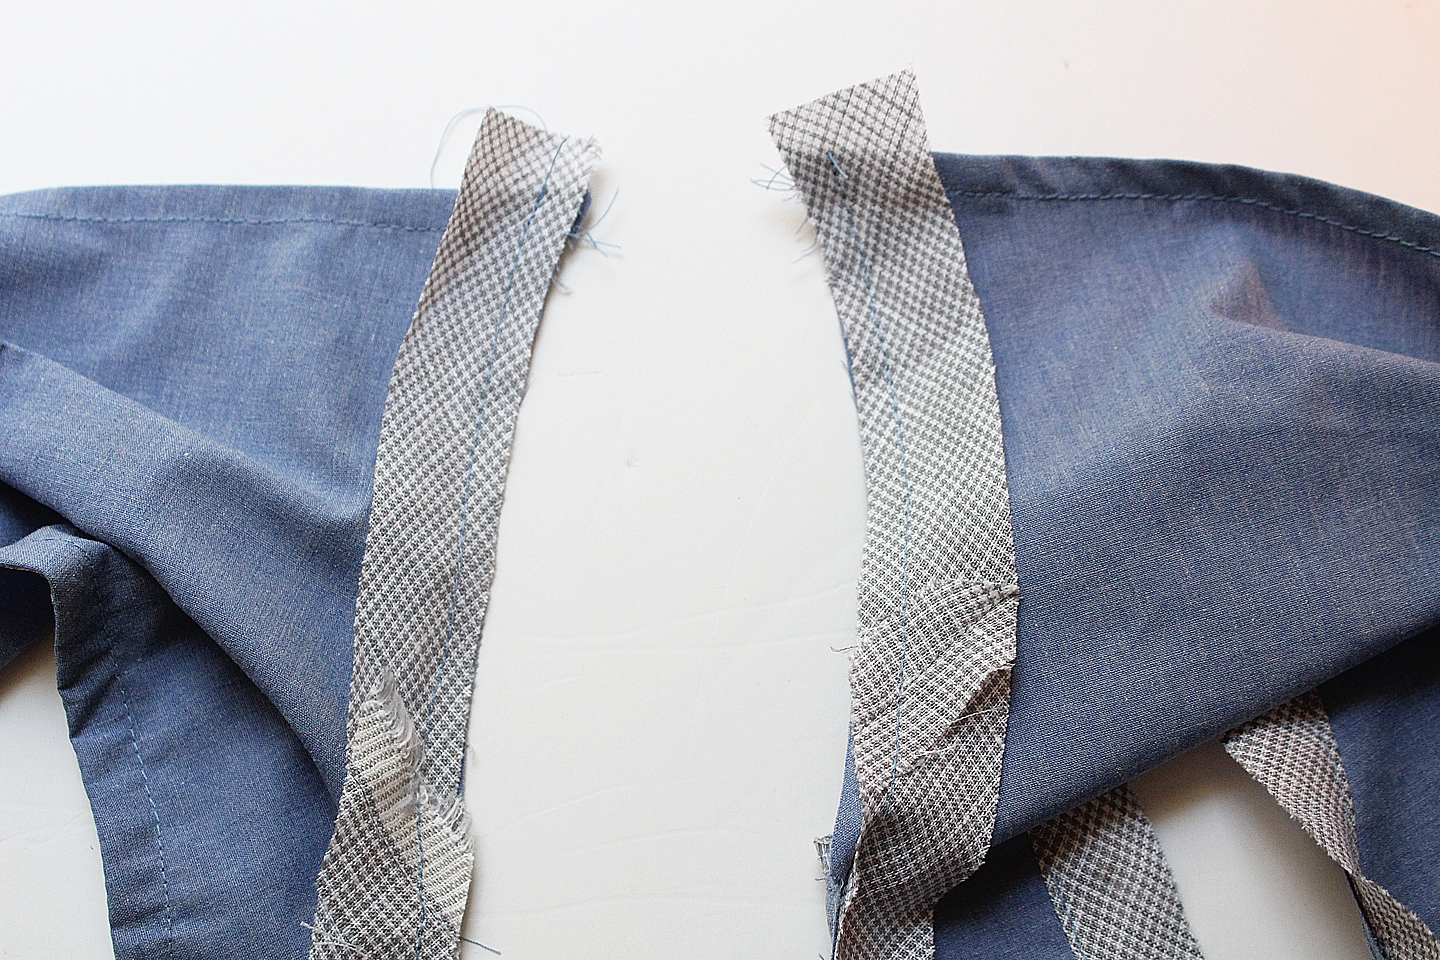
 Next, fold your top at the side seam with wrong sides together so the seam allowance of your bias tape sticks out. Match raw edges of short ends of bias tape and stitch with a 1/2″ seam allowance. Finger press the bias tape seam open. **see image 2 & 3 above
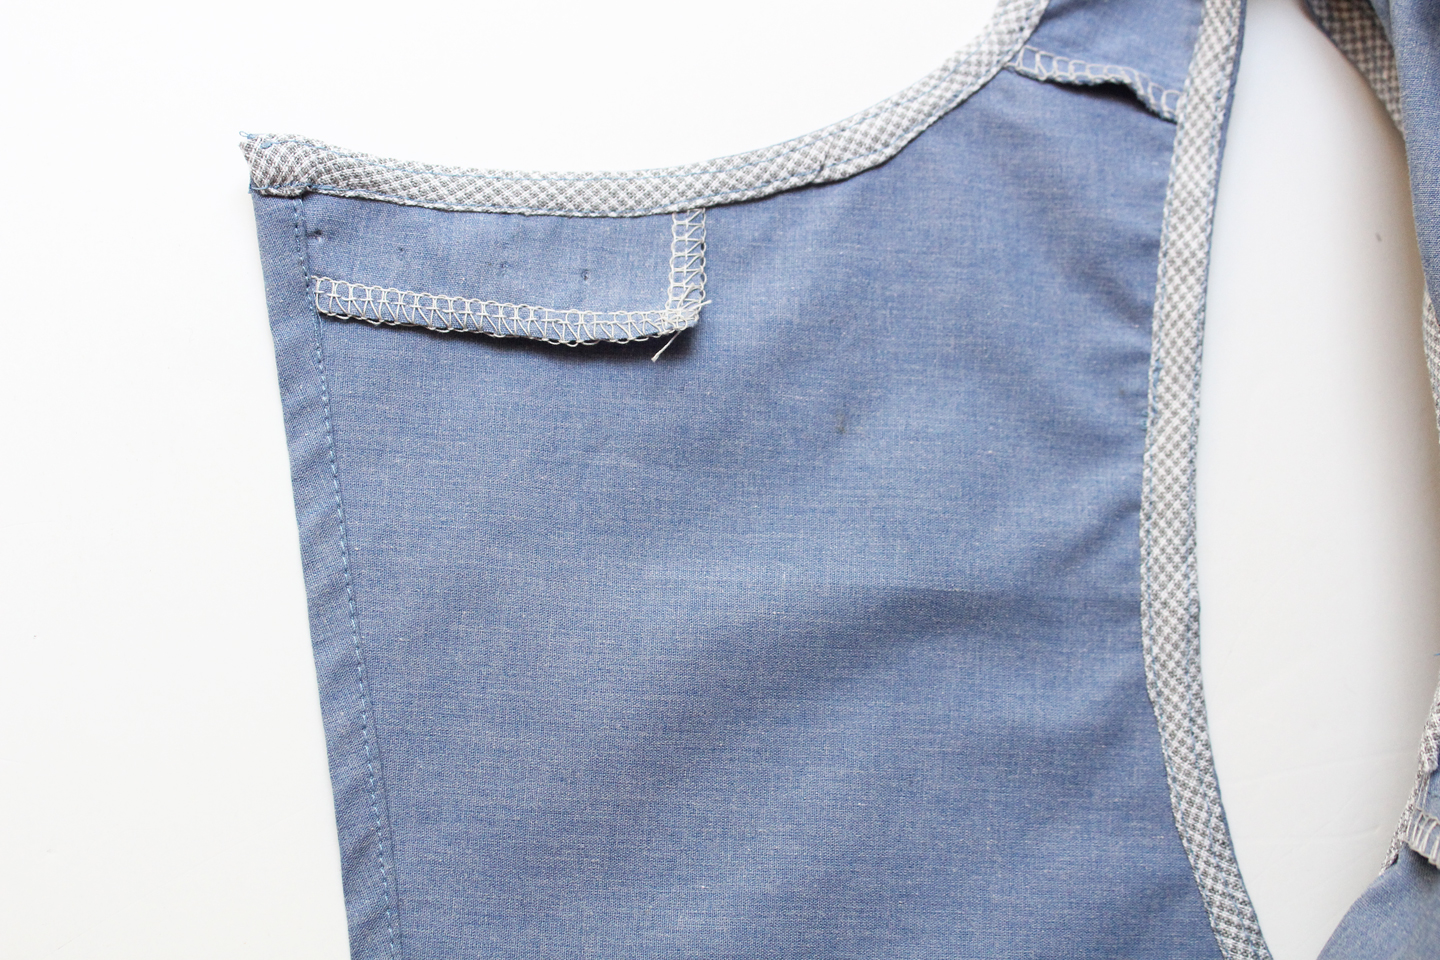
Next step is to under stitch. This is where you stitch along the edge of your bias tape about 1/8″ in from the seam we just sewed, catching all the seam allowances underneath. This will ensure when we turn everything to the inside we get a nice clean finish and there is no bias tape showing on the outside. **see above photo
Now we fold! The bias tape pictured was not store bought and does not have pre-pressed folds. You will find that store bought bias tape is quite easy to work with as the folds are already in place for you. If you are making your own bias tape you could also press in the folds yourself ahead of time. With 1/4″ double fold bias tape, first you fold down the loose edge 1/4″ towards the wrong side of the garment. Second, fold again 1/4″ meeting your first fold to your stitch line. Third fold one more time, encasing all raw edges under your folds and pulling all bias tape to the inside. I like to do this as I go (see video below) but if it’s easier for you you may want to pin or wonder clip in place ahead of time.
To finish, edge stitch on top of your bias tape 1/8″ away from the loose folded edge.
Isn’t it beautiful!
Now back to the Neckline
The neckline is essentially the same concept but we have an opening instead of a closed loop so our beginning and folding will be a bit different.
Begin at the back opening, stitch the bias tape to the neckline opening right sides together. Line up raw edges and leave 1/2″ overhang on each end. Under stitch like we did with the armholes above.
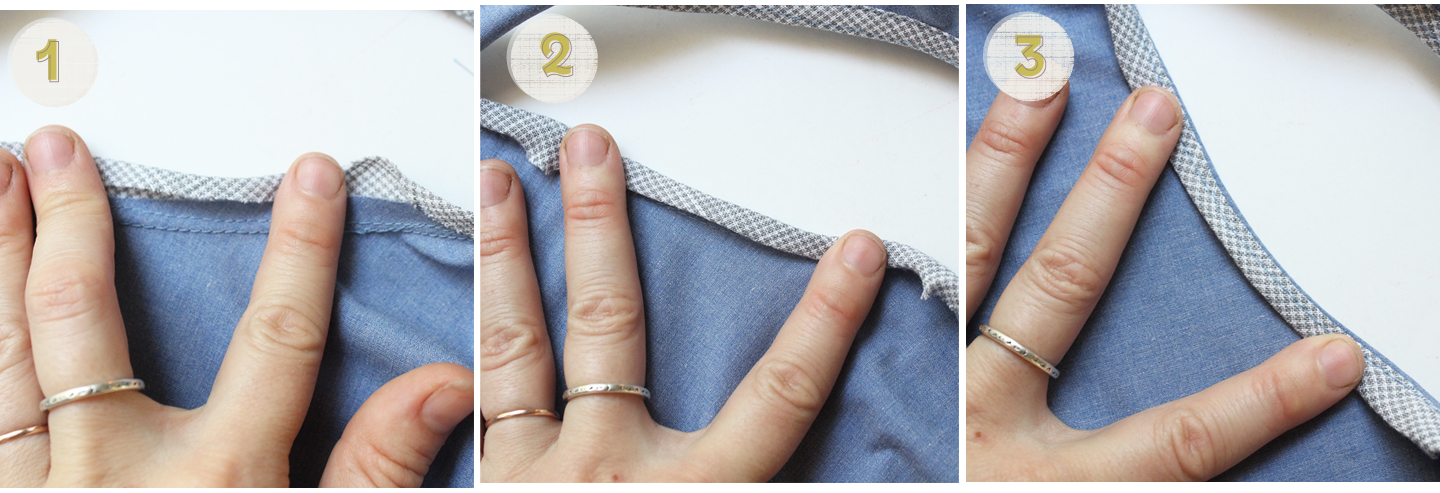
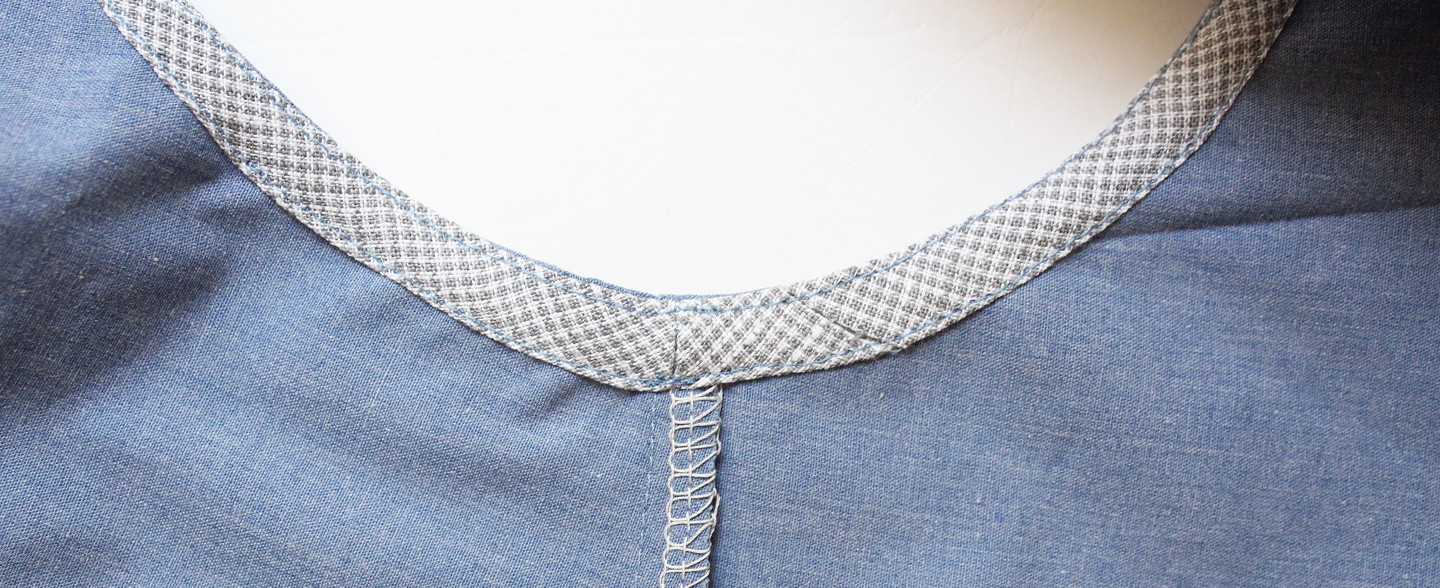
For the folding, before we start with our first 1/4″ fold down, you need to fold in that 1/2″ overhang. **see step 1 below Then you can proceed to fold each 1/4″ down as we did for the armhole until all the bias tape is on the inside. Edge stitch in place, being sure to catch the raw edge of that button hole facing.
When you are done it should look something like this:
Now, I know that even with detailed photos this can be a little tricky to understand if you’ve never done it before. I also want you to see how I do it all at my sewing machine with no pinning or pressing (till the end) so I made a handy little video for y’all to see it in action:
Join me tomorrow and we will tackle those pesky button holes!
Happy Krissa Crop Sewing!


Leave a Reply